Propagating Plants: Simple Methods to Multiply Your Collection
You can easily multiply your plant collection using five proven propagation methods that work for most garden varieties. Stem cuttings are the most popular technique, while leaf cuttings excel with succulents and African violets. Layering involves wounding and burying stems while attached to the parent plant, and grafting combines superior root systems with desirable traits. Division works perfectly for rejuvenating clumping perennials, and success depends on proper timing, sharp tools, and maintaining ideal humidity levels. Discover which specific techniques will transform your gardening results.
Notable Insights
- Stem cuttings are the most popular propagation method, with timing varying from softwood in late spring to hardwood after leaf drop.
- Division works effectively for perennial plants, best done in early spring when shoots reach three inches tall on cool, cloudy days.
- Layering involves wounding and burying stems while attached to the parent plant, providing continuous nutrients for higher success rates.
- Maintain 85-90% humidity and 73-77°F medium temperature while using rooting hormones to accelerate root development in propagated plants.
- Use sharp, clean cutting tools and well-draining growing media like perlite-peat mixtures to prevent infection and promote healthy root growth.
Understanding Different Types of Cutting Propagation
When you’re ready to expand your garden without purchasing new plants, cutting propagation offers an effective, cost-efficient method to create identical copies of your favorite specimens.
You’ll discover three primary cutting types: stem, leaf, and root cuttings, each suited for different plant species and growing conditions. Stem cuttings, the most popular method, involve cutting below a leaf node and can be further classified as herbaceous, softwood, semi-ripe, or hardwood based on stem maturity.
Stem cuttings remain the most versatile propagation method, with four distinct types matched to different stages of plant maturity.
Leaf cuttings work exceptionally well for succulents and African violets, while root cuttings utilize dormant plant energy stored in root segments. This asexual propagation technique enables genetic maintenance of parent plant characteristics, ensuring your new plants will display the same desirable traits as the original.
To boost your success rates considerably, consider applying rooting hormones, which accelerate root development and improve overall propagation outcomes across all cutting types. For optimal growth, newly propagated plants benefit from balanced NPK ratios that support healthy foliage development and root establishment. Many successful propagators apply liquid fertilizers every 1-2 weeks once roots begin developing to maintain sustained nutrition during this critical growth phase.
Mastering Layering Techniques for Healthy Root Development
While cutting propagation works well for many plants, you’ll find that some species respond better to layering techniques, which offer a gentler approach to creating new plants.
This method involves bending a healthy stem to the ground, wounding the underside to expose fresh tissue, then burying that section in moist soil while it remains attached to the parent plant.
The continuous supply of nutrients and water from the parent plant considerably improves layering success rates compared to cuttings.
You’ll want to apply rooting hormone to the wounded area and keep the buried section consistently moist but not waterlogged to promote ideal root health. For the soil medium, consider using premium organic mixes that contain mycorrhizae to enhance root development and nutrient uptake.
Species like magnolias, camellias, and rhododendrons, which are notoriously difficult to root from cuttings, often thrive with layering techniques. For optimal results, time your layering efforts for early spring or fall when plants naturally focus energy on root development.
If unwanted vegetation competes with your layered plants, consider using triclopyr-based herbicides that can effectively control invasive vines and woody weeds without harming your desired plants when applied carefully.
Grafting for Enhanced Plant Characteristics
When you’re ready to combine the best traits of two different plants, grafting offers a powerful technique that joins a superior root system with desirable above-ground characteristics.
You’ll need to focus on selecting compatible plant pairs, since successful grafting depends on choosing varieties that can form strong biological connections at their graft union.
The essential steps involve precise cutting, proper alignment of cambium layers, and secure binding, which we’ll walk through to help you master this valuable propagation method. This technique proves especially valuable for plants that don’t produce true from seeds, allowing you to reliably reproduce desired characteristics that would otherwise be lost through sexual propagation.
Choosing Compatible Plant Pairs
Successful grafting begins with selecting compatible plant pairs, a process that requires understanding the biological relationships between your chosen scion and rootstock.
You’ll achieve the highest success rates when working within the same species, as genetic similarity guarantees proper vascular connection and tissue integration. Your scion selection should focus on healthy, disease-free wood from the desired variety, while your rootstock choice must complement the scion’s growth requirements and provide beneficial characteristics like disease resistance or improved vigor.
Plants within the same genus often graft successfully, though compatibility decreases as taxonomic distance increases.
You’ll find that fruit trees like apples, pears, and stone fruits offer excellent grafting opportunities within their respective families.
Remember that both plants must possess vascular cambium, the essential tissue layer that enables graft union formation and long-term success. When performing grafting work, wearing protective gloves helps prevent cuts from sharp tools and shields your hands from thorns or rough bark surfaces. The cleft grafting technique stands out as the most commonly used method for achieving successful plant unions across various species.
Essential Grafting Technique Steps
Once you’ve identified your compatible plant pairs, the actual grafting process requires careful attention to timing, technique, and environmental conditions to achieve successful union formation.
Start by selecting disease-free scion wood during dormancy, making clean cuts with sharp tools to expose fresh cambium layers.
Different grafting techniques require specific preparation methods: cleft grafts need wedge-shaped scions inserted into split rootstock, while whip-and-tongue grafts require matching cuts for tight fits.
Precise cambium alignment remains critical, as these green layers beneath the bark must connect for vascular development.
Secure joints with grafting tape without crushing tissue, then apply sealant to prevent moisture loss.
Store grafts in cool, humid conditions around 45-50°F, protecting them from direct sunlight and temperature extremes while monitoring for successful callus formation. The grafting process enables multiple fruit varieties to grow on a single tree, making it an ideal technique for gardeners with limited space.
Division and Separation Methods for Perennial Plants
Division stands as one of the most rewarding propagation methods for home gardeners, offering a simple yet effective way to multiply your favorite perennial plants while rejuvenating aging clumps.
This vital perennial care technique works best with clumping species like asters, bee balm, and coneflowers, which naturally form dense root systems over time.
Division timing proves essential for success, with early spring being ideal when shoots reach about three inches tall, though some species like iris prefer late summer division.
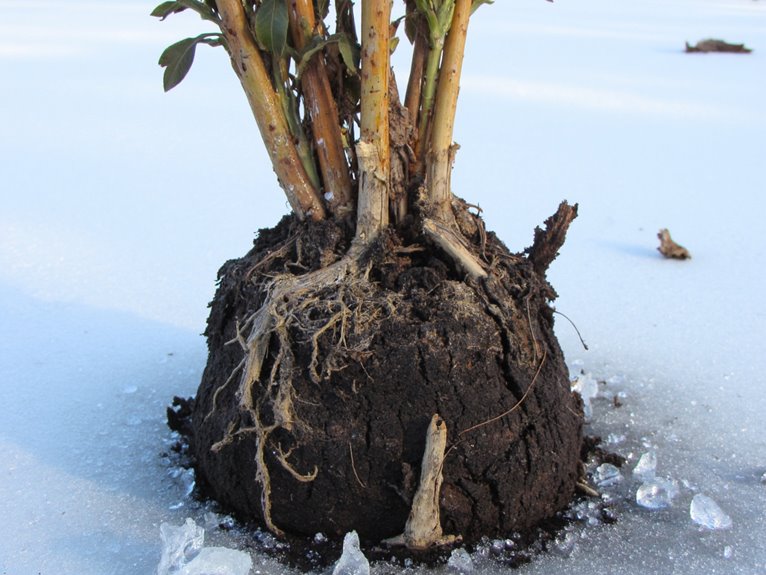
You’ll need sharp spades and clean cutting tools to separate root balls or slice rhizomes carefully.
Choose cool, cloudy days with forecasted rain to minimize transplant shock. Water thoroughly before dividing, then plant sections immediately in prepared holes, maintaining proper crown positioning for best establishment.
After division and replanting, supporting the newly separated plants with balanced NPK ratios during key growth stages will help establish strong root systems and promote healthy development.
For detailed inspection of root health and growth patterns during division, gardeners can use digital microscopes to examine fine root structures and assess the viability of separated sections.
Essential Supplies and Equipment for Successful Propagation
Having the right tools and materials transforms propagation from a hit-or-miss endeavor into a reliable method for expanding your garden collection. Sharp cutting tools like pruning shears create clean cuts that minimize damage and infection risk, while regular disinfection prevents disease spread.
Rooting hormones in powder, liquid, or gel forms stimulate faster, stronger root development, especially benefiting woody or difficult-to-root species. Propagation containers with clear humidity domes maintain suitable moisture levels, and transparent pots allow you to monitor root progress without disturbance.
Well-draining growing media such as perlite-peat mixtures provide proper aeration while retaining adequate moisture. Once your propagated plants establish roots, choosing organic fertilizers with balanced NPK ratios ensures healthy development without burning delicate new foliage. Supplemental equipment like heat mats and growth lights create ideal conditions, while plant labels help you track varieties and progress throughout the rooting process. Moisture meters provide precise readings to prevent overwatering during the critical rooting phase when young plants are most vulnerable to water stress.
Creating Optimal Growing Conditions
Once you’ve gathered your propagation supplies, you’ll need to create the right environment for your cuttings to develop strong, healthy roots.
Temperature and humidity control form the foundation of successful propagation, working together to minimize plant stress while encouraging rapid root development.
Managing these conditions properly can mean the difference between thriving new plants and disappointing failures in your propagation efforts.
Just as with fertilizer application, maintaining consistent environmental conditions throughout the propagation process is crucial for achieving the best growth results with your new plant cutting development.
For deeper plantings or when preparing multiple holes efficiently, consider using bulb augers with your drill to create precise planting holes that can reduce preparation time by up to 75% compared to manual methods.
Essential Propagation Supplies
Setting up your propagation workspace with the right supplies can make the difference between successful plant reproduction and frustrating failures.
Sharp, clean pruning shears provide precise cuts that minimize tissue damage, while rooting hormone stimulates faster root development and protects against disease.
Well-draining propagation mediums like perlite, vermiculite, or seed-starting mix balance moisture retention with proper aeration for healthy root growth.
Essential propagation tips include these fundamental supplies:
- Basic cutting tools – Sharp scissors, pruning shears, and labels for tracking varieties
- Rooting support – Hormone powder, sterile potting mix, and humidity domes
- Environmental control – Heat mats, grow lights, and spray bottles for cutting care
Plastic covers maintain vital humidity levels, while proper containers with drainage holes prevent waterlogging and root rot during the delicate rooting process.
Quality seed starter mixes containing mycorrhizae can significantly enhance root development and nutrient uptake for newly propagated plants.
When transplanting established cuttings, choose organic potting mixes containing coconut coir and perlite to achieve optimal moisture retention and prevent root rot in your newly propagated plants.
Humidity and Temperature Control
While proper tools and supplies form the foundation of successful propagation, creating the right environmental conditions determines whether your cuttings will thrive or struggle during their vulnerable rooting phase. Humidity monitoring and temperature regulation work together to create a suitable microenvironment that encourages rapid root development while preventing stress and disease.
| Environmental Factor | Suitable Range | Control Method | Key Benefit |
|---|---|---|---|
| Humidity | 85-90% | Misting systems, humidity domes | Prevents dehydration |
| Medium Temperature | 73-77°F | Heating mats, bench heating | Promotes root formation |
| Air Temperature | 68-73°F | Ventilation, thermal control | Balances growth |
| Air Circulation | Gentle, passive | Side vents, baffles | Reduces fungal issues |
You’ll need to maintain higher humidity than medium temperature, creating conditions that favor root growth over premature shoot elongation, ensuring your propagation success. For plants that prefer acidic growing conditions, incorporating peat moss into your propagation medium can provide the ideal pH environment while maintaining excellent moisture retention. Once your cuttings develop strong root systems, they’ll benefit from regular feeding with liquid fertilizers that provide immediate nutrient availability to support their transition into established plants.
Timing Your Propagation for Maximum Success
When you understand the importance of timing in plant propagation, you’ll dramatically increase your success rates and avoid the frustration of failed attempts. Seasonal factors play a significant role in determining when your plants are most receptive to propagation methods, with spring and autumn offering excellent conditions due to moderate temperatures and natural moisture levels.
Timing is everything in plant propagation – understand seasonal cycles and watch your success rates soar while avoiding common failures.
Master these essential timing techniques for best results:
- Take cuttings in early morning when plants are fully hydrated, ensuring maximum viability and reducing stress on your propagation material.
- Align propagation with growth cycles by using softwood cuttings in late spring, semi-hardwood in mid-summer, and hardwood after leaf drop.
- Consider your local climate and adjust timing accordingly, especially in subtropical regions where spring and autumn provide the most favorable conditions.
- Maintain consistent moisture during the propagation process with a reliable garden hose system that provides gentle, controlled watering without disrupting delicate developing roots.
Additionally, ensure proper airflow management around your propagation area to prevent fungal issues and promote healthy root development in your new plants.
Selecting the Right Method for Your Plant Species
Each plant species has unique characteristics that determine which propagation method will give you the best chance of success, and understanding these traits is your key to choosing the right approach.
Herbaceous plants with flexible stems root easily from softwood cuttings, while woody shrubs require hardwood cuttings taken during dormancy.
Succulents and African violets excel with leaf cuttings due to their regenerative tissue capabilities.
For plant selection involving hybrids or cultivars, you’ll need asexual methods like cuttings or grafting to preserve specific traits, since seeds introduce unwanted genetic variability.
Plants with naturally layered branches, robust root systems, or clumping growth habits suggest their preferred propagation methods.
When facing propagation challenges with rare species or low germination rates, vegetative techniques become essential alternatives to unreliable seed propagation.
Once your propagated plants are established, slow-release fertilizers can provide continuous nutrition for 2-6 months, supporting their long-term development and reducing the need for frequent feeding.
Frequently Asked Questions
Can I Propagate Plants Using Water Instead of Soil Medium?
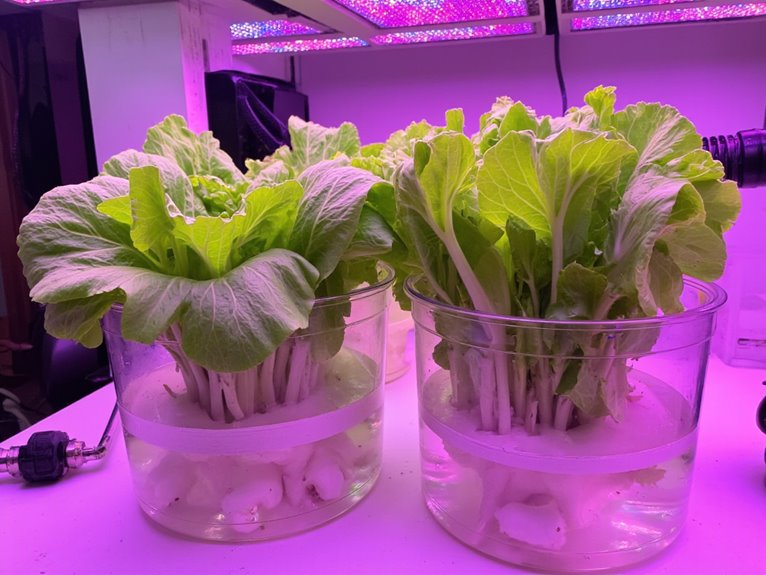
Yes, you can use water propagation instead of soil. You’ll place cuttings in clean water, allowing visible root growth monitoring. Change water weekly and transplant once roots reach 1-2 inches for best results.
How Do I Know if My Cutting Has Developed Enough Roots for Transplanting?
You’ll know your cutting shows transplant readiness when roots are visible through drainage holes, appear white and healthy, and root development equals the cutting’s length – typically after 6-8 weeks of growth.
What Should I Do if My Propagated Plants Start Showing Signs of Disease?
First focus on disease identification by examining yellowing leaves, spots, or wilting symptoms. Remove affected parts immediately, improve air circulation, reduce watering, and consider treatment options like fungicides for severe cases.
Can I Propagate Multiple Plant Varieties Using the Same Equipment and Containers?
You can use the same equipment for multiple varieties, but equipment sanitation is essential between uses. Different propagation techniques have varying cross-contamination risks, so you’ll need thorough cleaning to prevent disease spread.
How Long Should I Wait Before Fertilizing Newly Propagated Plants?
Wait 4-6 weeks before fertilizing newly propagated plants to let roots establish. Start with half-strength liquid fertilizer types providing balanced plant nutrients, then switch to slow-release formulations once they’re actively growing.
On a final note
You’ve now gained the essential knowledge to expand your plant collection through proven propagation methods. Whether you’re taking stem cuttings, attempting air layering, or dividing perennials, success depends on selecting the right technique for each species. Remember that timing, proper equipment, and ideal growing conditions will greatly improve your results. Start with easier plants like pothos or succulents, then progress to more challenging species as you build confidence and experience.

