Repotting Technique Steps: Proper Methods for Transferring Plants to New Containers
Repotting a plant starts by choosing a pot with drainage holes that’s slightly larger than the current root ball, with ceramic, terra cotta, or plastic based on your plant’s needs. Gently water the plant before removing it from its old container to make extraction easier, then support the entire root mass as you lift it out. Inspect the roots for damage or binding and trim any problematic ones carefully. Place the plant in the new pot so the top of the root ball sits an inch below the rim, fill with fresh soil, and water thoroughly without overwatering. Monitor your plant closely for a few weeks to confirm it adjusts smoothly to its new home.
Notable Insights
- Choose pots with drainage holes 2 inches larger than root ball; select ceramic, plastic, or terra cotta based on plant needs.
- Repot during growing season when plants are most resilient to minimize transplant shock.
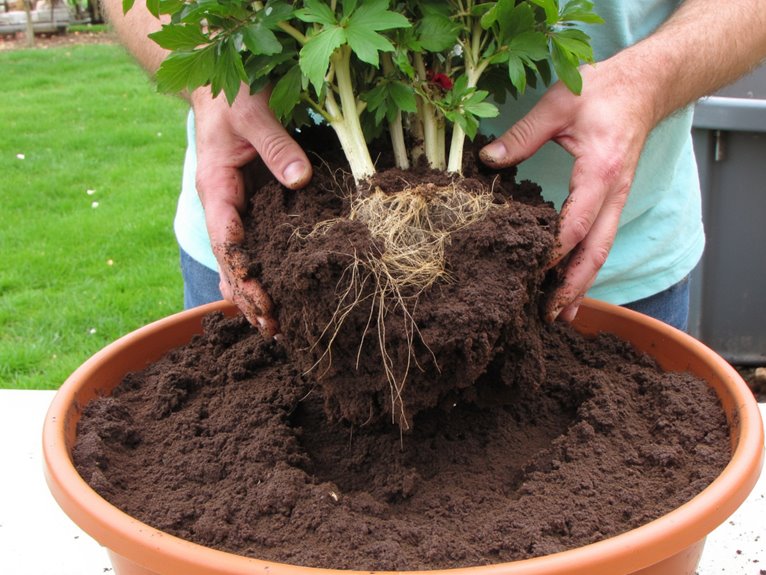
- Gently remove plants by tapping pot sides and supporting the entire root mass rather than pulling stems.
- Prune damaged roots and inspect for rot, ensuring root flare is visible above soil level in new pots.
- Fill with loose soil mix, water thoroughly after planting, and monitor moisture levels to avoid overwatering.
Selecting the Right Pot and Preparing the Soil
Pot selection is foundational to plant health, offering the right balance between growth potential and environmental stability.
Pot types like ceramic, terra cotta, or plastic each provide unique benefits based on your plant’s needs. For instance, succulents thrive in breathable terra cotta pots, while moisture-loving plants prefer plastic’s retention.
Terra cotta breathes for succulents, while plastic holds moisture for tropicals-choose wisely to match your plant’s needs.
Pot shapes matter too-deep containers suit plants with extensive root systems, while wider pots work for trailing species.
Always guarantee adequate drainage holes to prevent waterlogging and root rot. When choosing a size, aim for pots about 2 inches larger than the current plant or root ball to allow growth without overwhelming the roots. Two inches larger ensures optimal space for new growth while maintaining a balanced soil-to-root ratio.
Modern fabric grow bags offer exceptional breathability and root health benefits through natural air pruning techniques that prevent root circling while promoting enhanced nutrient absorption.
Removing the Plant From Its Old Container
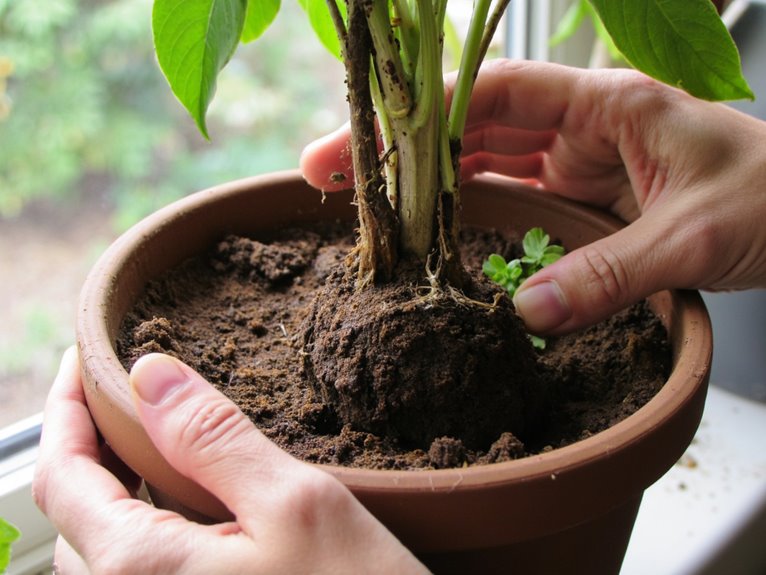
You’ll want to start by ensuring your plant is ready for this step, which connects nicely with selecting the right pot and soil preparation – both of which set the stage for a smooth repot-system.
Before removing, water the plant to loosen roots and ease extraction. For plastic pots, gently squeeze sides or tap edges to release the root ball. Avoid pulling by stems directly, as this damages roots.
- Water thoroughly before removal to make roots more flexible
- Clip protruding roots to prevent tearing during extraction
- Use pot considerations like material type to inform your technique
- Support the entire root mass rather than just the plant’s top
- Be prepared to cut tight pots if necessary
Timing is crucial, as repotting should only occur during the Growing Season. Handle with care to minimize stress on both plant and container. Keep the root ball intact for better transplant success. After successfully repotting, consider using liquid fertilizers to provide immediate nutrients that help plants recover quickly from transplant shock.
Inspecting and Pruning the Root Ball
After removing the plant, you should inspect the root ball for bound roots, damage, or congestion.
Look for roots circling the pot or growing upward – these need careful pruning. Root pruning improves nutrient and water uptake by preventing root binding
Proper technique helps prevent stress and promotes healthy growth patterns.
Inspection Techniques
How essential is examining the root ball before repotting?
Inspection techniques play a significant role in guaranteeing root health and successful transplants. A careful review helps identify issues that could hinder growth.
- Check for dark brown or black coloration, which may signal rot.
- Look for circling roots that can girdle the trunk.
- Confirm the root flare is visible to avoid planting too deep.
- Assess moisture levels to prevent drying during inspection.
- Use tools like trowels to gently expose and examine roots.
These steps help create a strong foundation for your plants in new containers.
Pruning Guidelines
A gentle touch can work wonders for your plant’s future. Inspecting the root ball means understanding root types and applying proper pruning techniques to avoid circling or girdling roots.
Use clean tools and moisten the root ball before cutting to reduce stress. When you find problematic roots, carefully prune them with precision rather than trying to untangle.
Remove about a third of the outer roots to encourage balanced growth. For container plants, cut roots along the sides and bottom to allow fresh soil during repotting. Avoid pruning too close to the trunk to maintain stability.
After pruning, water thoroughly and replace removed soil with compost-rich mix. Keep pruned roots covered to avoid drying.
Just as chemical stump removers require drilled holes for effective application, proper root pruning creates strategic entry points that allow fresh nutrients to penetrate and encourage healthy new growth.
With patience, these techniques will help your plant thrive in its new home.
Placing the Plant in the New Pot
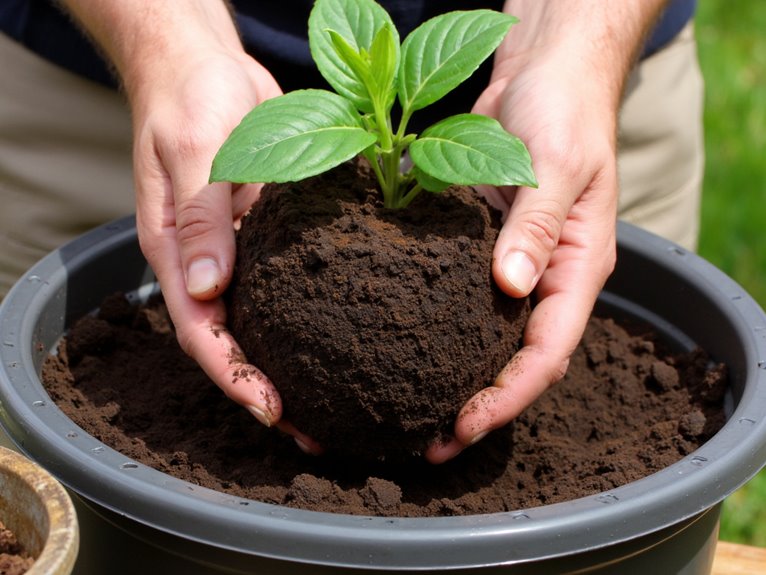
Once you’ve chosen the right pot, it’s time to carefully position the plant in its new home. Focus on root positioning-place the rootball centered so soil gaps fill evenly around roots.
Keep the top of the rootball 1 inch below the rim for stability. Handle the rootball gently to avoid damaging roots, especially if pot-bound. Loosen roots slightly to encourage growth into fresh soil. Address soil gaps by adding minimal substrate underneath the rootball.
- Center the plant to prevent uneven water distribution
- Avoid burying stems or exposing roots too deeply
- Support the rootball firmly without squeezing
- Fill gaps with loose potting mix, not compacted soil
- Double-check positioning before finalizing
Remember: proper root positioning creates a stable foundation, while filled soil gaps guarantee healthy growth.
Filling With Fresh Potting Mix
After placing the plant in the new pot, you’ll want to fill it with fresh potting mix that supports growth without overwhelming the roots.
Choose a mix tailored to your plant’s needs-cacti prefer drainage, while tropical plants benefit from peat-based options. This guarantees nutrient retention and proper moisture balance for healthy root development.
Start by adding enough soil to partially fill the container before positioning the plant. Gently work the mix around the root ball, avoiding compaction that hinders growth.
Keep the top inch of space open for watering without overflow.
Incorporate perlite or vermiculite if drainage needs improvement. The mix should be slightly moist but not soggy to prevent root rot while allowing hydration after repotting.
This careful approach sets your plant up for success in its new home.
Proper Watering After Repotting
After repotting, you should water plants thoroughly right away to settle the soil and keep new drainage holes damp-this helps prevent exposed roots from drying out and supports their adaptation.
The amount to give depends on how much the pot can hold without sitting in water, so aim for just enough to let excess drain through the bottom.
Timing is key too; wait until the top inch of soil feels dry before watering again to avoid overwatering risks.
Proper Watering After Repotting
Following a successful repot, giving your plant the right amount of water is essential for its recovery.
- Water immediately after repotting helps settle soil around roots and eliminates air pockets.
- Use watering methods like bottom watering or top watering based on plant type and pot size.
- Maintain moisture balance by allowing excess water to drain fully and avoiding waterlogged soil.
- Supplement with misting for tropical plants with high transpiration rates.
- Adjust frequency based on species-succulents need a dry period, while tropics require consistent hydration.
Provide your plant with the perfect watering experience after its container change!
Timing to Water
Once you’ve settled your plant into its new home, finding the right moment to water is just as important as the technique itself. Immediate watering helps settle soil and prevent root desiccation, especially if roots were exposed during repotting.
Water until drainage occurs, ensuring moisture reaches root zones while avoiding waterlogging. Some experts suggest waiting a week to let damaged roots heal, placing plants in cooler, shaded spots during this recovery phase. This delay supports root adaptation without stressing tender tissues.
Monitor soil consistently-water when the top inch is dry-but avoid overwatering. Water retention properties of your substrate will influence how frequently you need to hydrate, so check moisture levels rather than relying on schedules alone.
Amount to Give
A little goes a long way when rehydrating your plant’s roots. After repotting, water until the soil is evenly moist but not soggy-this balances water retention without drowning roots.
Larger pots need more water but less frequent watering due to their drainage characteristics.
- Water just enough for even moisture distribution, letting excess drain out.
- Adjust based on pot size and plant type rather than sticking to old routines.
- Use room temperature water to avoid shocking sensitive roots.
- Monitor runoff; larger pots may require less water after the initial flush.
- Balance water retention with proper drainage to keep roots healthy.
Find that sweet spot where your plant thrives without excess.
Providing Optimal Growing Conditions
After repotting, providing ideal growing conditions becomes essential for your plant’s recovery and long-term health.
Focus on soil composition that matches your plant’s needs – tropical plants prefer rich, well-draining mixes with organic matter, while succulents need sandy, fast-draining soils.
Balance nutrient levels by fertilizing at the right time of year, like late winter or spring, to support healthy growth without burning roots.
Choose containers 1-2 inches larger than before, ensuring good drainage and matching material to your plant’s moisture preferences.
Water thoroughly after repotting but avoid overwatering.
Place in indirect light initially and maintain consistent conditions for several weeks.
Monitoring for Transplant Shock
As plants adjust to their new home, keeping a watchful eye on their response is essential – recognizing early signs of transplant stress can make all the difference in helping them recover successfully.
Observe subtle changes as plants settle in – early warning signs like leaf discoloration or stunted growth indicate transplant stress needing immediate care.
Look for wilting leaves, yellowing between veins, or curling foliage – these symptom recognition cues signal water uptake issues. Stress indicators like stunted growth or premature leaf drop suggest root damage severity.
Monitor daily for 2-4 weeks post-transplant, noting any changes in leaf size or soil moisture levels.
- Check for leaf browning starting at margins
- Measure new shoot length weekly
- Observe root health during watering
- Track environmental condition correlations
- Document symptom timing for pattern analysis
Determining When to Repot Again
Once the plant has settled into its new environment, it’s important to recognize when it’s time to give it a bigger home. Signs like roots emerging from drainage holes or soil drying quickly signal overcrowding. Fast-growing plants might need annual repotting, while slow growers can go 2-4 years between transfers. The root system’s size relative to the pot matters most.
| Sign | Fast-Growing Plants | Slow-Growing Plants |
|---|---|---|
| Root-bound condition | Annual repotting needed | Every 2-4 years |
| Growth stagnation | Repot immediately | Wait until visible decline |
| Pot size ratio | Container 10″+ diameter | Containers 2″-8″ in diameter |
When the root system outgrows its container, it’s time to select a slightly larger pot. Matching repotting frequency to growth rate prevents transplant stress and guarantees healthy development.
Caring for Specific Plant Needs
After repotting, you should tailor your care based on each plant’s unique needs – from drainage requirements to soil composition preferences.
The right potting mix prevents waterlogged roots or dry soil conditions that stress newly potted plants.
Let’s explore how to choose between sandy blends for cacti, peat-rich soils for tropicals, and other specialized mixes that match each plant’s natural habitat.
Caring for Specific Plant Needs
One key aspect of successful repotting is understanding how to care for plants with different needs.
Every plant type requires tailored attention-succulents prefer dry conditions while tropical species need higher humidity.
Light exposure should be gradual, placing newly potted plants in bright indirect light rather than direct sun.
Root care involves trimming damaged roots and ensuring proper drainage to prevent rot.
For air plants or epiphytes, avoid heavy soil mixes that could suffocate their root systems.
Monitor each plant’s unique response and adjust watering frequency based on their growth phase.
- Succulents need less frequent watering than tropical varieties
- Tropical plants benefit from misting or humidity trays
- Desert species should have well-draining potting mix
- Leafy greens require more light than flowering houseplants
- Always check for root-bound signs before repotting
Soil Selection
Before you select a potting mix, consider how different plants respond to varying soil conditions-like how succulents thrive in fast-draining mediums while tropical species benefit from more moisture-retentive options.
Choosing the right soil types means finding the perfect moisture balance for your plant’s needs. For example, cacti require gritty mixes that dry quickly, while orchids prefer well-aerated bark-based soils.
Look for mixes with perlite or vermiculite for better drainage, and avoid dense “potting soil” products that can suffocate roots.
Remember to refresh old soil annually to maintain nutrient content and prevent compaction issues.
Choosing the Right Potting Mix Based on Plant Type and Drainage Requirements
When it comes to potting, what you choose matters quite a bit – selecting the right mix for your plant is vital to their health and happiness.
The right potting mix selection guarantees proper drainage needs are met, preventing waterlogged roots and promoting growth.
- Succulents need sandy mixes to avoid rot; ferns prefer peat-based ones that retain moisture.
- Perlite or pumice improve drainage for cacti, while coconut coir helps tropical plants stay hydrated.
- Match your mix to the plant’s native environment for best results – like using bark for trees and shrubs.
- Avoid heavy soils that suffocate roots; go lighter with compost and organic matter for most indoor plants.
- Test mixes by checking pH levels and nutrient content, especially for special cases like orchids or acid lovers.
Find your perfect potting mix by understanding your plant’s needs and giving them the ideal environment to thrive.
Frequently Asked Questions
Can I Reuse the Old Pot for a New Plant?
Yes, you can reuse the old pot for a new plant, but proper preparation is key.
Thorough pot cleaning removes pathogens and old soil debris before container sizing becomes essential – always choose a similarly sized pot to avoid stunted growth or root damage.
Make sure to disinfect if the previous plant had issues, and inspect drainage holes carefully.
With these steps, your plants will thrive in their renewed home.
How Do I Prevent Root Damage During Repotting?
Be gentle with the roots – don’t shake or pull them out manually.
Soak the plant beforehand to soften soil and roots.
Choose a container 1-2 inches larger for proper growth.
Handle the entire root system carefully, especially if compacted or bound, to maintain root health and minimize stress.
Only trim damaged roots with clean tools.
Is It Okay to Use Regular Garden Soil for Houseplants?
No, you shouldn’t use regular garden soil for houseplants.
It lacks proper drainage and aeration, which garden soil’s dense composition can’t provide. Houseplants need lightweight mixes that balance moisture retention with good drainage to prevent root rot.
While you could amend garden soil with perlite or sand, it’s not the same as using commercial potting mixes designed specifically for containers.
Should I Prune All Damaged Roots Before Replanting?
Yes, you should prune damaged roots before replanting – root pruning improves root health by removing nonfunctional tissue that can spread disease.
This encourages new feeder roots for nutrient uptake and reduces transplant shock. Only trim what’s necessary though – avoid cutting more than two-thirds of the total root mass.
Focus on circling or decayed roots rather than healthy ones. Proper root pruning helps your plant establish in its new container more quickly and strongly.
What if My Plant Doesn’t Show Root-Bound Signs?
If your plant doesn’t show root-bound signs, don’t rush to repot just yet.
Check for signs of stress like stunted growth or unusual soil drainage patterns.
Sometimes plants thrive in tight spaces-just make sure the pot isn’t too small for their expanding needs.
On a final note
Repotting is a straightforward process that can greatly benefit your plants’ health and growth. By following these steps carefully, you’ll guarantee your green friends thrive in their new homes. Remember to handle them gently and provide the right conditions for a smooth changeover. With practice, repotting will become second nature-just like any other gardening skill. Keep up the great work!