Vermicomposting for Container Gardens: Using Worms to Create Rich Plant Nutrition
Starting vermicomposting in containers is simple – begin with red wigglers, proper drainage, and moist bedding. These worms transform kitchen scraps into nutrient-rich castings packed with nitrogen, phosphorus, potassium, and trace elements that strengthen plants against stress. Their activity also improves soil aeration and moisture retention, creating ideal conditions for root growth. Mix 10-20% vermicompost with potting soil for enhanced nutrition. As your system thrives, you’ll discover how this natural process not only feeds your garden but also builds long-term soil health – uncover more about balancing food waste and plant needs as you explore further.
Notable Insights
- Vermicomposting provides nutrient-rich castings that enhance plant growth and resilience in container gardens.
- Red wigglers improve soil structure, creating pores for better aeration and water retention in pots.
- Worm castings supply essential nutrients like nitrogen, phosphorus, and potassium for vibrant blooms.
- Maintain moist, dark conditions with proper drainage to keep worms active and composting efficiently.
- Mix 10-20% vermicompost with potting soil to boost nutrition while preventing overfeeding and odors.
Nutrient-Rich Benefits of Worm Castings for Container Plants
Worm castings offer a nutrient-packed boost for container plants that’s both powerful and gentle on their roots. These composted outputs deliver nitrogen, phosphorus, potassium, and trace elements in forms plants can absorb immediately-enhancing nutrient availability without burning tender roots. This steady release builds plant resilience against stressors like drought or temperature swings. The microbial activity in castings further strengthens defenses against diseases common in containers. With improved water retention and aeration, root systems thrive, supporting greater yields and blooming. Use them alone or mixed with soil for best results-your plants will thank you with healthier foliage and robust growth patterns that outlast seasonal changes. This gradual nutrient delivery ensures consistent plant nutrition without the risk of over-fertilization often seen with chemical alternatives Sustained Nutrient Release.
Setting Up an Efficient Vermicomposting System in Containers
You’ll need a container with proper drainage and insulation, like wood bins with drilled holes, before adding your worm crew.
Red wigglers prefer dark, moist environments, so cover the bin or choose night-loving spots for their habitat. Optimal Temperature Range is crucial for their activity levels.
Feed them kitchen scraps covered in bedding, but skip meat, dairy, and oily foods that attract pests or smell bad.
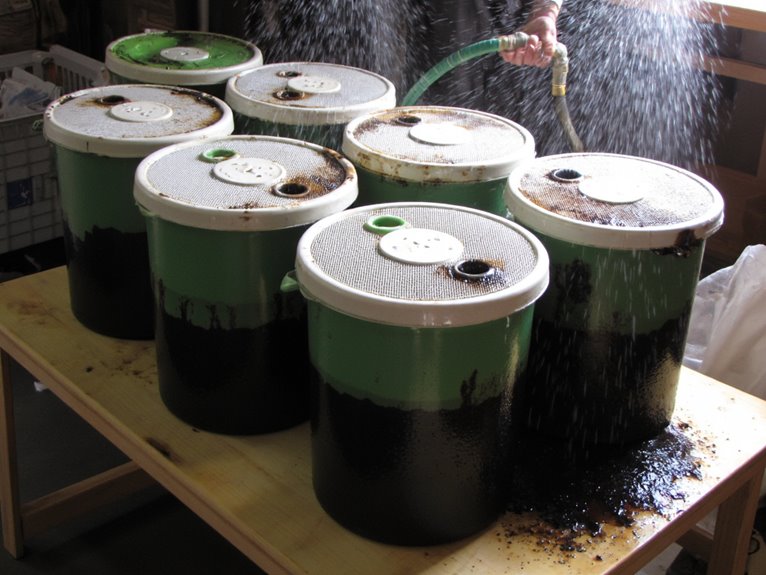
Bin Setup Essentials
When selecting a bin for your container composting system, think about both practicality and accessibility – finding a setup that lets you manage the worms without constant disruption is key. For optimal worm activity, aim for a size around 16 x 24 x 8 inches, which provides ample space without being too large to manage.
Plastic or rubber bins retain moisture and are easy to clean, while stackable options let you create vertical space. Choose sizes based on your garden scale: 10-15 gallons for small spaces, up to 40 gallons for larger container gardens.
Guarantee ventilation with holes in lids and sides to maintain aerobic conditions, and add drainage to prevent waterlogging.
Position bins in stable temperatures, away from direct sunlight and strong odors.
With the right bin setup, you’ll create an ideal environment for worms to thrive and transform your garden waste into rich compost.
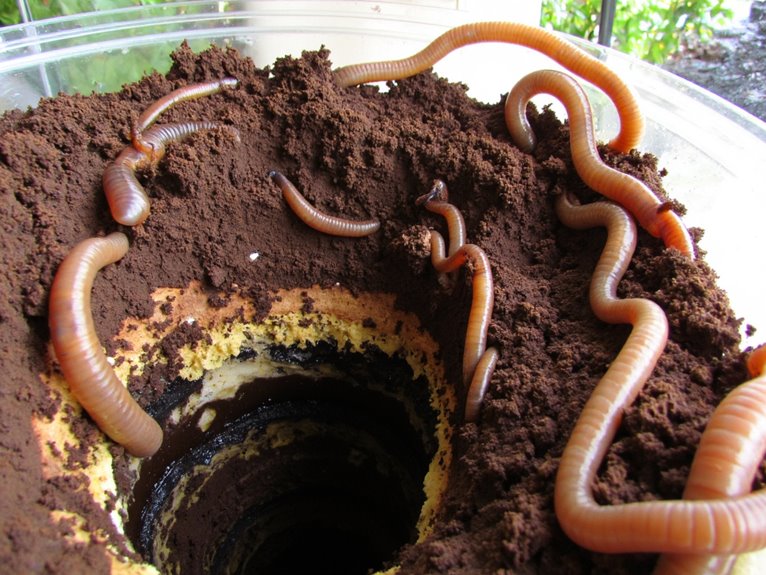
Worm Care Basics
Whether you’re starting fresh or expanding your container composting setup, nurturing worm health begins with crafting the right conditions-think of it as building a cozy, moisture-balanced home where these decomposers can thrive.
Focus on worm types like redworms for best results, and prioritize bin maintenance by monitoring moisture levels daily. Aim for a wrung-out sponge consistency to avoid anaerobic odors or worm stress.
Guarantee proper drainage to prevent drowning, and check temperatures regularly to stay within the ideal 55°F–77°F range.
Select quality bedding materials like shredded paper or coconut coir for aeration and microbial support.
Keep an eye on population health by balancing food input with worm numbers and harvesting castings when ready.
Feeding Techniques
It’s not just about keeping worms comfortable-it’s also about giving them the right food sources to thrive. For worm feeding, offer small quantities of fresh kitchen scraps like fruit and vegetable waste, buried in bedding to avoid odors.
Balance nitrogen-rich greens (compost balance) with carbon-rich materials like shredded paper. Feed 1-2 times weekly, matching their consumption rate-worms eat half their body weight daily.
Avoid citrus, onions, and oily foods. Monitor moisture levels carefully; aim for 70-85% dampness. Overfeeding or excess water can stress worms or create anaerobic conditions.
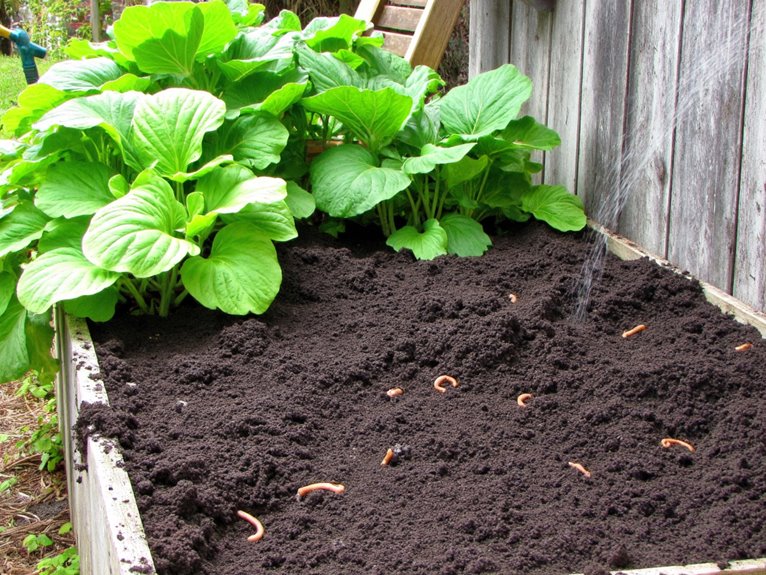
The resulting vermicompost will provide essential NPK nutrients that flowering plants need for healthy growth and vibrant blooms.
A well-balanced compost system guarantees efficient nutrient cycling while keeping your container garden’s soil consistently fertile and ready for planting.
How Worms Improve Soil Structure in Pots
Worms dig through potting mix, creating tunnels that boost porosity and let air flow around roots.
These channels help soil stay loose, preventing it from getting packed down in containers.
As they move, worms also mix the soil, spreading nutrients and improving how well it holds water without staying soggy.
Porous Pot Power
One might be surprised to learn that worms aren’t just decomposers but architects of soil structure in pots.
As they digest organic matter, they produce castings that create micro and macro pores, transforming dense potting mix into a breathable matrix. This porous power enhances soil aeration and drainage improvement, preventing water from pooling at pot bottoms.
With better airflow, roots avoid oxygen deprivation while accessing moisture steadily. Worms also stabilize soil particles through mucus and castings, resisting compaction that would otherwise choke plant growth.
The result? A balanced environment where air and water coexist effectively for container plants. While commercial potting soils often contain ingredients like peat moss and perlite for drainage, worm castings provide these benefits naturally while adding sustained nutrition. Let these unseen builders transform your pots from restrictive containers into thriving ecosystems!
Aeration Advantages
The unseen rhythm of worm tunnels transforms dense potting mix into a living network, where air flows as freely as water does in nature’s design.
Worm activity creates tiny channels that boost soil aeration, letting oxygen reach roots more efficiently than synthetic methods ever could.
- Worm tunnels act like natural pipes, carrying air deep into the root zone and reducing compaction.
- Soil aeration from these paths helps water drain better, avoiding soggy containers.
- The same tunnels let microbes breathe, creating a thriving underground community that boosts fertility.
- As worms work, they physically loosen soil, making it easier for roots to spread and grow.
This constant movement builds a resilient potting mix that supports strong plants with less effort. This improved soil structure works perfectly with organic liquid fertilizers, which can flow more easily through the aerated channels to reach plant roots effectively.
Moisture Retention
While worms work unseen in the soil, their activity creates a subtle but significant impact on moisture retention in container gardens. As they break down organic matter, worms produce castings that enhance soil hydration by improving porosity and water-holding capacity.
This natural process helps balance drainage with moisture management, preventing both drought stress and waterlogging. The organic content in worm castings acts like a sponge, holding adequate moisture for plant roots while allowing excess to drain. This is especially valuable in pots where soil can dry out quickly.
Improved soil structure from vermicomposting also reduces compaction, enabling better absorption of watering. With worms present, container soils maintain consistent moisture levels, supporting healthier root systems and reducing the need for frequent watering.
Let these unseen engineers help you create a balanced soil environment where plants thrive with minimal water waste.
Accelerating Compost Production With Vermicomposting
You’re about to discover how to turbocharge your container garden’s compost system-let’s turn waste into wealth faster than you’d expect.
Mechanical methods speed up the process dramatically, cutting time from months to weeks. A suitable C:N ratio of 25-30:1 fuels microbial activity that powers decomposition.
Worms thrive with proper moisture and aeration, so keep the bed loose and damp but not soggy.
- Use mechanical systems for faster results
- Balance browns and greens for suitable carbon-nitrogen ratios
- Chop feedstock to increase surface area
- Add accelerators like wood ash or biochar
These strategies create ideal conditions for worms and microbes to work together efficiently. The combination of biological activity, proper environment, and technology makes vermicomposting a powerhouse for quick, nutrient-rich compost.
You’ll be amazed at how little time it takes when done right!
Cost Savings From On-Site Worm Compost Production
Did you know that setting up worm composting on-site can save you hundreds of dollars annually? By cutting synthetic fertilizer costs, reducing waste disposal fees, and generating revenue from worm castings, vermicomposting offers clear financial incentives. A cost benefit analysis reveals these savings:
| Cost Saving Category | Annual Savings Potential |
|---|---|
| Fertilizer & Pesticides | $200-$500 |
| Waste Disposal Fees | $100-$300 |
| Worm Casting Revenue | $150-$400 |
With low initial costs and high returns, this sustainable practice becomes a smart investment for gardeners looking to optimize their budgets while nurturing healthy soil.
Environmental Impact of Organic Waste Diversion Through Vermicomposting
As container gardens generate organic waste that might otherwise end up in landfills, vermicomposting offers a way to turn this byproduct into something truly valuable.
It cuts down on waste management costs while slashing your carbon footprint with fewer emissions than traditional composting.
- Worms cut methane output by 32% and slash nitrous oxide by 40%, gases far more potent than CO2.
- Temperature, moisture, and worm activity all shape the carbon footprint of this process.
- Vermicompost traps heavy metals, cutting pollution before it reaches food chains.
- By keeping organic matter stable, it locks in carbon long-term-helping fight climate change.
This method not only cuts waste but builds soil health while reducing emissions.
It’s a win for both your garden and the planet.
Integrating Vermicompost Into Container Garden Care
While vermicompost might seem like an unusual addition to containers, its rich nutrients and soil-improving properties make it a game-changer for gardeners.
Packed with nitrogen, phosphorus, and potassium in available forms, it boosts chlorophyll and biomass while reducing transplant shock. Red wigglers excel in container vermicomposting due to their high reproduction rates and waste-processing efficiency.
When integrating, prioritize container compatibility by mixing 10-20% with potting soil or top-dressing regularly. This enhances aeration, water retention, and microbial activity without causing compaction.
Pair with coconut coir for moisture balance, and guarantee proper worm varieties’ needs are met with consistent moisture and food sources.
The result? Healthier roots, stronger plants, and less reliance on chemical fertilizers-all in your containers.
Frequently Asked Questions
Do Worms Need Special Food for Composting?
You do need to provide worms with special food for composting – a balanced worm diet combining carbon-rich bedding like shredded paper or cardboard with nitrogen from kitchen scraps.
This creates nutrient-dense vermicompost that enriches container garden soil. Avoid meats and dairy; opt for fruits, veggies, and coffee grounds instead.
The right mix supports healthy worm activity and produces exceptional compost benefits for your plants.
How Deep Should the Vermicompost Bin Be?
You should aim for a bin depth of 18 to 24 inches for ideal vermicomposting.
This range provides enough space for worms to burrow, regulates temperature, and supports proper moisture levels.
Shallow bins (3-4 inches) work for Red Wigglers, while Nightcrawlers need at least 8 inches.
Keep it within these composting dimensions for healthy worm activity and nutrient-rich output.
Can I Use Coffee Grounds Directly in Worm Bins?
You can use coffee grounds in worm bins, but be mindful of their effects.
The coffee benefits include enriching compost with nitrogen and microbes, but the worm reactions depend on how you add them. Fresh coffee’s acidity can shock worms, so mix it with food scraps or bedding to buffer it.
Start small-like a cup per week-and watch for signs of stress. Pre-composted grounds work best, as they’re less harsh. If worms avoid them, try adding clay or coir to help.
Are All Worms Suitable for Composting?
No, not all worms are suitable for composting. The types of worms you choose greatly affect your composting benefits.
Red wigglers and other epigeic species work best in bins, breaking down waste quickly and enriching soil with nutrient-dense castings.
Avoid garden earthworms-they dig too deep and don’t process organic matter as efficiently.
Pick worms designed for surface litter to maximize your composting results.
What’s the Ideal Temperature Range for Worms?
You’re looking at the perfect worm habitat temperature range – between 72°F and 80°F (22°C to 27°C). This keeps red wigglers active and productive.
Temperature control is key; too cold and they slow down, too hot and they suffer. Keep your bin shaded, insulated, and moist to maintain this ideal range for healthy worm populations.
In hot climates, move bins indoors or use cooling techniques to avoid exceeding 90°F temperatures.
On a final note
You’ve discovered a game-changer for container gardens – worms that create nutrient-rich castings better than store-bought compost. Setting up a vermicomposting system is simpler than you think, with endless benefits for soil structure and plant growth. By turning kitchen scraps into black gold, you’re not just saving money – you’re closing the loop on waste while nurturing thriving container plants. Give it a try and watch your garden flourish!