African Violet Propagation: Growing New Plants From Leaf Cuttings
Propagate African violets by selecting healthy middle leaves with strong petioles, cutting at a 45-degree angle, and letting them callus briefly. Plant in well-draining soil, keeping the base above the surface, and maintain temperatures between 65-75°F with indirect light. Mist to keep humidity around 40-60% but avoid overwatering. Roots develop in 4-6 weeks when you see white roots or new “babies” at the base. Once strong enough, transplant carefully into fresh soil. With these basics mastered, you’ll be ready to grow more violets in no time!
Notable Insights
- Maintain temperatures between 65°F–75°F (18–24°C) for optimal African violet propagation conditions.
- Use well-draining soil mixes like perlite-and-peat moss to prevent waterlogging of cuttings.
- Place cuttings in bright, indirect light near east/west-facing windows for initial growth.
- Shape petioles at 45-degree angles and plant just enough stem to avoid covering the leaf blade.
- Keep humidity at 40–60% using plastic domes, but gradually reduce it as roots develop and new growth appears.
Selecting the Perfect Leaf for Propagation
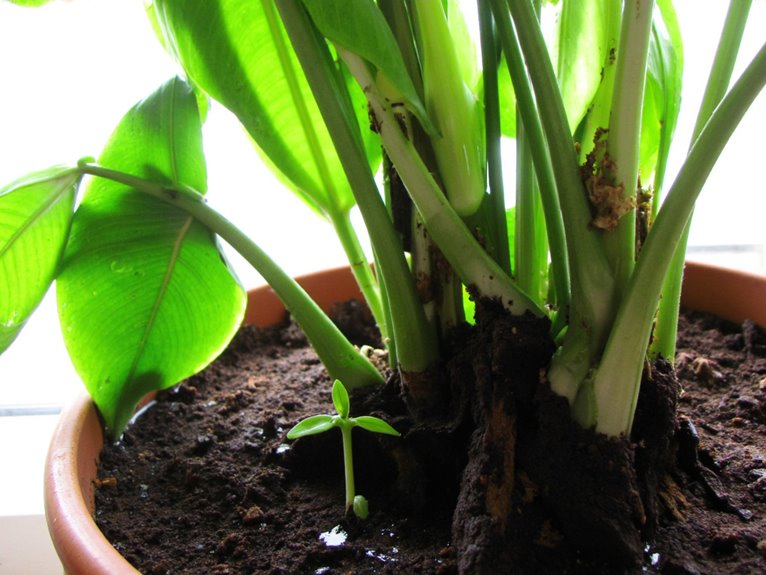
Almost any healthy leaf might work for African violets, but the best ones come from the middle of the plant – not too young, not too old. Focusing on leaf health means avoiding damaged, discolored, or pest-riddled leaves; opt for vibrant, firm ones with intact petioles. Leaf positioning matters too – second-row leaves balance maturity and energy reserves better than center or outer ones. Take care when removing to avoid harming the parent plant. Optimal leaf selection increases propagation success by providing a balanced mix of energy and developmental potential.
Preparing Your Leaf Cuttings for Planting
Once you’ve found that perfect leaf, the real work begins with careful preparation to set your cutting up for success. Make a clean cut using sharp tools, then shape the petiole at a 45-degree angle for better rooting. Keep the leaf blade oriented upright or slightly backward when planting.
| Cutting Technique | Planting Position |
|---|---|
| 45-degree angle | Upright or slight lean |
| Clean, sharp tool | Prevents damage and infection |
| Dried cut surface | Reduces rot risk |
| Root hormone dip | Encourages faster growth |
| Proper petiole length | Guarantees stability |
Position the fuzzy underside up and bury just enough stem for support. Avoid covering the leaf itself to prevent moisture buildup. With patience and precision, your new African violets will thrive from these carefully prepared cuttings.
When planting your cuttings, ensure the base of the leaf remains above the growing medium to avoid rot, which is crucial for successful root development.
Choosing the Right Rooting Medium
Whether you’re starting from scratch or refining your technique, selecting the perfect rooting medium forms the foundation for successful African violet propagation. Experiment with perlite-and-peat moss mixes, vermic – perlite and peat moss combination – as a standard option, or try vermiculite alternatives for improved aeration. Prioritize moisture retention strategies without excess sogginess, pairing them with drainage solutions like gravel layers. For humidity control methods, sphagnum moss creates perfect conditions under ventilated containers. Always sterilize mediums to avoid contamination and guarantee proper aeration for root breathing. Common mistakes include overwatering or using unbalanced pH soils – aim for slightly acidic levels. Temperature effects matter too; keep mediums within ideal ranges for best results. Consider using coconut coir as an excellent alternative that provides superior moisture retention while maintaining the proper drainage African violets need for healthy root development.
Creating Ideal Conditions for Root Development
Having chosen your rooting medium, the next step is crafting the perfect environment for those cuttings to take hold-think of it as giving them a cozy bed to grow into something beautiful. Temperature stability is key: keep it between 68°F and 75°F (20°C and 24°C) to avoid shocking the developing roots. Use a hygrometer to monitor humidity control, aiming for 40–60% to prevent drying without causing rot. Place cuttings near east/west-facing windows for filtered light, avoiding direct sun. Maintain consistent conditions-no sudden changes-to reduce stress on fragile new plants. Verify your setup is sterilized to guard against disease, and water carefully to keep soil moist but not soggy. With patience and attention to these details, your African violets will soon transform from simple cuttings into thriving, rooted plants ready for their next growth stage.
Propagating in Soil vs. Water: Which Is Better?
Is there a perfect way to propagate African violets, or does the method depend on your garden setup and goals? Both soil and water methods have their merits. Water benefits include reduced rot risks and visible root growth without disturbing the cutting. Soil advantages offer quicker initial rooting and potentially larger plants after 6 months. Water propagation requires careful temperature control, while soil needs balanced moisture. Either way, clean tools are essential. If you prioritize observation and disease prevention, water might be better. For faster results and simpler changes, soil could suit your space. Consider which method aligns with your garden conditions and patience level-both can produce beautiful new violets!
Caring for Cuttings During Root Formation
Once you’ve made your cutting choice, the real work begins with creating the perfect conditions for those tiny roots to get started. Maintain humidity control using domes or terrariums to keep moisture consistent without waterlogging, while avoiding condensation on leaves to prevent rot. Water from below with a well-draining mix to guarantee proper watering techniques that support cutting health without causing stem rot. Provide bright indirect light rather than direct sun to protect delicate cuttings, and use grow lights if natural light is insufficient. Keep temperatures between 72-82°F for consistency, using heat mats if needed. Open covers periodically for air circulation while inspecting for disease prevention. With proper care, most African violets will develop roots within 3-4 weeks.
Recognizing When Your New Plants Are Ready to Transplant
How might you know when your African violet cutting has grown into a plant worth moving? Look for 2-3 sets of fully formed leaves that are vibrant green and sturdy. Check if roots peek through drainage holes-healthy root health means they’re thick and white, not wiry or discolored. A strong stem strength will hold up the foliage without bending. Transplant timing arrives when the plant tolerates fresh soil without wilting. Don’t rush it; wait until these signs confirm your new plants are ready for their next home!
Transplanting Techniques for Healthy African Violets
You’ve probably noticed that your African violets have grown quite a bit recently – those little cuttings you took earlier are now sturdy plants with multiple sets of leaves. Successful transplant techniques begin with careful handling to protect root health during the move. Choose pots one-third the width of the plant’s spread and prepare fresh, well-draining soil mix tailored to your climate. Gently remove the plant, brushing off old soil and trimming damaged foliage before replanting. Center the root ball in the new pot, filling around it without compacting the soil. Keep roots just below the soil surface for ideal growth. Avoid overwatering immediately after transplanting and create a humid environment to ease the shift. With these steps, your African violets will thrive in their new homes.
Common Challenges and How to Avoid Them
While African violets are generally resilient, propagation can sometimes be tricky – especially when dealing with humidity levels that are too low or watering practices that don’t quite hit the right balance. Proper humidity management is key to encouraging root formation in cuttings; aim for 50-70% humidity without letting the area become stagnant. Combine this with pest prevention strategies like regular inspections and clean tools to avoid issues like mealybug infestations. Keep temperatures steady between 72°F and 80°F, and use well-draining soil mixes to prevent waterlogging. When taking cuttings, choose mature leaves with a clean cut angle and remove only the necessary stem portion. Avoid direct sunlight initially, and guarantee good air circulation to reduce fungal risks. With careful attention to these factors, your African violets should thrive in their new homes.
Tips for Successful Propagation and Plant Care
Once you’ve selected your leaf cuttings, preparing the right growing medium is vital to support healthy root development. Use well-draining mixes like vermicity/perlite combinations, keeping soil moist but not soggy. Small pots with drainage holes prevent waterlogging. When planting, create gentle holes and avoid compacting soil too tightly.
Temperature control is important during propagation – maintain 65-75°F (18-24°C) for best rooting. For humidity management, cover cuttings with plastic domes or clamshells, especially in dry environments. Open these periodically to prevent fungal issues.
Water carefully to keep soil damp without saturation. Avoid direct sunlight initially. After 4-6 weeks, look for “babies” at the base before transplanting. Gradually reduce humidity as plants mature while maintaining stable temperature conditions. With patience and consistent care, your African violets will thrive as new plants.
Frequently Asked Questions
What Happens if I Use a Leaf With Damaged Veins?
Using a leaf with damaged veins means you’re starting with a weaker cutting - the vein impact hinders nutrient flow, stressing the cutting health. Rooting is less likely, and the plantlet may wilt or fail to develop properly.
Can I Propagate From the Petiole Alone Without a Leaf Blade?
No, you can’t reliably propagate from the petiole alone without a leaf blade. The leaf blade provides nutrients and helps root formation. Petiole propagation works best when combined with part of the leaf.
How Often Should I Water Cuttings Without Causing Rot?
You should water cuttings every 3-4 days, but only when the soil’s dry to the touch. Balance cutting frequency with moisture needs – keep soil damp but not soggy. Check regularly and adjust based on conditions like light and temperature.
Is Direct Sunlight Safe for Newly Rooted Plants?
No, direct sunlight isn’t safe for newly rooted plants-it can scorch leaves and roots. Focus on plant acclimation with bright, indirect sunlight instead. Gradually introduce sunlight exposure as the plant strengthens.
Do African Violets Propagate Equally Well in All Seasons?
You won’t get equal results across seasons – propagation slows in colder months when temperatures drop below ideal ranges. Seasonal influences like light duration and humidity levels require adjusting propagation techniques for best outcomes.
On a final note
With patience and careful technique, propagating African violets from leaf cuttings is well within reach of any green thumb. By selecting healthy leaves, providing proper conditions, and handling the young plants with care, you’ll soon be enjoying a blooming collection of these charming indoor wonders. Embrace the process, learn from each plant’s unique needs, and watch your garden grow-one vibrant violet at a time.