Microgreens for Beginners: The Fastest Way to Grow Fresh Greens
You can grow fresh microgreens in just 7 days with simple setup and care. Start by selecting high-quality seeds like broccoli or radish, which are easy for beginners. Use a sterile potting mix mixed with compost, and place them in a tray with good drainage. Provide bright light – natural sunlight works best or use full-spectrum LED lights. Water regularly but don’t overwater, keeping the soil consistently moist. Harvest when shoots reach 1-3 inches tall with vibrant leaves. Store them dry in airtight containers to preserve flavor and nutrition. With this fast-growing method, you’ll enjoy fresh greens year-round – and if you keep going, you’ll discover even more ways to make your microgreen garden thrive.
Notable Insights
- Start with easy-to-grow brassica seeds like broccoli or radish for reliable sprouts within 7-14 days.
- Use sterile potting mix with good drainage, and provide consistent moisture without overwatering delicate roots.
- Place under bright light (3,000-10,000 lux) for 12-16 hours daily using LEDs to mimic sunlight efficiently.
- Harvest when stems reach 1-3 inches tall with vibrant leaves, cutting at soil level for best flavor and texture.
- Store in airtight containers with ventilation to preserve freshness up to 5 days without washing before use.
Selecting High-Quality Seeds for Your Microgreen Garden
Whether you’re starting from scratch or looking to level up your garden game, selecting the right seeds is like laying the foundation for a successful microgreen venture. Focus on seed varieties that balance ease of growth with flavor potential-brassicas offer reliability, while arugula brings peppery excitement. Prioritize seed sourcing from reputable suppliers offering high-quality, food-safe seeds tested for germination rates above 85%. Look for organic options and avoid bulk seeds packed with fillers. Check expiration dates to guarantee freshness, as old seeds struggle to sprout consistently. Experiment with beginner-friendly choices like broccoli or radish before branching out to herbs or lettuces. With the right seed sourcing strategy and thoughtful variety selection, your microgreen garden will thrive in just a few weeks.
1. For those interested in nutritional diversity, consider varieties like red cabbage microgreens high vitamin K which offer not only visual appeal but also significant health benefits.
Preparing the Right Growing Medium at Home
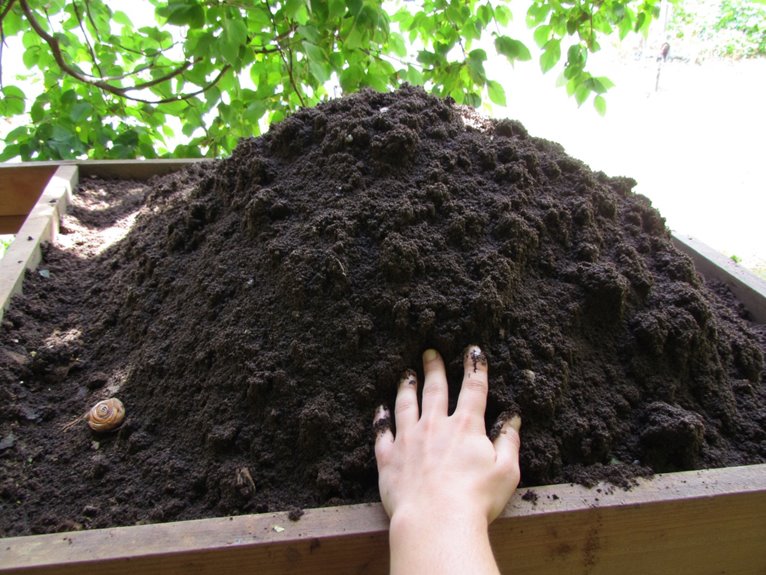
Although you might be tempted to use regular garden soil for your microgreens, creating the right growing medium at home is essential for healthy sprouts and robust growth. A good medium should balance moisture retention with proper drainage-think coconut coir’s water-holding power or bamboo mats’ renewable structure. Don’t forget nutrient addition; coir may need extra feeding for longer grows. Start with sterile potting mix, then add compost or vermiculite to enrich it. Keep the mix consistently moist but not soggy, as over-watering can drown roots. For enhanced root development and nutrient uptake, consider incorporating beneficial elements like earthworm castings or mycorrhizae into your growing medium. With the right medium, your microgreens will sprout strong and green in just a week or two.
Setting Up Optimal Lighting Conditions
While natural sunlight is ideal for your microgreens, setting up the right artificial lighting system at home can yield excellent results. Focus on light spectrum-blue for growth, red for flowering-but full-spectrum LEDs mimic sunlight best. Keep intensity between 3,000-10,000 lux by adjusting how close you place lights; too far and stems stretch, too close and leaves burn. Provide 12-16 hours of light daily with timers to replicate natural cycles. Choose efficient LED or fluorescent sources over incandescent. LED options consume 90% less electricity than traditional bulbs while providing equivalent brightness and coverage. If plants yellow or stretch, troubleshoot lighting intensity or duration. With the right balance, your microgreens will thrive!
Blue light promotes vegetative growth is particularly important during the microgreen stage, as it supports leaf development without encouraging flowering, which would be undesirable for these young plants.
Watering Techniques for Thriving Microgreens
Three key watering methods for microgreens – bottom, top, and hybrid approaches – each offer unique benefits that growers can leverage based on their setup. Bottom watering keeps foliage dry, reducing mold risks, while top watering allows targeted hydration. Hybrid methods combine both for flexibility.
| Method | Pros & Cons |
|---|---|
| Bottom | Reduces humidity but needs extra trays |
| Top | Simple but risks soil compaction |
| Hybrid | Balanced approach for varied setups |
| Moisture Management | Monitor daily; avoid overwatering |
| Watering Techniques | Adjust based on species and growth stage |
Bottom watering involves soaking trays in water reservoirs, while top watering uses mist sprays. Both require careful observation to maintain ideal moisture levels without damaging delicate shoots. Start with small amounts and increase as microgreens develop.
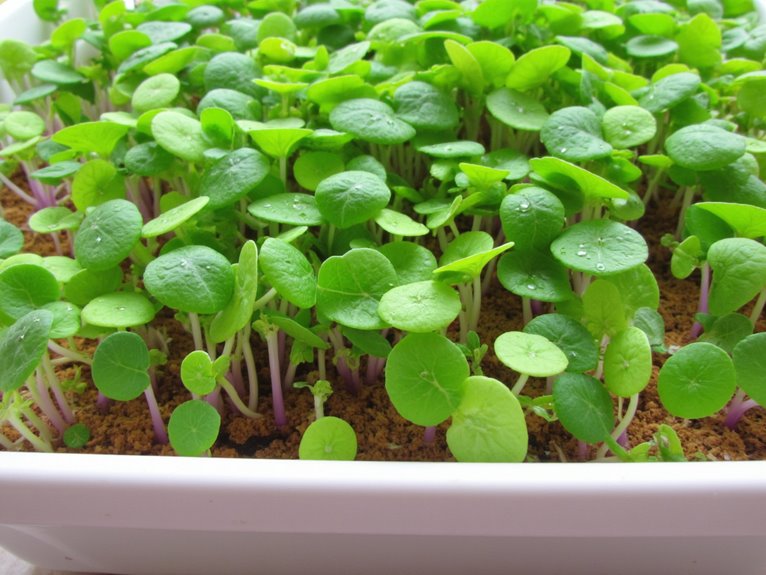
Monitoring Growth and Determining Harvest Time
Once your microgreens have sprouted, regularly inspecting their progress becomes essential to ensuring a successful harvest. Look for growth consistency in height, color, and leaf development across the tray – uneven sprouting may require adjusting light or moisture levels. Track daily changes to identify harvest indicators like fully expanded cotyledons and emerging true leaves. When stems reach 1-3 inches tall with vibrant green foliage, they’re usually ready. Gently touch leaves; they should feel firm but not limp. Avoid harvesting if plants show yellowing or wilting signs of stress. Consistent monitoring helps catch issues early while ensuring you pick at peak freshness when all growth markers align perfectly. For even faster and more consistent results, consider upgrading to hydroponic systems which provide automated nutrient distribution and optimal growing conditions for microgreens.
How to Properly Harvest Fresh Microgreens
Get your scissors ready – it’s time to harvest those vibrant shoots at their peak! Mastering harvesting techniques guarantees you get the best flavor and texture. Always cut at soil level with sanitized tools to protect your crop.
| Tool | Technique | Sanitation |
|---|---|---|
| Sharp scissors | Clean, even cuts | Wash after each use |
| Electric clippers | Faster but riskier | Disinfect regularly |
| Quick-Cut Harvester | Consistent results | Requires thorough cleaning |
Handle gently to avoid bruising and always inspect for contamination. A quick harvest boosts turnover potential without sacrificing quality.
Storage Methods to Preserve Flavor and Nutrition
After cutting those vibrant shoots at soil level, the real work really begins – preserving their flavor and nutrition for later use. Proper storage containers like airtight glass jars with vented lids or perforated bags help maintain moisture control without drying out greens. Line the bottom with paper towels to absorb excess humidity and change them regularly. Keep microgreens away from fridge surfaces and ethylene-producing foods to avoid cold damage and spoilage. Don’t wash shoots before storing; instead, pat them dry gently to prevent condensation buildup. With these methods, you’ll extend their freshness while keeping every bite full of flavor and nutrition.
Common Challenges and Solutions for Beginners
As you commence on cultivating these tiny powerhouses, poor germination can be disheartening when seeds fail to sprout uniformly – but don’t worry, there are clear fixes for these common issues. Guarantee even seed distribution by weighing each tray, use drainage holes and bottom watering to avoid rot, and cover trays initially for darkness. For pest management, keep humidity low with ventilation and avoid overhead watering that attracts fungus gnats. Disease prevention requires sterile equipment and quick harvests to minimize mold risk. Provide bright light after germination to prevent leggy growth, and maintain stable temperatures. With attention to these details, you’ll overcome challenges and enjoy a bountiful microgreen crop!
Maximizing Nutritional Benefits From Your Crop
Once you’ve got your microgreens sprouting strong, choosing the right varieties can really boost your nutritional game if you’re aiming for specific benefits. With nutrient diversity spanning vitamins, minerals, and antioxidants concentrated up to 40 times higher than mature greens, species selection becomes key. Let’s explore some top picks:
| Species | Key Nutrients | Health Benefits |
|---|---|---|
| Broccoli | Magnesium, Phenolics | Red blood cell support, antioxidant |
| Sunflower | Calcium, Fumaric Acid | Bone health, metabolic balance |
| Black Radish | Phenolics | Free radical neutralization |
| Bean | Vitamin C | Immune support, skin health |
| Pea | Phosphorus, Copper | Cardiovascular function |
Prioritize species based on your nutritional goals and mix them for a broad spectrum of benefits.
Growing Microgreens Seasonally for Continuous Supply
Whether you’re gardening in a climate with distinct seasons or simply want to avoid the hassle of waiting for outdoor conditions to improve, growing microgreens indoors lets you harvest fresh greens year-round, no matter what’s happening outside. By practicing seasonal crop selection, you can grow broccoli and kale in winter or arugula in spring, matching flavors to your menu. Indoor temperature control between 68°F-75°F guarantees steady growth regardless of outdoor weather. Supplement lighting extends photosynthesis during shorter days. Rotate crops like brassicas one week, then legumes the next, to prevent disease. Plant new seeds every 7-10 days for continuous harvests, and water carefully from below to avoid mold. With these techniques, you’ll enjoy fresh microgreens anytime-you just need a tray, lights, and a little planning!
Frequently Asked Questions
Can I Grow Microgreens Without Using Soil?
Yeah, you totally can grow microgreens without soil-hydroponic systems and alternative mediums like coconut coir or paper towels work great. It’s clean, saves space, and keeps things simple for beginners. Just keep it moist and provide good light!
What’s the Best Way to Sterilize Containers for Seeds?
You’re better off using heat or hydrogen peroxide for container sterilization. Plastic, metal, and glass containers work best. Heat kills pathogens directly, while peroxide offers a chemical alternative. Both methods guarantee clean containers for seed germination without harmful residues.
How Do I Know if My Microgreens Are Getting Enough Light?
You know if your microgreens are getting enough light by watching their color and growth - vibrant green and compact leaves mean they’re happy. Check your light sources and make sure they’re on for at least 14-16 hours a day. If they’re pale or stretching, they need more light!
Should I Use Tap Water or Filtered Water for Misting?
Should you use tap water or filtered water for misting? Tap water benefits include cost and convenience, but filtered water advantages like cleaner moisture and reduced mold risk make it better for microgreens. Let tap water sit 24 hours to cut chlorine, or go filtered for safer, more consistent results.
Do Microgreens Need Fertilizer for Growth?
Yes, microgreens need fertilizer for growth. Fertilizer types like balanced NPK, organic options, or Azomite support them during growth stages. Start when cotyledons appear and use sparingly to avoid burn-your greens will thank you!
On a final note
With microgreens, you’ve opened a simple path to fresh nutrition right in your kitchen or garden. By following these steps-choosing quality seeds, setting up proper conditions, and caring for your plants-you’re not just growing food; you’re cultivating health and sustainability. Keep learning as you go, experimenting with flavors and techniques to make every harvest special. Your journey toward green thumb confidence has just begun.