Guide to Successful Seed Starting and Transplanting Strategies
Get ready to grow your best garden yet with our guide to successful seed starting and transplanting strategies. You'll learn how to select the right seeds, prepare the perfect seed starting mix, and troubleshoot common issues. With practical tips and expert advice, you'll be equipped to nurture your seedlings from start to finish. Let's get those green thumbs ready!
Selecting the Right Seeds
When selecting seeds for your garden, choose varieties that are well-suited to your climate and growing conditions. Consider factors like average temperatures, humidity, and the length of your growing season. This will ensure that the seeds you select have the best chance of thriving in your specific environment. Look for seeds that are labeled as suitable for your hardiness zone, as this indicates they are adapted to the typical conditions in your area. Additionally, consider any unique characteristics of your garden, such as soil type and sun exposure. By choosing seeds that align with your specific conditions, you set yourself up for success and reduce the likelihood of struggling to grow plants that aren't well-suited to your environment.
Understanding Seed Starting Containers
To successfully start your seeds, choose appropriate containers that provide adequate space for root growth and allow for easy transplanting into the garden. Opt for containers with drainage holes to prevent waterlogged soil, promoting healthy root development. Use biodegradable pots made from materials like peat, coconut coir, or paper, which can be directly planted into the soil, reducing root disturbance during transplanting. Plastic trays and individual cells are also suitable for starting seeds and can be reused for multiple seasons with proper sterilization. Ensure the containers are clean and have been sanitized to minimize the risk of seedling diseases. Remember to label your containers to keep track of different seed varieties. Understanding the importance of suitable containers will set your seedlings up for success and make the transplanting process a breeze.
Preparing the Seed Starting Mix
Selecting a high-quality seed starting mix is essential for ensuring optimal germination and early seedling growth. Look for a mix that is light, well-draining, and sterile to prevent diseases. You can purchase a pre-made seed starting mix from a garden center or create your own by combining peat moss, vermiculite, and perlite. To prepare the mix, moisten it with warm water until it's evenly damp but not soggy. Fill your seed starting containers with the mix, leaving a little space at the top for easy watering. Gently firm the mix in each container to remove air pockets. Remember to label your containers before sowing the seeds. Properly preparing the seed starting mix sets the foundation for successful seed germination and healthy seedling development.
Germination Tips and Techniques
Once the seed starting mix is prepared, you can begin the process of germination using a variety of tips and techniques to ensure successful seedling development. To kickstart germination, maintain a consistent temperature between 65-75°F and ensure adequate moisture levels. Consider using a seedling heat mat to provide bottom heat, promoting faster and more uniform germination. Additionally, covering the containers with plastic domes or plastic wrap can create a humid environment, speeding up germination. Lightly misting the soil surface with water can also help maintain moisture levels without disturbing the seeds. As the seeds germinate, ensure they receive ample light to prevent stretching and encourage sturdy growth. Implementing these germination tips and techniques will set the stage for healthy seedlings ready for transplanting.
Providing Adequate Light and Temperature
Maintain a consistent temperature between 65-75°F and ensure that your seedlings receive ample light to promote healthy growth and development. Place your seedlings in a location where they can receive at least 12-16 hours of bright, indirect light each day. If natural light is insufficient, consider using grow lights to supplement. Keep a close eye on the temperature, as fluctuations can stress the seedlings. Investing in a thermometer and a heating mat can help you regulate the temperature effectively. Remember, providing the right conditions for your seedlings is crucial for their overall success. With the proper light and temperature, your seedlings will thrive, setting the stage for strong, vigorous plants ready for transplanting.
Watering and Humidity Control
To ensure the health and vitality of your seedlings, it is essential to carefully manage the watering and humidity levels, creating an optimal environment for their growth. When watering your seedlings, aim for consistent moisture without over-saturation. A good rule of thumb is to water when the top layer of soil feels dry to the touch. Use a spray bottle to mist the seedlings and surrounding soil, ensuring that they receive adequate moisture without being drenched. Additionally, maintaining proper humidity levels is crucial for seedling health. Consider using a humidity dome or a small, portable humidifier to regulate moisture levels, especially during the early stages of growth. By paying close attention to watering and humidity, you can provide your seedlings with the ideal conditions for strong, healthy development.
Fertilizing Seedlings
When fertilizing seedlings, apply a balanced liquid fertilizer diluted to half strength to provide essential nutrients for healthy growth. Once your seedlings have developed their first set of true leaves, it's time to start fertilizing. Choose a balanced, water-soluble fertilizer with an equal ratio of nitrogen, phosphorus, and potassium. Dilute the fertilizer to half the recommended strength to avoid burning the delicate roots of the seedlings. Using a watering can or spray bottle, gently apply the diluted fertilizer to the soil around the seedlings, taking care to avoid getting any on the leaves. Fertilize your seedlings every two weeks to promote strong, vigorous growth. Pay attention to the specific needs of each plant variety and adjust the fertilization schedule as needed. Providing the right nutrients at the right time will set your seedlings up for success when it's time to transplant them.
Hardening Off Seedlings
To properly harden off your seedlings, gradually introduce them to outdoor conditions over a period of 7 to 10 days. Start by placing them in a sheltered, shady spot for a few hours each day, gradually increasing the time and exposure to sunlight. This process helps the seedlings acclimate to the fluctuations in temperature, wind, and sunlight they'll experience in the garden. It toughens them up, reducing transplant shock and increasing their chances of thriving once they're in the ground. Keep an eye on the weather forecast, and if there's a chance of frost, bring your seedlings back inside or protect them with row covers. Hardening off is a crucial step in the seed starting process, and taking the time to do it right will set your plants up for success in their new outdoor environment.
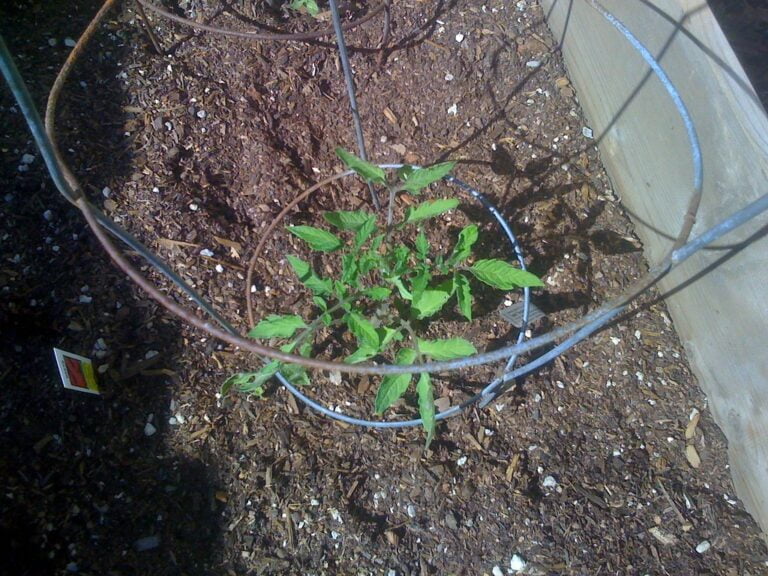
Transplanting Seedlings Into the Garden
How can you ensure a successful transition when transplanting your seedlings into the garden after hardening them off? Start by choosing a mild, overcast day for transplanting to minimize stress on the seedlings. Before transplanting, water the seedlings thoroughly to help ease the transition. Dig a hole slightly larger than the root ball of the seedling and gently place the seedling into the hole. Be sure to pat the soil firmly around the base of the seedling to provide support. Water the transplanted seedlings immediately after planting to help settle the soil and reduce transplant shock. Consider using a diluted organic fertilizer to promote healthy growth. Lastly, provide some shade for the first few days to protect the seedlings from direct sunlight. With these steps, you can help your seedlings thrive in their new garden home.
Troubleshooting Common Seed Starting Issues
Why might your seedlings be experiencing stunted growth or yellowing leaves despite proper care? There are several common issues that could be causing these problems. Firstly, check if your seedlings are getting enough light. Inadequate light can lead to leggy growth and yellowing leaves. Additionally, overwatering or underwatering can both cause stunted growth and yellowing leaves. Ensure that the soil is consistently moist but not waterlogged. Furthermore, using the wrong type of soil or not providing enough nutrients can also hinder the growth of your seedlings. Consider using a high-quality potting mix and incorporating a balanced fertilizer as needed. Lastly, check for pests or diseases that could be affecting your seedlings. By addressing these common issues, you can troubleshoot and resolve the stunted growth and yellowing leaves of your seedlings, setting them up for success.
Conclusion
Now that you've got the basics down, it's time to put your seed starting and transplanting skills to the test. Remember, patience and attention to detail are key when it comes to successful seed starting. Keep an eye on your seedlings, provide them with the right conditions, and soon enough, you'll have healthy, thriving plants ready to be transplanted into your garden. Happy gardening!