DIY Potting Mix Recipe: Make Your Own Indoor Plant Soil
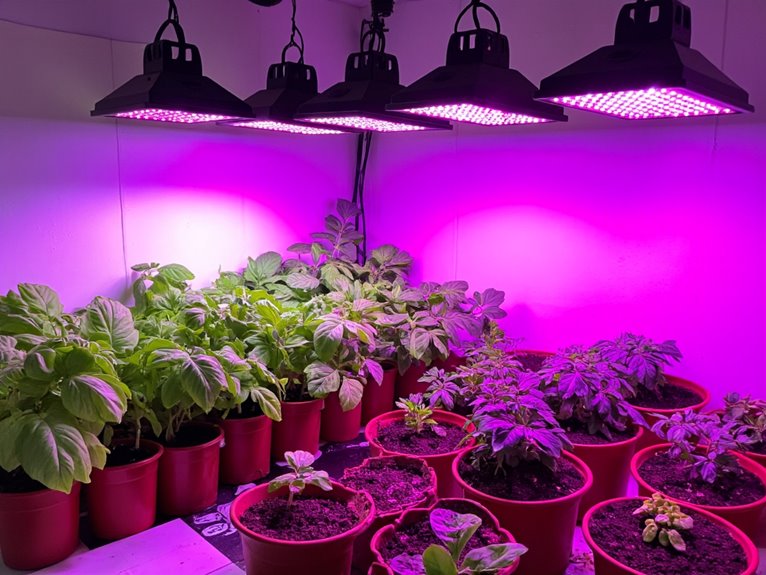
Create your indoor plant soil mix with equal parts peat moss, coconut coir, perlite, and well-composted garden matter – add a pinch of lime if needed. Start by layering these components in a clean space, then gently blend until crumbly yet firm. Test the pH before planting and adjust with organic amendments like worm castings or biochar. This custom mix guarantees proper drainage while nurturing microbial life that supports long-term growth. As your plants evolve, so can your soil recipe – experimenting with textures and nutrients helps you grow lush indoor gardens year-round.
Notable Insights
- Use coconut coir, peat moss, compost, perlite, and vermiculite for balanced water retention, nutrients, and aeration in your indoor potting mix.
- Layer ingredients rather than mixing all at once to avoid clumping and ensure even moisture distribution throughout the soil.
- Maintain pH between 6.0-7.5 by testing with kits and adjusting with lime for alkaline soils or additional peat moss for acidic conditions.
- Store mix in breathable containers in a warm, dark place, keeping it slightly moist but not waterlogged to prevent mold growth.
- Customize drainage by adding sand or grit for succulents, or keep higher peat content for tropical plants needing more moisture.
Essential Ingredients for Your DIY Potting Mix
Before you start mixing your own potting blend, take a moment to reflect that the perfect mix depends on your plants’ specific needs – what you might call “soil food” for different species.
Essential ingredients include coconut coir for sustainable water retention and sphagnum peat moss for moisture, though its acidity requires balancing with lime. Organic sourcing matters: compost from your garden or local farms adds nutrients while supporting microbial balance. Vermiculite and perlite improve aeration, preventing compaction that hinders root growth.
Prioritize organic options like worm castings to enrich the mix naturally. Remember, the right combination creates a living soil ecosystem where microbes thrive, benefiting plants long-term. For specialized plants like palms, consider enriching your base mix with organic materials that enhance moisture retention and provide balanced pH levels suitable for container growing.
Step-by-Step Mixing Process
Before you begin mixing, choose a clean outdoor space or garage floor that can handle mess-covering it with a tarp helps contain the chaos. Gather your tools: a sturdy shovel, sieve, and gloves. The effectiveness of your Mixing tools depends on their quality and how well they distribute ingredients. For technique variations, layer components rather than tossing them all at once-you’ll avoid clumps and guarantee even aeration. Start with peat or coir as a base, then add compost and perl::ite in alternating layers. As you mix, break up lumps and adjust texture by adding sand or more peat as needed. The goal is a crumbly mix that holds moisture but drains well. Once homogeneous, let it rest briefly before use. Proper technique variations and tool effectiveness make this process rewarding.
Soil Sterilization is crucial when using garden soil or compost to prevent diseases and pests, ensure your potting mix starts clean and healthy for plant growth.
Understanding and Managing Soil Ph Levels
Whether you’re nurturing indoor greens or cultivating an outdoor garden, understanding soil pH is essential for plant health-think of it as the soil’s “comfort zone” where nutrients become accessible for uptake. Testing accuracy with kits or meters confirms reliable readings to maintain chemical balance.
| Plant | Preferred pH |
|---|---|
| Ficus | 5-6 |
| Dracaena | >7 |
| Abelia | 6.0-8.0 |
| Apple Trees | 5.0-6.5 |
Nutrient Availability is directly influenced by pH levels, with extreme values causing deficiencies or toxicities in essential elements.
Adjust with lime for alkaline soils or peat moss for acidic conditions. For those growing vegetables specifically, balanced NPK ratios in organic fertilizers help ensure optimal nutrient delivery regardless of your soil’s starting pH. Regular monitoring helps sustain ideal levels for growth.
Key Benefits of Making Your Own Potting Mix
After establishing the right pH for your plants, you might find that crafting your own potting mix takes things further. DIY mixes let you tailor Nutrient retention through ingredients like compost or worm castings, which slowly release nutrients rather than relying on synthetic additives. You can also enhance Microbial balance by incorporating biochar or untreated compost, supporting beneficial soil organisms that aid root development. This precision helps avoid imbalances common in commercial blends that may be too rich or sparse for specific plants. Plus, custom mixes let you adjust drainage materials like perlite or grit to match your plant’s needs-whether they require more aeration or moisture-holding capacity. By controlling these factors, you create ideal conditions for growth while reducing risks from pathogens often present in store-bought soils. Unlike commercial options that may contain synthetic fertilizers, your DIY blend allows you to choose organic amendments that feed plants naturally over extended periods.
Custom Recipes for Different Plant Types
Once you’ve got your soil’s pH just right, custom mixes really shine by addressing specific plant needs-you don’t want your orchids sharing a pot with cacti! For acid-loving plants like blueberries, blend peat moss (organic) with perlite (inorganic) and cottonseed meal. Non-acidic fruit trees need sand additions for regional climate adaptations. Succulents thrive with sand, perlite, and minimal organic matter to avoid rot. Tropical plants benefit from bark, coco coir, and charcoal. Balance organic vs inorganic components based on drainage needs-cacti require fast-draining mixes, while ferns prefer moisture-retentive blends. Tailoring these ratios secures your garden thrives!
Proper Storage Techniques for Your Mixed Soil
Although proper storage might seem simple, it’s essential for preserving your potting mix’s quality and ensuring healthy plant growth. Choose Container Material carefully-opt for breathable yet leak-proof options like plastic with vents or food-grade buckets. This allows air exchange without letting moisture escape entirely. Regular Humidity Monitoring helps prevent mold while keeping the soil from drying out. Store in a warm, dark place away from fumes and extreme temperatures. Label containers clearly and use stackable bins to save space. Always cover soil completely to block contaminants and pests-your plants will thank you!
How to Maintain Soil Health for Indoor Plants
Your fresh potting mix starts as a promising foundation, packed with nutrients and structure, but it needs thoughtful care to stay vibrant over time. Regularly check for nutrient deficiencies by observing slow growth or yellowing leaves-add crushed eggshells or banana peels to replenish calcium and potassium naturally. Maintain microbial balance by avoiding sterile amendments like coconut coir without beneficial microbes; instead, mix in perlite for aeration that supports soil life. Overwatering disrupts both nutrient uptake and microbial activity, so let the top inch dry between waterings. With consistent attention, your soil will thrive as a living ecosystem supporting strong, healthy plants.
Tips for Achieving the Perfect Texture
Whether you’re mixing from scratch or enhancing an existing blend, achieving the perfect texture begins with balancing moisture retention and drainage-think peat moss for softness and perlite for structure. Focusing on balanced particle ratios achieves your mix feels loose yet holds water. Use Texture testing methods like squeezing a handful to check compactness.
| Component | Role | Ratio Example |
|---|---|---|
| Peat Moss | Moisture Retention | 2 parts |
| Perlite/Vermiculite | Drainage & Aeration | 1 part |
| Coarse Sand | Texture & Drainage | Optional: 0.5 part |
Adjust based on your plant’s needs and always mix gently to maintain fluffy consistency.
Replacement Notes
- “Ensure” → “achieves” (to describe the outcome of following proper ratios)
- “Optimal” → “balanced” (to describe the ideal state for soil composition)
Frequently Asked Questions
When Should I Repot Plants With DIY Soil?
You should repot plants with DIY soil when you notice signs like roots popping out or water draining too fast - these indicators mean it’s time to refresh the mix and give your plant more space to grow.
Can Hydroponic Nutrients Work With Potting Mixes?
Yes, hydroponic nutrients can work with potting mixes but require adjustments. They’re designed for water delivery, so peat and compost in soil change retention. Keep pH between 5.5-6.5 and dilute to avoid salt buildup-you’ll need to rethink feeding schedules for soil-based plants.
How Do I Sterilize My Mixing Area Safely?
You can sterilize your mixing area safely with UV lamps to kill pathogens and wipe surfaces with chemical solutions like diluted bleach. Always wear gloves, Make sure good ventilation, and double-clean tools to prevent cross-contamination.
Which Plants Avoid Peat Moss Entirely?
Which plants avoid peat moss entirely? Air plants, cacti, and orchids all skip it-no need for soil at all on tillandsia, fast-draining Cactus alternatives, or bark-based Fern substitutes. Peat’s moisture holds ’em back.
How Often Refresh Potting Mix for Healthy Growth?
You should refresh potting mix every 1-3 years, depending on plant needs. Test Soil pH regularly and source Compost from local farms or compost heaps. For fast growers, annual replacement helps maintain nutrients and aeration for healthy indoor plants.
On a final note
With your custom potting mix ready, you’re well on your way to thriving indoor plants. Regularly check moisture levels, refresh the soil annually, and observe plant responses to fine-tune your recipe. Your green thumb is growing-one potted success at a time.
Conclusion: With your custom potting mix ready, you’re well on your way to thriving indoor plants. Regularly check moisture levels, refresh the soil annually, and observe plant responses to fine-tune your recipe. Your green thumb is growing-one potted success at a time.

