Seed Starting Supplies: Everything You Need to Grow From Seed
You’ll need quality seed starting mix, appropriate containers, proper lighting, and temperature control to successfully grow seeds indoors. Choose soilless mixes with pH 6.0-7.0 to prevent damping-off disease, while selecting containers based on plant size requirements. LED grow lights providing 3,000+ lumens should stay 2-4 inches above seedlings, and heating mats maintain suitable soil temperatures of 75-90°F for germination. Essential tools include spray bottles for gentle watering, thermometers for monitoring, and labels for organization. The complete setup creates ideal conditions that transform your gardening experience.
Notable Insights
- Choose quality soilless seed starting mix with proper pH (6.0-7.0) to prevent disease and support healthy germination.
- Select appropriate containers based on plant size needs, from small cells for herbs to larger pots for tomatoes.
- Provide adequate lighting with LED or fluorescent grow lights positioned 2-4 inches above seedlings for 14-16 hours daily.
- Maintain consistent soil temperature of 75-90°F using heating mats and monitor humidity levels between 35-95% for optimal germination.
- Use proper watering techniques like bottom watering and gentle spray bottles to keep soil moist without damaging delicate seedlings.
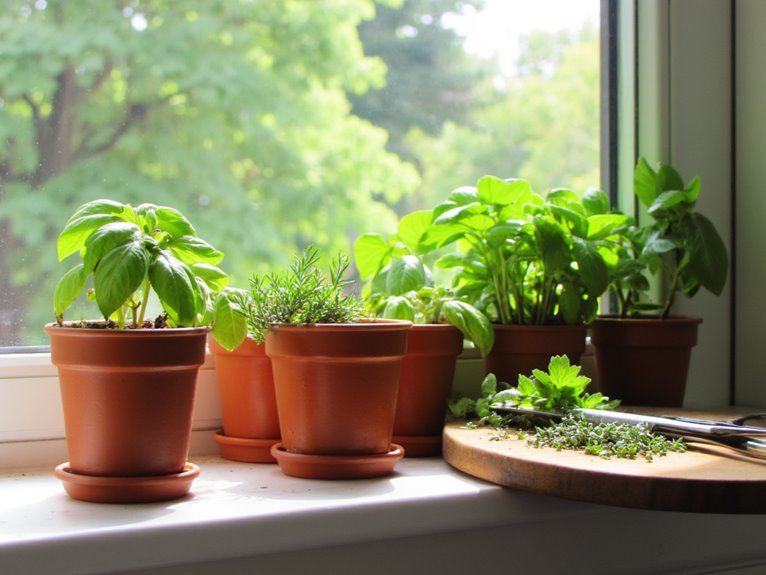
Choosing the Right Seeds for Indoor Starting
When you’re planning your indoor seed starting venture, selecting the right varieties can make the difference between a thriving garden and a disappointing season.
Focus your indoor crop planning on warm-weather crops like peppers, tomatoes, cucumbers, and melons, which benefit most from the extended growing season that indoor starting provides.
Cool-weather crops such as lettuce, spinach, and most brassicas typically tolerate direct outdoor sowing and don’t require indoor preparation.
Root vegetables generally perform better with direct sowing, though onions are a notable exception that you can start indoors for better control. Once your seedlings are established and ready for transplanting, having quality tools like hedge shears becomes essential for maintaining the garden borders and landscape areas around your vegetable plots.
Your seed variety exploration should consider local climate zones and frost dates, as these factors determine your growing season length and ideal starting times. Starting seeds indoors allows you to access a greater variety of crops that may not be available at local nurseries.
For optimal germination and early growth, ensure your seed starting medium maintains proper pH levels between 6.0 and 7.0 to support healthy nutrient uptake during the critical establishment phase.
Seed Starting Mix: The Foundation of Healthy Growth
Your seed starting success begins with selecting the right growing medium, which provides the sterile, well-draining foundation that young seedlings need to thrive.
Whether you choose a commercial soilless mix or create your own blend using materials like coco coir and perlite, the proper medium prevents damping-off disease while supporting healthy root development.
Quality mixes undergo sterilization processes like heat treatment to eliminate harmful pathogens that could otherwise cause seedling failure.
The ideal growing medium should maintain a pH range between 6.0 and 7.0 to ensure optimal nutrient uptake and faster root development in young seedlings.
Premium organic starting mixes often include beneficial mycorrhizae that form symbiotic relationships with plant roots to enhance nutrient uptake and strengthen seedling development.
You’ll discover that understanding soilless benefits, mastering DIY recipes, and exploring peat-free alternatives empowers you to give your seedlings the best possible start.
Soilless Mix Benefits
Something remarkable happens when you choose a quality soilless mix for your seed starting journey, as this specialized growing medium creates the best foundation for healthy seedling development. The soilless mix advantages extend far beyond basic soil alternatives, providing sterilized conditions that eliminate harmful pathogens while promoting superior plant health through enhanced drainage and aeration.
| Benefit Category | Key Advantage | Impact on Growth |
|---|---|---|
| Disease Prevention | Sterilized medium | Eliminates damping-off risks |
| Root Development | Light, airy texture | Promotes healthy root expansion |
| Water Management | Excellent drainage | Prevents waterlogged conditions |
| Germination Success | Pathogen-free environment | Increases sprouting rates |
These specialized mixes combine ingredients like peat moss, perlite, and coconut coir to create prime growing conditions that support vigorous seedling development from the very start. Many professional-grade options include mycorrhizae that enhance root development and improve nutrient uptake for stronger overall plant growth. The lighter weight of soilless mixes also makes it significantly easier to move mature seedlings outdoors when transplanting time arrives.
DIY Blend Recipes
Creating your own seed starting mix puts complete control of growing conditions directly in your hands, allowing you to customize ingredients that match your specific gardening needs and budget constraints.
Custom mix variations can range from simple two-ingredient blends to complex formulations that balance moisture retention, drainage, and organic matter perfectly.
Here are four proven DIY recipes that deliver excellent germination results:
- Classic Formula: 1 part peat moss, 1 part perlite, 1 part vermiculite for balanced moisture and drainage
- Compost-Enhanced Mix: 4 parts compost, 2 parts peat moss, 1 part vermiculite, 1 part perlite
- Peat-Free Alternative: Equal parts coconut coir, pumice, and screened compost with optional azomite
- Minimal Blend: 10 parts screened compost to 3 parts vermiculite
These aeration components like perlite and vermiculite prevent compaction while maintaining proper moisture levels for healthy seedling development.
Making your own mix provides significant savings compared to purchasing commercial seed starting mix, which typically costs around $5 for just 8 quarts.
Peat-Free Alternatives
While peat moss has dominated seed starting mixes for decades, environmental concerns about bog ecosystem destruction have sparked widespread interest in sustainable alternatives that deliver comparable germination results.
You’ll find excellent peat free composition options featuring coconut coir as the primary ingredient, which provides similar moisture retention and structure to traditional peat-based products. The coir benefits include rapid renewability compared to peat’s centuries-long formation process, though you’ll need to monitor watering more closely since these mixes dry faster.
Commercial brands like Organic Mechanics offer ready-to-use blends combining coir with perlite, vermiculite, and organic fertilizers for ideal seedling development. For gardeners who prefer customization, you can create your own potting mix by combining coconut coir with compost, adjusting the ratio based on your specific seed size requirements. These sustainable alternatives support robust germination rates while protecting critical bog ecosystems that store carbon and support biodiversity. Like choosing the right fertilizer for fruit trees, selecting appropriate NPK ratios in your seed starting mix ensures optimal nutrient availability during critical early growth phases.
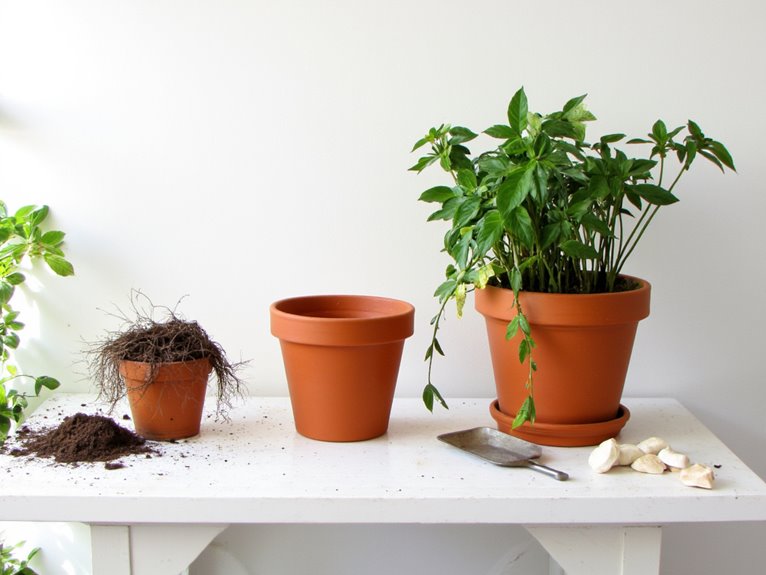
Containers and Pots for Every Growing Need
How do you choose the right container when countless options line garden center shelves and fill your recycling bin? Understanding container materials helps you match vessels to your specific growing needs, budget, and environmental values.
Seedling trays with multiple cells maximize space efficiency while providing organized growing conditions for large quantities of seeds. Individual pots offer customization for different plant sizes, from 2.25″ squares for leafy greens to quart-sized containers for tomatoes.
Consider these key factors when selecting containers:
- Plant size requirements – larger vegetables need bigger cells or individual pots
- Transplant plans – biodegradable options reduce shock during garden moves
- Budget constraints – recycled yogurt cups and egg cartons cost nothing
- Environmental impact – peat pots and paper containers decompose naturally
When starting seeds, you’ll also need specialized seed-starting potting mix that provides the light texture and proper nutrients necessary for germination success. Quality potting soils typically contain ingredients like peat moss, coir, and perlite for optimal moisture retention and drainage.
Match your container choice to your gardening goals for ideal seedling success.
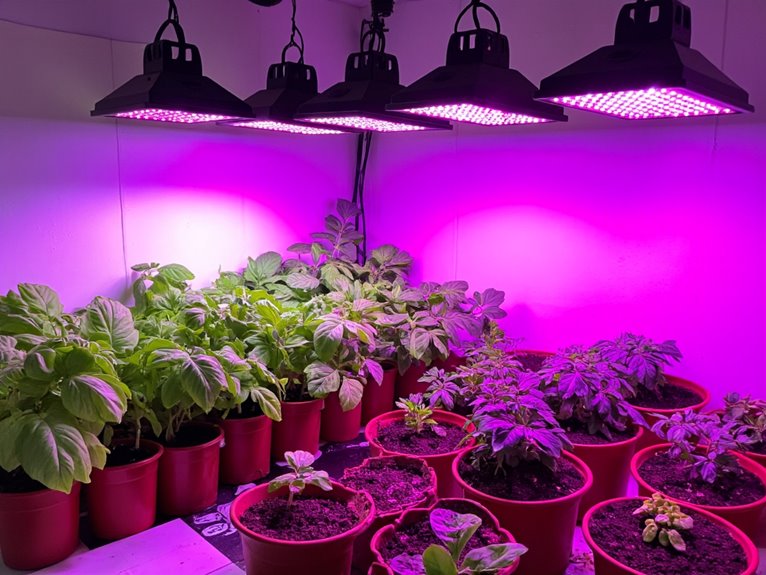
Lighting Solutions to Power Plant Development
Unless you’re blessed with a south-facing window that receives intense sunlight for 14-16 hours daily, you’ll need artificial lighting to grow strong, healthy seedlings indoors. Fluorescent shop lights with T-8 or T-5 fixtures offer the most cost-effective solution, providing adequate lumens intensity for robust seedling development.
LED grow lights are increasingly popular, requiring at least 3,000 lumens for ideal results. Energy-efficient models should provide 1800+ lumens at 10 watts or less to minimize monthly electricity costs while maximizing growth potential.
Understanding light spectra helps you choose the right fixture for your needs. Blue light promotes strong foliage and root development during early seedling stages, while full-spectrum bulbs mimic natural sunlight.
Modern grow lights often feature built-in timers with 3, 9, or 12-hour presets that automate lighting schedules and reduce monitoring effort.
Position lights 2-4 inches above seedlings, adjusting height as plants grow. Maintain 14-16 hours of daily lighting to prevent weak, leggy growth that occurs with insufficient illumination.
Temperature Control and Environmental Management
Proper lighting sets the foundation for seedling success, but temperature control determines whether your seeds will actually germinate and thrive in their growing environment.
Most vegetable seeds require soil temperatures between 75°F and 90°F for ideal germination, though cool-season crops tolerate lower ranges. Effective temperature management creates the warm, consistent conditions that activate enzymes and promote rapid sprouting.
Essential tools for maintaining proper growing conditions include:
- Heating mats – Place under seed trays for direct soil warming
- Thermostats with soil probes – Monitor and maintain precise temperatures automatically
- Space heaters – Raise ambient temperatures in enclosed seed-starting areas
- Ventilation systems – Provide air circulation during warm periods
Budget-friendly LED grow lights consuming only 10-11 watts can supplement natural lighting while generating minimal heat that won’t disrupt your carefully controlled temperature zones.
Humidity control remains equally critical, as excessive moisture causes mold while insufficient levels slow germination rates dramatically. Ultrasonic humidifiers can maintain precise humidity levels between 35-95% with quiet operation under 26 decibels to avoid disrupting your seedlings’ delicate development.
Watering Techniques and Moisture Balance
Success in seed starting hinges on mastering the delicate balance between providing adequate moisture and avoiding waterlogged conditions that spell disaster for emerging seedlings.
You’ll want to maintain consistently moist soil that supports germination while preventing root rot and fungal diseases that thrive in waterlogged environments.
Two primary watering methods offer distinct advantages for different situations.
Choose your watering technique based on your specific growing conditions and the level of disease prevention you need.
Top watering using spray bottles provides gentle moisture application during germination, while bottom watering through trays beneath your containers reduces disease risks by keeping foliage dry. Your choice between these techniques should consider moisture retention needs and watering frequency requirements.
Environmental factors considerably impact your watering schedule, with higher temperatures and lower humidity demanding more frequent attention.
Check soil moisture daily by feeling the top inch, adjusting your routine based on seasonal variations to guarantee peak seedling health.
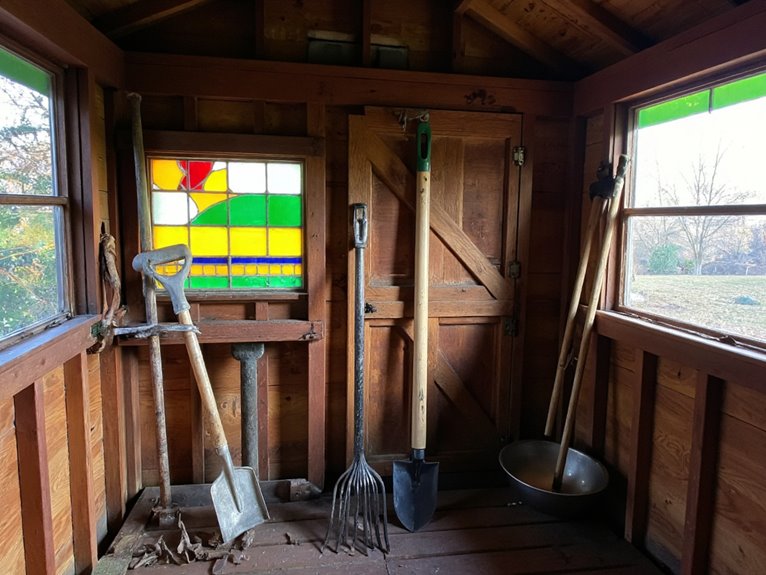
Essential Tools and Accessories for Success
Three essential categories of tools transform seed starting from guesswork into reliable success, each addressing critical needs that determine whether your seedlings thrive or struggle.
Environmental monitoring equipment, including thermometers and hygrometers, helps you track temperature and humidity levels for ideal germination conditions.
Seedling support systems encompass everything from proper labeling tools to mild organic fertilizers that nourish delicate plants once true leaves emerge. Understanding NPK ratios helps ensure your young seedlings receive balanced nutrition without risking fertilizer burn during their vulnerable early growth stages.
Key accessories that enhance your seed starting success include:
- Small circulation fans that prevent damping-off disease and strengthen stems
- Seed labels and garden journals for tracking varieties and planting dates
- Quality seed starting soil blends formulated for moisture retention and aeration
- Bottom watering trays that support healthy root development through gentle watering methods
For optimal germination in cooler environments, seedling heat mats maintain root zone temperatures 10-20°F above ambient air while providing energy-efficient operation for continuous use.
These tools work together, creating controlled environments where seeds consistently germinate and develop into robust seedlings.
Organic and Sustainable Growing Options
You can transform your seed starting practice into an environmentally conscious process by choosing peat-free growing mixes, which protect sensitive bog ecosystems while providing excellent drainage and nutrient retention.
Organic seed selection goes beyond avoiding synthetic chemicals, as certified organic varieties often feature heirloom genetics that support biodiversity and offer superior adaptation to local growing conditions.
These sustainable choices create healthier garden ecosystems while reducing your environmental footprint, proving that responsible gardening practices can enhance both plant performance and ecological stewardship.
Peat-Free Mix Alternatives
While traditional peat moss has dominated seed starting mixes for decades, environmentally conscious gardeners are increasingly turning to sustainable alternatives that offer comparable performance without depleting fragile bog ecosystems.
These peat free benefits include reduced environmental impact while maintaining excellent moisture retention and aeration properties essential for successful germination.
Several eco friendly options provide excellent results for seed starting:
- Coconut coir – offers superior water retention and renewable sourcing from coconut husks
- Sterilized compost blends – provide gentle nutrients while supporting beneficial microbial activity
- Perlite and vermiculite combinations – guarantee proper drainage and prevent damping-off diseases
- Earthworm castings – enhance soil biology and nutrient availability in small proportions
You’ll find these alternatives perform comparably to peat while supporting sustainable gardening practices. Many professional seed starting mixes now feature OMRI certification to ensure they meet strict organic standards and are free from harmful contaminants. For optimal germination success, consider pairing your sustainable seed starting mix with hydroponic systems that provide automated nutrient delivery and controlled growing conditions.
Organic Seed Selection
Beyond selecting the right growing medium, choosing organic seeds forms the foundation of sustainable gardening practices that benefit both your plants and the environment. Certified organic seeds comply with USDA standards, ensuring they’re grown without synthetic pesticides, fertilizers, or genetic modifications that can compromise soil health and biodiversity.
When considering seed sourcing, prioritize reputable suppliers who provide transparency about their cultivation methods and non-GMO status.
Heirloom advantages include superior flavor profiles, climate adaptability, and the ability to save seeds for future seasons, preserving genetic diversity while reducing your reliance on commercial suppliers.
You’ll find that organic seeds often produce more resilient plants that naturally resist pests and diseases, requiring fewer chemical inputs throughout their growth cycle and supporting your garden’s long-term sustainability.
Frequently Asked Questions
How Long Do Seeds Remain Viable for Planting?
Most seeds stay viable for one to several years depending on variety and storage conditions. You’ll find seed shelf life varies considerably, so it’s smart to conduct germination tests on older seeds before planting.
Can I Reuse Seed Starting Trays From Previous Seasons?
Yes, you can reuse seed starting trays from previous seasons. Proper seed tray maintenance requires thorough cleaning and disinfecting with bleach solution for effective disease prevention, ensuring pathogens don’t harm new seedlings.
What’s the Ideal Humidity Level for Seed Germination?
You’ll want humidity levels between 70-90% during germination for ideal conditions. Most seeds thrive in this range, though specific plants like carrots need higher levels while lettuce requires lower humidity for best sprouting.
How Do I Prevent Mold Growth on Seed Starting Mix?
For effective mold prevention, use sterile seed-starting mix and avoid overwatering. Guarantee proper soil sterilization by cleaning containers with bleach solution, maintain good airflow, and let soil dry slightly between waterings.
When Should I Start Hardening off My Seedlings Outdoors?
You should start your hardening schedule 1-2 weeks before transplanting when seedlings have 3-4 true leaves. Wait for suitable outdoor conditions with temperatures consistently above 45-50°F and no frost risk.
On a final note
You’re now equipped with the essential knowledge to transform tiny seeds into thriving plants through proper indoor starting techniques. Remember that successful seed starting combines quality materials, consistent environmental conditions, and patient care throughout the germination process. Start small with a few varieties, monitor your seedlings closely, and don’t hesitate to adjust your methods as you gain experience and confidence in your growing abilities.