Starting Seeds: Easy Guide for First-Time Gardeners
You can successfully start seeds indoors by choosing beginner-friendly varieties like tomatoes, lettuce, and basil, then using a well-draining seed starting mix with equal parts coco coir, vermiculite, and perlite. Sow seeds at twice their diameter depth, maintain temperatures between 65-75°F with heating mats, and provide 14-16 hours of bright light daily using LED grow lights. Keep soil consistently moist but not soggy, and begin transplanting preparations with gradual outdoor acclimation seven to ten days before moving seedlings to your garden.
Notable Insights
- Choose easy varieties like tomatoes, lettuce, and basil, and use well-draining seed starting mix in transplant trays.
- Sow seeds at twice their diameter depth and maintain germination temperatures between 65°F and 75°F using heating mats.
- Provide 14-16 hours of bright light daily using full-spectrum LED lights and maintain consistent lighting schedules.
- Keep soil damp but not soggy, switch to bottom-watering after germination, and fertilize with diluted balanced fertilizer.
- Transplant during cool morning hours after 7-10 days of gradual outdoor acclimation when temperatures are 50-75°F.
Choosing the Right Seeds and Essential Supplies
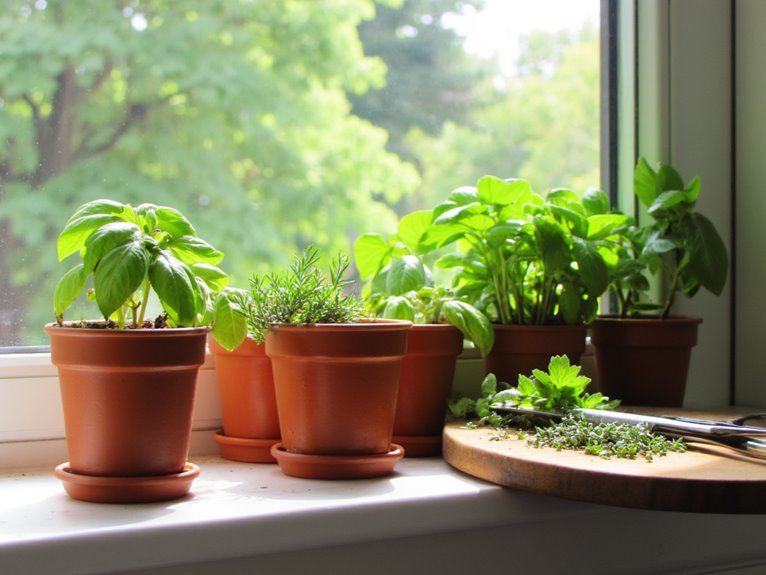
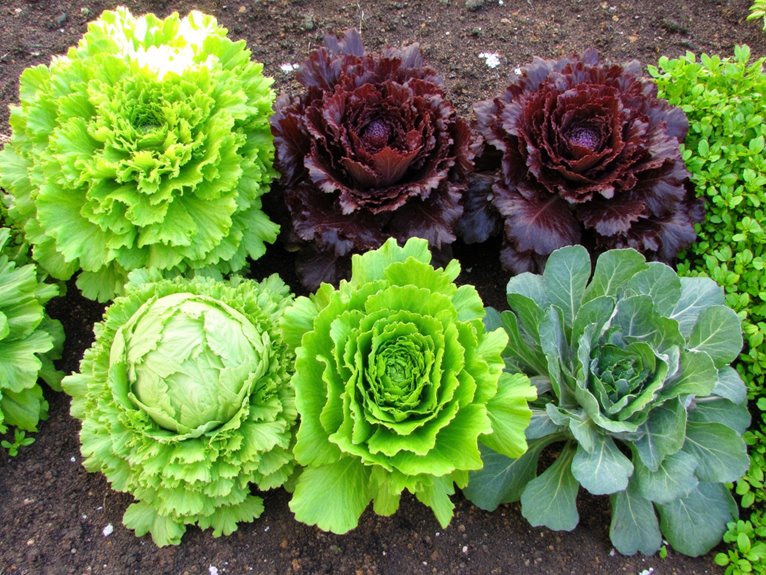
When you’re selecting your first seeds for indoor starting, you’ll want to focus on varieties that transplant easily and offer high success rates for beginners. For excellent seed selection, choose vegetables like broccoli, Brussels sprots, cabbage, cauliflower, eggplant, kale, lettuce, and tomatoes, which handle indoor-to-outdoor shifts well.
Easy herbs including basil, oregano, thyme, and parsley provide quick gratification while building your confidence.
Your essential indoor supplies should include seedling transplant trays with adjustable humidity domes, which maintain proper moisture levels during germination.
Seedling trays with humidity domes are essential for maintaining optimal moisture levels throughout the germination process.
Light, well-draining seed starting mix guarantees healthy root development, while durable plant labels with oil-based paint pens keep your varieties clearly identified throughout the growing season. Quality seed starting mixes often contain mycorrhizae and organic ingredients like worm castings to enhance nutrient uptake and promote stronger seedling growth.
Starting seeds indoors also increases garden output and provides access to a much wider variety selection than what’s typically available at local nurseries. Adequate lighting, whether natural sunlight or grow lights, supports strong seedling growth during the critical indoor development phase. Consider using a water-soluble fertilizer once your seedlings develop their first true leaves to provide essential nutrients for healthy growth.
Preparing Your Seed Starting Medium
Three key components form the foundation of every successful seed starting medium: coco coir or peat moss for moisture retention, vermiculite for water and nutrient storage, and perlite for proper drainage and aeration.
You’ll want to mix equal parts of these materials using proper mixing techniques in a large container, creating uniform texture considerations that support healthy germination.
Commercial mixes offer convenience and reliable sterilization methods, eliminating disease risks that concern new gardeners.
However, you can create your own blend by combining components with clean tools, then pre-moistening to achieve proper moisture control-damp but not soggy.
Consider your container options carefully, ensuring they’re sanitized with diluted bleach solution.
Remember that nutrient balance matters; most seed mediums require supplemental feeding once seedlings develop their first true leaves. When using coco coir specifically, buffering coco coir with calcium and magnesium solutions before planting helps prevent common nutrient deficiencies. For enhanced root development during this critical stage, look for mixes containing mycorrhizae fungi which naturally improve nutrient uptake. Bottom watering prevents disturbing delicate seedlings while maintaining ideal moisture levels.
Proper Sowing Techniques for Maximum Germination
Your carefully prepared seed starting medium sets the stage, but proper sowing techniques determine whether those seeds actually sprout into healthy seedlings. These germination tips guarantee you’re giving your seeds the best possible start.
Start by sowing seeds at roughly twice their diameter depth, which balances moisture retention with oxygen availability for ideal germination. For tough-coated seeds like beans or morning glories, try mechanical scarification by carefully nicking the seed coat with nail clippers, or soak them in lukewarm water for up to 24 hours.
| Seed Type | Ideal Temperature | Sowing Depth |
|---|---|---|
| Cool-season (peas, spinach) | 45-50°F | 2x seed diameter |
| Warm-season (beans, peppers) | 60-70°F | 2x seed diameter |
| Fine seeds (lettuce, herbs) | Species-specific | Surface to shallow |
| Large seeds (squash, beans) | 60-70°F | 1-2 inches |
| Root crops (carrots, radish) | 50-65°F | ¼ to ½ inch |
After sowing, lightly press the soil surface to improve seed-to-soil contact for consistent moisture absorption. For seeds requiring cold stratification, such as certain perennials and native wildflowers, expose them to moist freeze-thaw conditions in your refrigerator for several weeks before spring sowing to break their natural dormancy.
Creating the Ideal Germination Environment
Once you’ve sown your seeds correctly, creating the right germination environment becomes the decisive factor in transforming those dormant seeds into vigorous seedlings.
Germination temperature should stay between 65°F and 75°F, with heating mats providing consistent warmth when needed. You’ll find that monitoring soil temperature directly gives better control than relying on room temperature alone.
Proper moisture management requires keeping your growing medium moist but never soggy, as waterlogged conditions prevent oxygen from reaching seeds and cause rot. Cover your containers with plastic or glass initially to maintain humidity, then remove it once germination begins.
Guarantee adequate air circulation around your seedlings, as poor ventilation leads to damping off and fungal diseases that can destroy your efforts. Some seeds naturally exhibit dormancy factors that prevent immediate germination even under optimal conditions, which can help stagger emergence timing for better survival rates.
Caring for Seedlings and Transplanting Tips
Once your seeds have germinated and sprouted, you’ll need to shift your focus to proper seedling care, which includes watering techniques, spacing, and disease prevention.
As your seedlings grow stronger and develop their first true leaves, you’ll eventually need to transplant them to larger containers or outdoor garden beds. Seedlings require 14-16 hours of bright light daily to develop properly and maintain healthy growth. For indoor seed starting, full-spectrum LED lights covering 380-760nm wavelengths can effectively support all growth stages from seedling to flowering. Look for models with programmable timers that can automatically maintain consistent lighting schedules of 12 hours or more, eliminating the need for daily manual adjustments.
Understanding these essential care practices and transplanting methods will help guarantee your seedlings develop into healthy, robust plants ready for their permanent garden home.
Proper Seedling Care
After your seeds have successfully germinated and tiny green shoots emerge from the soil, proper seedling care becomes critical for developing strong, healthy plants that’ll thrive in your garden.
Four essential practices will guarantee your seedlings develop into robust plants:
- Monitor seedling moisture carefully by keeping soil damp but not soggy, switching to bottom-watering after germination to encourage deep root growth and prevent overwatering issues.
- Meet light requirements by providing 12-16 hours of strong, consistent illumination daily, rotating trays periodically for even exposure and preventing leggy growth.
- Address nutrient needs with diluted, balanced fertilizer after true leaves appear, starting at half strength to avoid nutrient burn in young plants.
- Maintain proper airflow conditions with gentle circulation to prevent fungal diseases, while implementing thinning techniques and early maintenance to eliminate weaker seedlings.
As your seedlings mature and develop, consider setting up a wood compost bin to create nutrient-rich compost from kitchen scraps and garden waste that will nourish your plants throughout the growing season.
As your seedlings mature and prepare for transplanting outdoors, be aware that lawn pests like grubs can damage newly transplanted seedlings by feeding on their tender root systems.
Transplanting Best Practices
Successfully transplanting seedlings represents the essential bridge between indoor growing and outdoor garden success, requiring careful attention to timing, technique, and environmental conditions.
Master transplant timing by choosing cool morning or late afternoon hours when temperatures range between 50°F and 75°F, avoiding midday heat that stresses delicate plants.
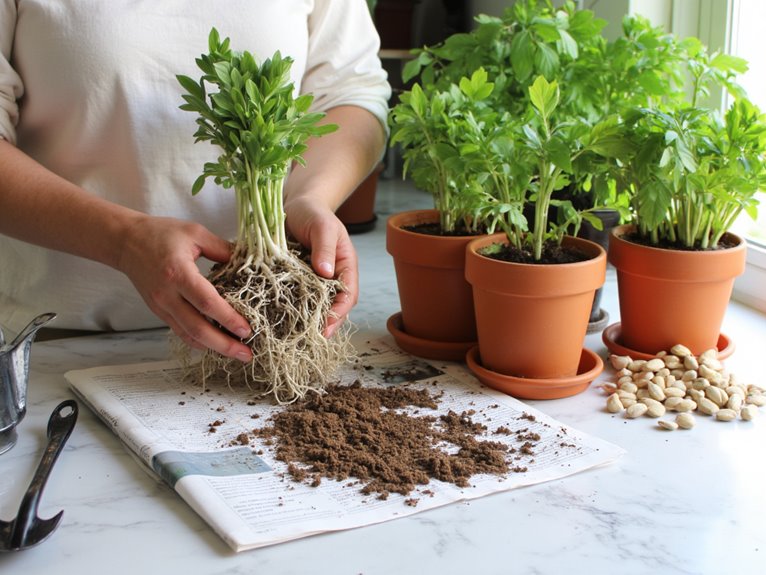
Begin seedling acclimation seven to ten days before transplanting, gradually exposing your seedlings to outdoor conditions using shade cloths or cold frames for protection.
Water seedlings thoroughly two to three hours before transplanting, then dig holes twice the width of root balls to accommodate spreading roots.
Plant at the same depth as pot soil, firm gently around stems, and water immediately after planting to eliminate air pockets and establish strong root-to-soil contact.
Use quality potting soil with ingredients like peat moss and perlite to ensure proper moisture retention and drainage for newly transplanted seedlings.
For seedlings started under artificial lighting, maintain your grow light schedule of 8-12 hours daily until outdoor conditions stabilize to prevent transplant shock.
Troubleshooting Common Seed Starting Problems
Even experienced gardeners encounter setbacks when starting seeds, but most problems have straightforward solutions that you can implement right away.
Two of the most frustrating issues you’ll likely face are damping-off disease, which kills seedlings overnight, and poor germination rates that leave you with empty seed trays.
Understanding these common problems, along with their prevention methods, will help you troubleshoot issues quickly and get your seed starting back on track.
Another challenge many gardeners face is dealing with pests that can damage young seedlings, but chemical-free ultrasonic repellers offer an eco-friendly solution that’s safe around plants and won’t introduce harmful substances to your growing environment.
Once your seedlings are established and ready for transplanting, you may encounter weed competition in your flower beds, which is why selective herbicides can be valuable for targeting unwanted plants while preserving your carefully grown flowers.
Preventing Damping Off Disease
When you’re starting seeds, damping off disease represents one of the most frustrating setbacks you can encounter, causing seemingly healthy seedlings to suddenly collapse and die.
This fungal pathogen management challenge strikes quickly, but effective damping off prevention strategies can protect your seedlings.
Follow these essential prevention steps:
- Use sterilized soil and containers – Start with pasteurized seed-starting mix and disinfect pots with 10% bleach solution.
- Control moisture carefully – Keep soil moist but never saturated, watering from the bottom when possible.
- Maintain proper temperature – Keep soil between 65-70°F using heat mats to promote rapid, healthy germination.
- Ensure good airflow – Provide adequate ventilation around seedlings and avoid overcrowding to reduce humidity.
These practices create an environment where your seedlings thrive while discouraging harmful fungi.
Fixing Poor Germination Rates
Poor germination rates can leave you staring at empty seed trays, wondering what went wrong with your carefully planted hopes. Several factors typically cause this frustrating problem, but each has straightforward solutions you can implement immediately.
First, check your seed longevity by examining expiration dates and storage conditions, as old or improperly stored seeds lose viability over time.
Next, evaluate your planting depth, ensuring you haven’t buried seeds too deeply for their size.
Soil aeration plays an important role, so replace compacted soil with loose, well-draining seed-starting mix that allows proper oxygen flow.
Finally, assess your watering practices, maintaining consistent moisture without waterlogging, and verify that you’re providing appropriate light conditions for your specific seed varieties.
Once seeds successfully germinate, consider that seedlings need gentler, diluted fertilizer concentrations to avoid burn and support healthy early growth. When applying liquid fertilizers to young plants, use 1-2 ounces per gallon and apply bi-weekly to prevent over-fertilization.
Frequently Asked Questions
How Much Money Should I Budget for Seed Starting Supplies?
You should budget $20-75 for seed starting supplies depending on your needs. Budget considerations include starting with recycled containers and basic materials, then investing in reusable equipment like grow lights and heat mats later.
When Is the Best Time to Start Seeds Indoors?
Start seeds 6-8 weeks before your last frost date, but check each variety’s specific light requirements and temperature preferences on seed packets since timing varies by plant type and local climate conditions.
Can I Reuse Seed Starting Trays From Previous Years?
Yes, you can reuse seed starting trays for several years with proper seed tray cleaning between seasons. Essential seed starting tips include disinfecting trays with diluted bleach if disease occurred previously.
How Long Do Seeds Stay Viable if Stored Properly?
Seed longevity varies by type when you maintain proper storage conditions. Most crop seeds last 1-3 years, while some like muskmelon remain viable for 5 years. You’ll maximize lifespan by storing them cool and dry.
What’s the Difference Between Heirloom and Hybrid Seeds?
Heirloom seeds produce plants true to their parent with stable genetics you can save year after year. Hybrid benefits include disease resistance and higher yields, but you can’t reliably save their seeds.
On a final note
Starting seeds successfully requires patience, preparation, and attention to detail, but you’ll find the process incredibly rewarding. You’ve learned the fundamental techniques for choosing quality seeds, creating ideal growing conditions, and nurturing healthy seedlings. Remember that every gardener faces challenges, so don’t get discouraged if your first attempts aren’t perfect. With practice and persistence, you’ll develop confidence and skills that’ll serve you throughout your gardening journey.