Why Are My Indoor Plant Leaves Turning Yellow?
Yellow leaves on your indoor plants typically indicate watering issues, with overwatering being the most common culprit affecting 80% of houseplant problems. You’ll notice overwatered plants have limp, droopy yellow leaves with mushy stems, while underwatered plants show crispy, brown-edged yellowing. Nutrient deficiencies, inadequate light reducing photosynthesis, poor air circulation, and temperature stress can also cause yellowing. Sometimes it’s simply natural aging as older leaves lose chlorophyll. Understanding these specific causes will help you restore your plant’s vibrant green health.
Notable Insights
- Overwatering causes yellow, limp leaves with mushy stems, while underwatering creates yellow leaves with crispy brown edges.
- Nutrient deficiencies show specific patterns: nitrogen causes bottom leaf yellowing, iron creates yellow between green veins.
- Insufficient light reduces chlorophyll production, leading to yellowing between leaf veins and poor photosynthesis.
- Natural aging causes older bottom leaves to yellow as nutrients redirect to new growth.
- Temperature stress from heat above 85°F or cold below 60°F triggers yellowing as a stress response.
Overwatering: The Most Common Culprit Behind Yellow Leaves
When you’re wondering why your indoor plant’s leaves are turning yellow, overwatering stands as the primary suspect, affecting roughly 80% of houseplant problems.
You’ll notice these leaves become limp and droopy rather than dry and crispy, which would indicate underwatering instead. The telltale signs include mushy stem bases, foul-smelling soil, and both old and new leaves dropping simultaneously with yellowing symptoms.
Excess moisture creates devastating conditions for root health, promoting fungal diseases that turn roots grey and slimy while preventing oxygen from reaching the root zone.
Waterlogged soil suffocates plant roots, creating the perfect breeding ground for deadly fungal infections that destroy root systems.
This waterlogged environment attracts fungus gnats and creates compacted soil conditions that inhibit proper drainage. To prevent future issues, establish a weekly checking routine on the same day to monitor your plant’s watering needs consistently.
Fortunately, plant recovery is achievable through proper diagnosis and corrective action, including adjusting watering schedules, improving drainage, and removing damaged roots.
Underwatering: When Your Plant Is Crying Out for Moisture
While overwatering dominates houseplant problems, underwatering presents an equally challenging scenario that can leave your plants struggling for survival. When you notice yellowing leaves with crispy, brown edges, your plant is signaling severe water stress that demands immediate attention.
| Symptom | Underwatered Signs | Overwatered Signs |
|---|---|---|
| Leaf texture | Dry, brittle, crispy | Soft, limp, mushy |
| Soil condition | Pulls away from pot edges | Waterlogged, soggy surface |
| Root health | Dry but firm roots | Black, rotting roots |
Check soil moisture regularly by inserting your finger several centimeters below the surface, ensuring consistent hydration without shocking your plant. Generous watering can prompt quick recovery, especially for partially wilted plants that haven’t reached the point of irreversible damage. When plants are severely dehydrated, applying liquid fertilizers can provide immediate nutrient availability to support recovery once proper watering has resumed. Proper soil moisture management and monitoring root health will help you distinguish between these two common watering issues.
Nutrient Deficiencies: Missing Elements Your Plant Needs
When your indoor plant’s leaves start yellowing, you’re often witnessing a silent cry for essential nutrients that fuel healthy growth, vibrant color, and strong development.
These deficiencies create distinct patterns and symptoms that, once you learn to recognize them, become valuable diagnostic tools for restoring your plant’s health. However, accurately identifying deficiencies can be challenging since these symptoms can often resemble other growing condition issues such as drought or waterlogging.
Understanding which nutrients your plant lacks, and when to provide targeted fertilizer solutions, transforms you from a worried plant parent into a confident caretaker who can address these nutritional needs effectively. Just like pest control methods that require strategic placement for optimal results, nutrient delivery also depends on proper application timing and positioning to maximize plant absorption.
Essential Nutrient Deficiency Signs
Although yellowing leaves often signal watering issues, nutrient deficiencies frequently cause this troubling symptom in indoor plants. Understanding nutrient roles helps you identify specific deficiency effects that manifest through distinct leaf patterns and colors.
| Nutrient | Key Symptoms | Affected Areas |
|---|---|---|
| Nitrogen | Yellowing older leaves, stunted growth | Bottom leaves upward |
| Potassium | Brown leaf edges, burnt tips | Leaf margins, tips |
| Iron | Yellow between veins, green veins remain | Young leaves first |
Each nutrient deficiency creates unique visual signatures on your plants. Nitrogen deficiency causes older leaves to yellow progressively upward, while potassium creates brown, burnt-looking edges. Iron deficiency produces yellowing between leaf veins on younger foliage, with veins staying green. Recognizing these patterns enables targeted treatment. Both deficiencies and excesses can negatively impact your plant’s health and growth.
Fertilizer Solutions and Timing
Identifying nutrient deficiencies through leaf patterns leads naturally to selecting appropriate fertilizer solutions that restore your plant’s health and vibrant green coloration.
Fertilizer timing proves essential, as you’ll want to apply nutrients during active growing seasons when plants absorb them most effectively. Spring and summer months offer ideal windows for regular fertilization, while dormant periods require reduced feeding to prevent burn damage.
Complete nutrient formulas containing balanced nitrogen, phosphorus, and potassium ratios like 10-10-10 address multiple deficiencies simultaneously, supporting overall leaf health. Accurate measurement of fertilizer prevents nutrient burn while ensuring your plants receive adequate nutrition for healthy growth.
For specific issues, targeted supplements work faster-magnesium sulfate corrects yellowing between veins, while iron chelates restore green color in acid-loving plants.
Liquid fertilizers allow quick nutrient uptake and flexible application schedules, making them ideal for rapidly correcting deficiencies and maintaining consistent plant nutrition.
Inadequate Light: When Your Plant Can’t Photosynthesize Properly
Since light serves as the primary energy source for photosynthesis, inadequate lighting quickly becomes one of the most common culprits behind yellowing leaves in indoor plants.
When your plants don’t receive sufficient light intensity, their photosynthesis efficiency drops considerably, limiting chlorophyll production and triggering the telltale yellowing you’re seeing. Poor light spectrum from artificial sources can also degrade chlorophyll, causing leaves to lose their vibrant green color.
You’ll notice yellowing typically appears between leaf veins first, creating a distinctive pattern called interveinal chlorosis.
Additionally, inadequate light reduces your plant’s ability to absorb essential nutrients like nitrogen and magnesium, which are vital for maintaining healthy, green foliage and supporting proper photosynthetic function throughout the growing season. Full-spectrum grow lights covering 380-760nm wavelengths can effectively support all growth stages and help restore proper chlorophyll production in struggling indoor plants.
Poor light conditions can also compromise root development, which is essential for nutrient uptake and overall plant health.
Poor Air Circulation: How Stagnant Air Affects Plant Health
While proper lighting addresses your plant’s energy needs, another environmental factor often works silently behind the scenes to compromise leaf health: poor air circulation. Stagnant air creates multiple problems that manifest as yellowing leaves, including restricted carbon dioxide absorption that limits photosynthesis and weakens overall growth.
Without adequate airflow, humidity levels rise dramatically, creating ideal conditions for fungal diseases like mold and mildew that damage leaf tissue directly.
Effective airflow solutions include oscillating fans positioned to create gentle, distributed movement throughout your growing space. This circulation prevents soil from staying persistently wet, reducing root rot risks that cause nutrient uptake problems.
Additionally, proper humidity control through ventilation keeps dust and pollutants from accumulating on leaf surfaces, maintaining clear stomata for best gas exchange and preventing the suffocation symptoms that lead to yellowing. For optimal plant health, consider using plant humidifiers to maintain humidity levels between 40-60% while ensuring proper air circulation to prevent stagnant conditions.
Temperature Stress: Hot and Cold Extremes That Harm Plants
Beyond airflow concerns, temperature extremes create another significant threat to your indoor plants’ health, often triggering the yellow leaves you’re trying to prevent.
Your plants thrive in consistent temperatures between 65-75°F during the day, with slightly cooler nights supporting ideal growth and health.
Temperature extremes above 85°F or below your plant’s specific cold threshold trigger a harmful stress response that damages essential cellular functions.
Heat stress impairs photosynthesis enzymes, while cold stress slows this crucial energy conversion process, both leading to yellowing leaves.
Key temperature management strategies include:
- Monitor conditions with digital thermometers to maintain stable environments
- Relocate plants away from heating vents, air conditioners, and direct sunlight
- Increase humidity during hot periods using humidifiers or water trays
- Avoid sudden temperature shifts that cause thermal shock and leaf discoloration
Natural Aging Process: Understanding Normal Leaf Yellowing
Sometimes the yellowing leaves on your indoor plants aren’t signaling a problem at all, but rather reflecting the completely natural aging process that every healthy plant experiences throughout its lifecycle.
This phenomenon, called senescence, occurs when older leaves gradually lose their green chlorophyll and shift to yellow hues as part of normal development.
You’ll typically notice this leaf age progression starting with the lowest, most mature foliage first, while newer growth remains vibrant and healthy.
These natural processes allow your plant to redirect valuable nutrients from aging leaves toward developing new shoots, flowers, or roots.
The yellowing usually begins at leaf tips or edges, progressing inward slowly over time.
Unlike stress-related yellowing, natural aging affects only select older leaves while the rest of your plant maintains its vigor and shows no additional symptoms.
Plant-Specific Factors: Species-Related Yellowing Causes
Understanding your plant’s specific species becomes essential when diagnosing yellowing leaves, as each variety carries unique genetic traits that influence how it responds to environmental stressors and nutrient availability.
Species sensitivity varies dramatically between plant families, meaning what causes yellowing in one plant won’t necessarily affect another. Your plant’s natural habitat determines its tolerance levels, making light adaptation vital for preventing stress-related yellowing.
Consider these species-specific yellowing patterns:
- Tropical plants like calatheas and peace lilies yellow from cold drafts below 60°F, reflecting their warm climate origins.
- Succulents and cacti develop yellow leaves under insufficient light, losing their characteristic vibrant coloration and compact growth.
- Ferns and shade-tolerant species show yellow margins when exposed to excessive direct sunlight or heat stress.
- Nutrient-sensitive varieties like philodendrons exhibit distinct yellowing patterns between leaf veins when deficient in magnesium or iron.
Prevention and Recovery: Keeping Your Plants Healthy and Green
The best defense against yellow leaves is establishing proper watering techniques, ideal growing conditions, and early problem detection systems.
You’ll save yourself countless headaches by learning to read your plant’s moisture needs, providing consistent light and temperature conditions, and catching issues before they escalate.
These preventive measures, combined with quick recovery strategies, will keep your indoor garden thriving with healthy, vibrant green foliage year-round.
Understanding NPK ratios will help you select the right fertilizer formula to address your plant’s specific nutritional needs and prevent deficiency-related yellowing.
Additionally, providing balanced nutrition through appropriate fertilizers every 1-2 weeks can strengthen your plants’ natural defenses and promote the vibrant growth needed to prevent yellowing leaves.
Proper Watering Techniques
When you master proper watering techniques, you’ll prevent most cases of yellowing leaves and create an environment where your indoor plants can thrive. The key lies in understanding that effective watering involves more than simply adding water to your pots.
Here are four essential watering techniques to protect your plants:
- Water thoroughly from the top until water drains completely from the bottom, washing out accumulated salts while ensuring proper soil drainage throughout the root zone.
- Use room temperature water to avoid shocking your plants, as cold water temperature can stress roots and disrupt normal plant functions.
- Aim your watering can spout close to the soil surface to prevent displacing potting medium and disturbing delicate root systems.
- Water during daytime hours to allow soil to dry properly and reduce fungal problems that contribute to yellowing leaves.
Choosing the right potting soil with well-draining mixes supplemented with perlite or coarse sand helps prevent water-related issues that lead to yellowing leaves. Additionally, selecting soils with proper pH levels between 6.0-7.0 ensures optimal nutrient availability and prevents nutrient-related yellowing.
Optimal Growing Conditions
Although proper watering forms the foundation of plant care, creating ideal growing conditions requires attention to four vital environmental factors that work together to prevent yellowing leaves.
Temperature control involves maintaining 65-75°F during the day with nighttime drops of 10 degrees, while avoiding placement near heating vents or cold drafts that cause stress.
Humidity management becomes essential since most tropical houseplants need 30-65% relative humidity, which you can achieve through pebble trays, grouping plants, or using humidifiers.
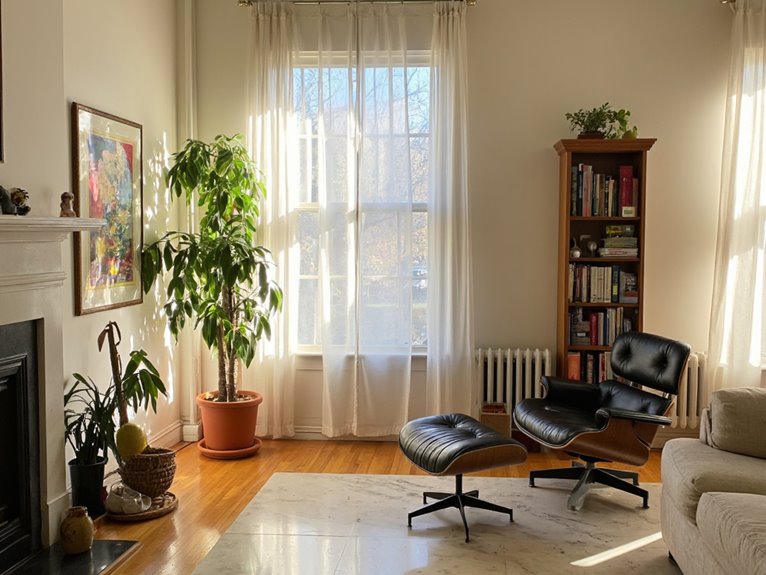
Light assessment determines successful plant placement, matching low-light varieties to north-facing windows and high-light plants to southern exposures.
Finally, soil optimization with well-draining potting mix and appropriate fertilization during growing seasons prevents nutrient deficiencies. Composting organic waste through dual-chamber tumblers can provide nutrient-rich amendments for your potting soil while reducing household waste.
Understanding NPK ratios helps you select the right fertilizer composition to address specific nutrient deficiencies that commonly cause yellowing leaves in indoor plants.
Strategic environment adjustment of these factors creates thriving conditions.
Early Problem Detection
Before yellowing leaves become a widespread problem throughout your indoor garden, you can catch the earliest warning signs and take corrective action to save your plants.
Early sign detection starts with monitoring how yellowing typically begins at the bottom leaves and progresses upward, signaling watering issues or nutrient deficiencies that require immediate attention.
Here are four key strategies for early problem detection:
- Check moisture levels weekly by inserting your finger into the top inch of soil before watering.
- Monitor leaf color changes for interveinal chlorosis or unexpected yellowing patterns across multiple plants.
- Assess drainage quality to prevent waterlogged conditions that cause root suffocation and chlorosis.
- Evaluate light placement within 1-2 feet of windows to prevent photosynthesis-related yellowing.
Regular inspection helps you adjust care regimens before major damage occurs. If you notice tiny insects like spider mites or aphids on your yellowing leaves, these pests can accelerate leaf damage and require immediate treatment to prevent further plant stress.
Frequently Asked Questions
Can Yellow Leaves Turn Green Again or Should I Remove Them?
Yellow leaves rarely turn green again, so you should remove them for better plant health. This leaf care practice redirects energy to healthy growth and prevents pest issues from developing on dying foliage.
How Long Does It Take for a Plant to Recover From Yellowing?
Plant recovery from yellowing typically takes 1-4 weeks, depending on yellowing causes like nutrient deficiency or watering issues. You’ll see new green growth first, while full recovery may need several months.
Is It Normal for New Plants to Develop Yellow Leaves After Repotting?
Yes, it’s completely normal for plants to develop yellow leaves after repotting due to repotting stress and temporary nutrient deficiency. Your plant’s adjusting to new soil and conditions, so expect this response during recovery.
Can Using Tap Water Instead of Filtered Water Cause Leaf Yellowing?
Yes, tap water effects can definitely cause leaf yellowing. Poor water quality from chlorine, fluoride, minerals, and pH imbalances disrupts your plant’s nutrient uptake, leading to chlorosis, brown tips, and overall decline.
Do Yellow Leaves Spread the Problem to Other Healthy Leaves on the Plant?
Yellow leaves don’t directly spread yellowing to healthy leaves. However, if you’re dealing with leaf disease or nutrient deficiency, the underlying cause can progressively affect multiple leaves throughout your plant.
On a final note
Yellow leaves don’t mean you’re failing as a plant parent, and with proper diagnosis, you can nurse your green companions back to health. By checking watering habits, light conditions, and nutrient levels, you’ll identify the underlying cause quickly. Remember that some yellowing occurs naturally as plants age, so don’t panic immediately. Stay observant, make gradual adjustments, and your indoor garden will thrive with consistent, thoughtful care.

