DIY Hydroponic System Building: Mason Jar and Bucket Growing Projects
Build your hydroponic system with mason jars for herbs like basil and buckets for leafy greens like lettuce, ensuring they’re opaque to block algae. Use filtered water and mix balanced nutrients according to plant stages, aiming for 1.5-3.0 ppm EC levels. Position lights 6-12 inches above plants for 12-16 hours daily with full-spectrum LEDs. Start simple with the Kratky method before expanding to bucket systems with pumps. Maintain pH 5.8-6.5 and change reservoir water weekly to keep your garden thriving-perfect for fresh produce year-round!
Notable Insights
- Choose mason jars for compact herb gardens and buckets for larger plants like lettuce or spinach.
- Use pumps rated for your system size to avoid stagnant water and ensure proper aeration.
- Maintain pH between 5.5-6.5 and EC levels based on plant needs with regular testing.
- Position lights appropriately according to species requirements, using timers for consistency.
- Clean reservoirs weekly and replace water regularly to prevent algae and nutrient imbalances.
Gathering Essential Supplies for Your Hydroponic System
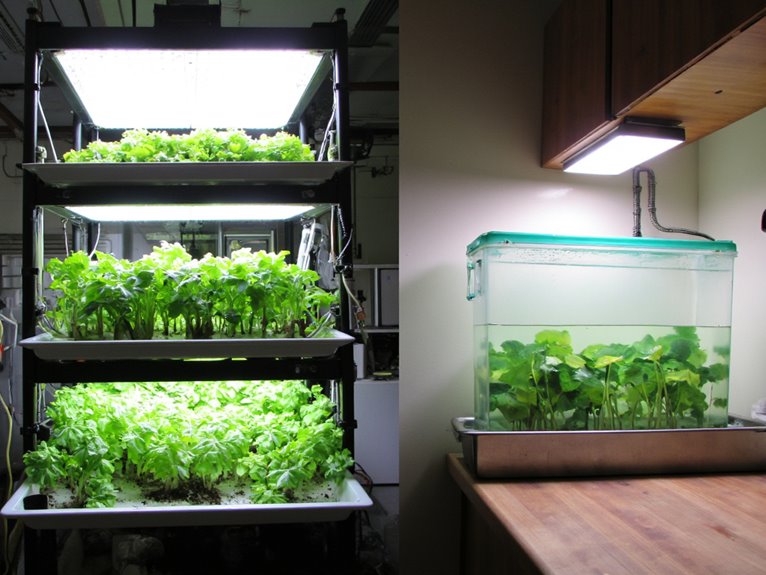
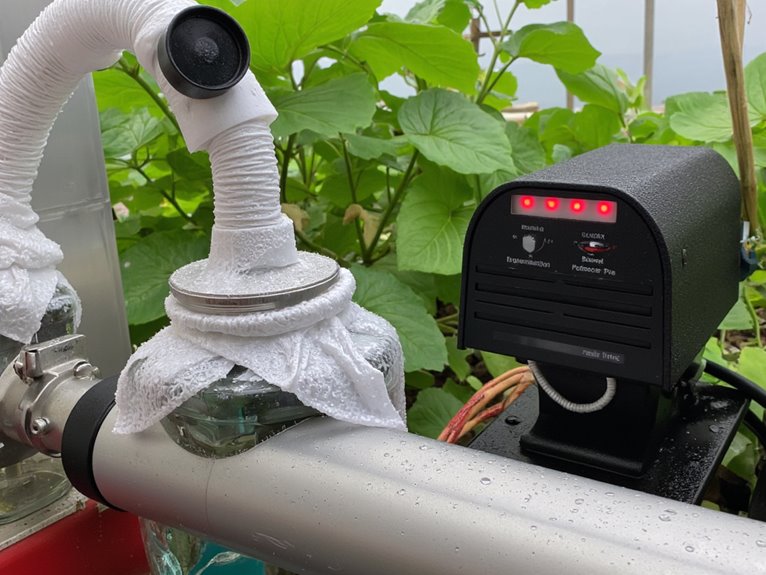
Before you get started with building your hydroponic setup, it’s essential to gather all the necessary components that will form the foundation of your system. Focus on container types-reservoirs should be large enough for your plants, whether you’re using plastic buckets, storage bins, or even repurposed mason jars. Don’t forget about pump efficiency; a reliable water pump supports proper circulation and oxygenation for healthy root development. Pair it with an air stone or diffuser to maintain water movement.
Choose container types that let you easily monitor and refill solutions while blocking light to prevent algae growth. Invest in a pump rated for your system’s scale to avoid stagnant water, which can lead to root rot. Using the right reservoir size ensures adequate nutrient solution volume for plant uptake without excess water waste. Proper drainage properties are essential to prevent water retention that could harm your plants’ root systems. Start simple with a deep water culture setup before expanding to more complex designs like NFT or ebb-and-flow. With the right supplies, you’ll be growing fresh produce in no time!
Creating and Maintaining the Nutrient Solution
Once you’ve gathered your system components, it’s time to focus on creating the nutrient solution that will feed your plants directly through water-no soil needed. A balanced hydroponic mix provides all 16 essential elements, so start with a clean reservoir filled with filtered water. For nutrient ratio adjustments, follow precise ppm guidelines tailored to your crop; leafy greens need more nitrogen than fruiting plants require potassium. Organic fertilizer options like compost teas or worm castings offer an eco-friendly alternative without disrupting pH balance. Always add micro-nutrients first, then macronutrients, and stir well after each addition. Regularly test EC levels and adjust based on plant response-overfeeding can burn roots while underfeeding slows growth. Consider starting with proven two-part nutrient systems that offer straightforward mixing ratios and reduce the chances of miscalculation, making them ideal for beginners. With practice, maintaining this essential solution becomes second nature to keeping your hydroponic garden thriving.
1. It’s important to monitor pH levels regularly as they directly affect nutrient availability to plants.
Optimizing Light Exposure for Plant Growth
Whether you’re setting up lights for the first time or fine-tuning your existing system, providing the right amount of light at the right intensity is essential for plant health and growth success. Light Duration Optimization shapes growth stages, while Spectrum Selection Techniques fuel photosynthesis efficiently.
| Plant Type | Recommended Light Duration | Spectrum Needs |
|---|---|---|
| Tomatoes | 8–14 hours daily | Full-spectrum LED |
| Lettuce | 3–6 hours direct light | Lower intensity red/blue |
| Herbs | 6–10 hours | Balanced PAR spectrum |
| Peppers | 10–12 hours | Higher intensity with blue boost |
| Spinach | 7–9 hours | Increased green/blue ratio |
Adjust distances based on species-sun-lovers need closer lights, while shade-tolerants thrive farther away. Use timers to maintain cycles and avoid stressing plants with excess light. Experiment to find your perfect balance.
Energy-efficient LED models with dimming capabilities allow you to customize light intensity throughout different growth phases while keeping monthly operating costs between $2-4.
(For optimal results, ensure your system replicates natural sunlight conditions by carefully balancing light duration and spectrum.)
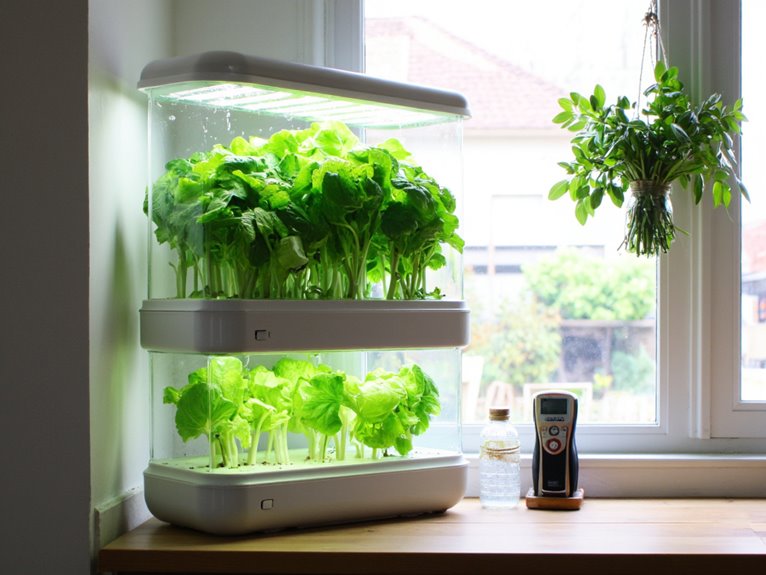
Choosing the Right Plants for Your Setup
After getting your lighting just right, selecting plants that thrive in water-based systems becomes your next focus. Consider plant compatibility with container sizes-compact herbs like basil and parsley work well in mason jars, while leafy greens like lettuce need slightly larger buckets. Nutrient solution pH requirements vary by herb variety; basil prefers slightly acidic water (6.0-6.5) with higher EC levels, while spinach thrives in neutral pH (6.8-7.2). Brassicas like kale and mustard greens also adapt well due to high water content. Start simple with fast-growing greens or aromatic herbs before tackling cucumbers or strawberries that need more care.
Preventing Algae Growth in Clear Containers
Even if you’ve chosen the perfect plants for your hydroponic setup, algae can still sneak in and spoil the view-especially in clear containers. Focus on Light barrier effectiveness by covering jars with opaque materials or using dark-colored containers. If light penetration is inevitable, consider UV-C lights designed for aquariums that kill spores without promoting growth. For Chemical treatment safety, use hydrogen peroxide solutions rather than harsh chemicals like bleach. Always rinse thoroughly after cleaning to avoid residue that could harm plants. Regular inspections and proper sealing of cracks will further strengthen your defenses against algae.
Monitoring and Managing Water Levels
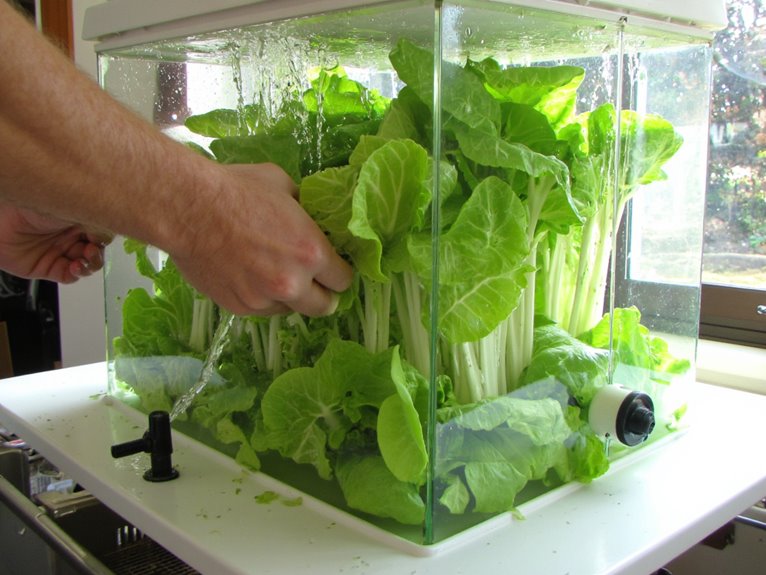
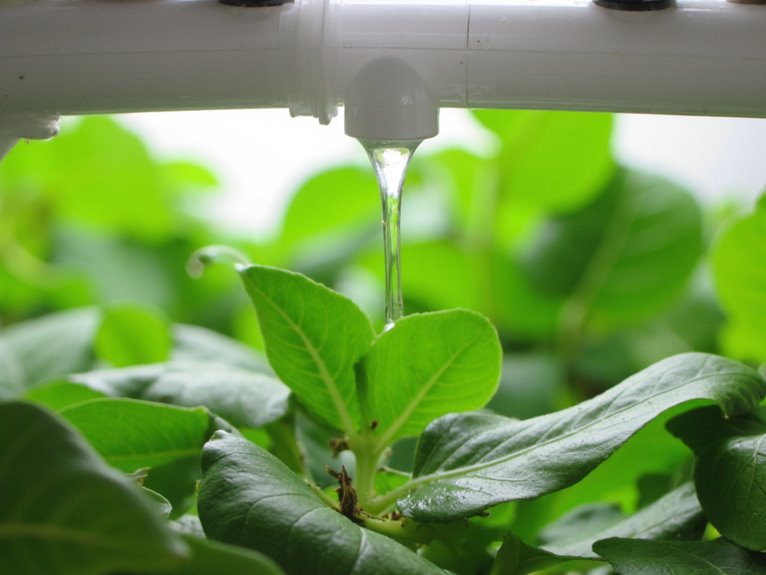
Whether you’re setting up a simple mason jar system or a more complex deep water culture setup, keeping an eye on water levels is essential to plant health. Automated sensors and float valves offer reliable solutions for maintaining consistent levels, while visual indicators provide affordable alternatives for smaller systems. Regular sensor calibration verifies accurate readings, preventing both overflow prevention failures and under-watering stress. In DWC systems, aim for water covering roots but avoiding full submersion. For buckets, top up regularly to combat evaporation. Monitoring EC values alongside water levels helps maintain balanced nutrition. Prioritize waterproof containers and check for leaks frequently-stable water supports thriving plants without surprises.
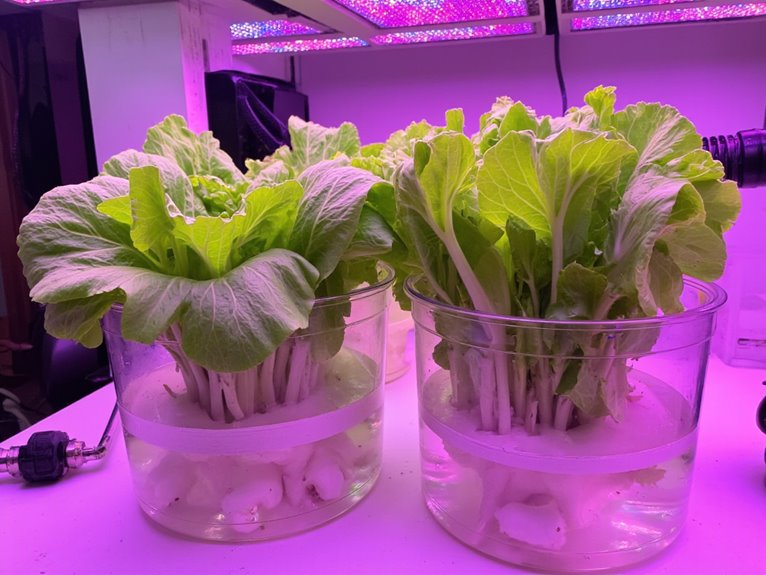
Implementing the Kratky Method for Passive Growing
Once your system is stable, you might want to explore simpler methods like the Kratky technique that requires no pumps or electricity. This passive approach uses floating roots to absorb nutrients as the solution level drops naturally over time-no complicated timing needed. Developed by Dr. Bernard A. Kratky, it’s perfect for classrooms or balconies where power sources are limited.
The Kratky method suspends plants above a nutrient reservoir, with roots partially submerged at first. As water levels fall, floating roots continue to uptake nutrients until the solution is fully consumed. This “set-and-forget” approach works best for leafy greens and herbs with short growth cycles.
| Concept | Description | Solution Timing |
|---|---|---|
| Floating Roots | Roots that absorb nutrients as solution level drops | Natural uptake without pumps |
| Initial Setup | Plants placed above reservoir with partial submersion | One-time nutrient mix |
| Harvest Time | Typically 2-4 weeks depending on crop | Solution consumed completely |
This method’s simplicity makes it ideal for beginners while still delivering good yields for appropriate plants.
Expanding With Bucket Hydroponic Systems
As you grow more confident with hydroponics, expanding to bucket systems opens new possibilities for cultivating a wider range of plants in limited spaces. When designing your system layout, consider how container stacking methods can maximize vertical space without overcrowding roots or blocking airflow. Position buckets on a tilted table so excess water drains back into the reservoir, and use pipe clamps to secure tubing connections. Experiment with different crops by adjusting media types like perlite or clay pebbles based on plant needs. With proper pump power and regular maintenance checks, your bucket system can support multiple layers of growth while staying simple enough for beginners.
Common Issues and Solutions for Home Growers
While hydroponics offers a clean and efficient way to grow plants, it’s not without its challenges-especially for home growers new to the concept. Nutrient balance is key; imbalances can cause yellowing leaves or stunted growth. Monitoring pH levels (5.5–6.5) supports plants absorb nutrients properly. Over-fertilizing raises salt concentrations, damaging roots and wilting plants. Using hydroponic-specific nutrients avoids toxicity issues. Regular checks of pH, EC, and temperature support plant health and early problem detection. With the right approach, these common issues become manageable hurdles on your growing journey.
Frequently Asked Questions
Can I Use Regular Garden Soil With My Mason Jar Hydroponic System?
Y’can’t use regular garden soil with your mason jar system-it’ll waterlog, rot roots, and mess up nutrient balance. Hydroponics needs proper mediums like rockwool, coco coir, or clay pebbles for plant source and soil type compatibility.
What’s the Best Way to Transplant Seedlings Into the Jar Setup?
What’s the best way to transplant seedlings into the jar setup? Use neoprene collars, keep roots dry before planting, and position them just above water. Ideal light sources should be low-stress for a few days. Most effective transplant timing techniques mean waiting until roots are long but not mushy-around day 5 for lettuce, day 10 for tomatoes.
How Do I Clean My Mason Jars Without Using Harsh Chemicals?
Just use white vinegar and hot water to deodorize and cut through grime - no harsh chemicals needed! For Fermentation methods, let them sit covered with a cloth to trap odors naturally. Compost bin tips? Add a layer of ash or crushed eggshells to absorb smells permanently.
Can I Grow Tomatoes in a Small Mason Jar Hydroponic Container?
Yes, you can grow tomatoes in a small mason jar hydroponic container! Space efficiency solutions like vertical stacking techniques make it work. Use compact varieties, proper nutrients, and monitor levels daily for best results.
Do I Need to Add Ph Adjusters to My Nutrient Solution?
You probably need pH adjusters for stability, but natural alternatives like calcium carbonate or potassium bicarbonate work too. Testing methods will help you decide if adjustments are needed before adding anything.
On a final note
With patience and careful planning, your hydroponic garden can thrive year-round, offering fresh produce in your own home. Remember to regularly test your nutrient levels, adjust lighting as plants grow, and keep containers clean to prevent algae buildup. Whether you’re starting with mason jars or expanding to bucket systems, the key is consistency and attention to detail. Don’t be discouraged by minor issues-each challenge is an opportunity to learn and improve your setup. Happy growing!