A Step-By-Step Guide to Growing Cantaloupe From Seeds
I’ve successfully grown cantaloupe from seeds by following these steps. Start by selecting varieties like ‘Ambrosia,’ ‘Athena,’ or ‘Hales Best Jumbo’ for their sweetness and characteristics. Begin indoors by planting 2-3 seeds per cell in a seed-starting mix, ensuring good air circulation. Prepare the soil with proper pH, drainage, and nutrients before transplanting seedlings to a sunny location. Water consistently, fertilize appropriately, and watch for pests like cucumber beetles. Prevent mildew by watering at the base and choose resistant varieties. Always maintain soil health and optimize sunlight exposure. Prune vines, support fruits, and adapt techniques for a fantastic harvest ahead.
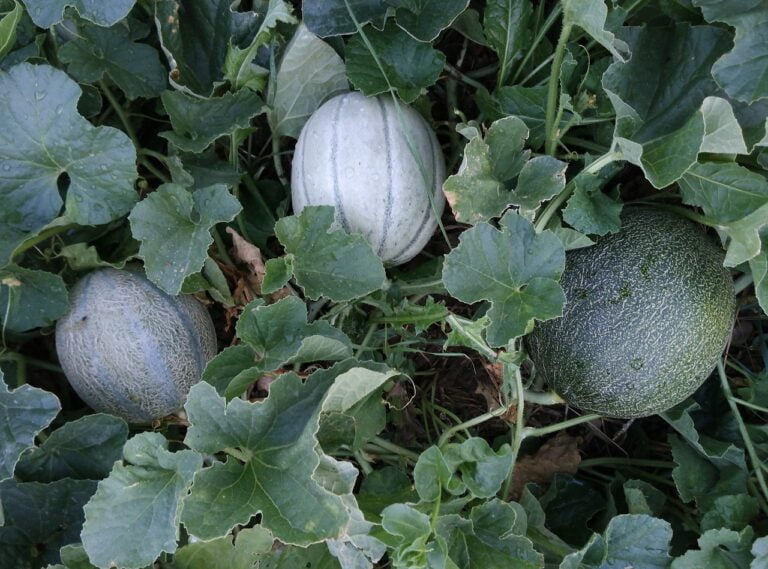
Selecting Cantaloupe Varieties
When selecting cantaloupe varieties for your garden, I recommend starting with popular choices like ‘Ambrosia,’ ‘Athena,’ and ‘Hales Best Jumbo’ known for their sweetness and resistance to diseases. ‘Ambrosia’ is favored for its exceptional flavor, high sugar content, and juicy texture, making it a top pick for many gardeners. ‘Athena’ stands out for its importance resistance, vigorous growth, and delectable taste, making it a reliable option for various climates. ‘Hales Best Jumbo’ is a classic heirloom variety with a perfect balance of sweetness and musky aroma, ideal for home gardens.
Each of these varieties has a different number of days to maturity, typically ranging from 70 to 90 days. It’s vital to take into account your climate and growing conditions when selecting the right cantaloupe variety. For instance, ‘Ambrosia’ and ‘Athena’ thrive in warmer climates with plenty of sun, while ‘Hales Best Jumbo’ can tolerate slightly cooler temperatures. Understanding the specific characteristics of each variety will help you match them to your preferences and gardening goals accurately.
Starting Cantaloupe Seeds Indoors
To successfully start cantaloupe seeds indoors, prepare a seed-starting tray with a seed-starting mix to create an important environment for germination. I recommend using an assorted melon seeds variety pack for a diverse selection of melons suitable for your home garden. Plant 2-3 cantaloupe seeds per cell in the seed-starting tray, ensuring they are about half an inch deep. This method increases the chances of successful germination, giving your cantaloupe plants a strong start.
After planting the seeds, it is essential to keep the soil moisture level consistent. Make sure the soil is damp but not waterlogged, as overly wet conditions can lead to rotting. Additionally, providing good air circulation around the seedlings is crucial for healthy growth. You can achieve this by placing a small fan nearby on low speed or by opening a nearby window slightly to allow for airflow.
Starting cantaloupe seeds indoors allows you to get a head start on the growing season, giving your plants more time to mature and produce fruit. With the right care and attention to detail during the germination process, you’ll soon have healthy cantaloupe seedlings ready to be transplanted into your garden once the last frost date has passed.
Preparing the Soil for Planting
Breaking ground for a successful cantaloupe crop involves meticulous soil preparation to secure ideal growing conditions for the plants. The first step is to test the soil pH, aiming for a range between 6.0 to 6.8, which is best for cantaloupe growth. Prior to planting, it’s important to clear the planting area of weeds, rocks, and debris that could hinder the development of the cantaloupe plants.
Next, the soil should be loosened to a depth of at least 12 inches. This practice promotes proper root development, allowing the cantaloupe plants to establish a strong foundation. To make sure the soil is nutrient-rich, incorporate organic matter such as compost or aged manure. These additives provide essential nutrients for the plants to thrive.
Moreover, proper drainage is critical to prevent waterlogging, which can lead to root rot in cantaloupe plants. Well-draining soil facilitates the movement of excess water away from the roots, maintaining a healthy environment for growth. By taking these steps in soil preparation, you set the stage for a successful cantaloupe harvest.
Transplanting Cantaloupe Seedlings
As I prepare to transplant cantaloupe seedlings, timing becomes essential to guarantee maximum growth and yield potential. It’s important to wait until after the danger of frost has passed before moving the seedlings outdoors. Checking the soil temperature is also key; make sure it’s at least 60°F for a successful transplant.
When choosing a location, opt for a sunny spot with good air circulation. Digging holes that are twice the size of the root ball for each seedling is significant. This extra space allows for proper root development, which is important for the plant’s overall health and productivity.
After carefully transplanting the seedlings, water them generously to help them establish themselves in their new environment. This initial hydration is critical for their survival and growth. Keep a close eye on the seedlings in the days following the transplant to make sure they are adapting well to their new surroundings.
Providing Water and Fertilizer
When providing water and fertilizer for cantaloupe plants, it is important to maintain a consistent schedule to support their growth and fruit production effectively. Cantaloupe plants require 1 to 2 inches of water per week, especially in hot and dry conditions. To encourage robust root growth, water deeply but be cautious not to overwater, as this can lead to root rot.
For best fruit development, it is essential to apply a balanced fertilizer with higher levels of phosphorus and potassium. These nutrients play a vital role in flowering, fruit set, and overall fruit quality. Fertilize your cantaloupe plants every 3-4 weeks throughout the growing season to make sure they have the necessary nutrients for healthy growth.
Consider using a water-soluble fertilizer to deliver nutrients directly to the roots, promoting efficient absorption. This method can enhance the plant’s ability to uptake essential nutrients, supporting its overall health and productivity. By providing adequate water and a balanced fertilizer regimen, you can help your cantaloupe plants thrive and yield a bountiful harvest.
Dealing With Pests and Diseases
I’ve encountered cucumber beetles and aphids as common pests that pose a threat to cantaloupe plants, while powdery mildew and bacterial wilt are diseases that can quickly spread among the vines. To combat these issues, implementing important crop rotation practices and regularly inspecting plants for early signs of trouble are essential steps in maintaining a healthy crop. Additionally, using organic pest control methods such as neem oil or insecticidal soap can effectively manage pests while preserving the beneficial insect population.
Pest Prevention Methods
To safeguard your cantaloupe plants from common pests and diseases, employing preventive measures such as using row covers and practicing crop rotation is essential. Row covers act as a physical barrier, protecting your plants from pests like cucumber beetles and aphids. Crop rotation helps reduce the risk of soil-borne diseases that can harm your cantaloupes. Regularly inspect your plants for powdery mildew, a common disease, and address it promptly if found. Avoid over-fertilizing with nitrogen, as this can increase susceptibility to pests and diseases. Consider planting companion plants such as marigolds or nasturtiums to naturally deter pests and attract beneficial insects to your cantaloupe garden. Following these methods diligently can help maintain the health and productivity of your cantaloupe plants.
Disease Management Strategies
Implementing strategic disease management techniques is essential for safeguarding cantaloupe plants from common pests and diseases. To protect your cantaloupe crop, employ cultural practices like crop rotation and proper spacing to reduce pest and disease risks. Regular monitoring for signs of pests such as aphids, cucumber beetles, and spider mites is vital. Combat these pests using organic solutions like insecticidal soap or neem oil. Maintain garden hygiene by promptly removing diseased plant material to prevent disease spread. Additionally, apply fungicides preventatively, such as copper-based sprays, to shield cantaloupe plants from diseases like powdery mildew and downy mildew. By incorporating these strategies into your gardening routine, you can help safeguard the health and productivity of your cantaloupe plants.