Guide to Planting Carrots in Containers
Are you interested in growing your own carrots but don't have a big garden? Look no further! This guide will show you how to plant carrots in containers, allowing you to enjoy fresh, homegrown carrots even in limited spaces. You'll learn everything from selecting the right container and preparing the soil mix to sowing the seeds and managing pests. Get ready to embark on a rewarding journey of container gardening and enjoy the satisfaction of serving your own delicious carrots.
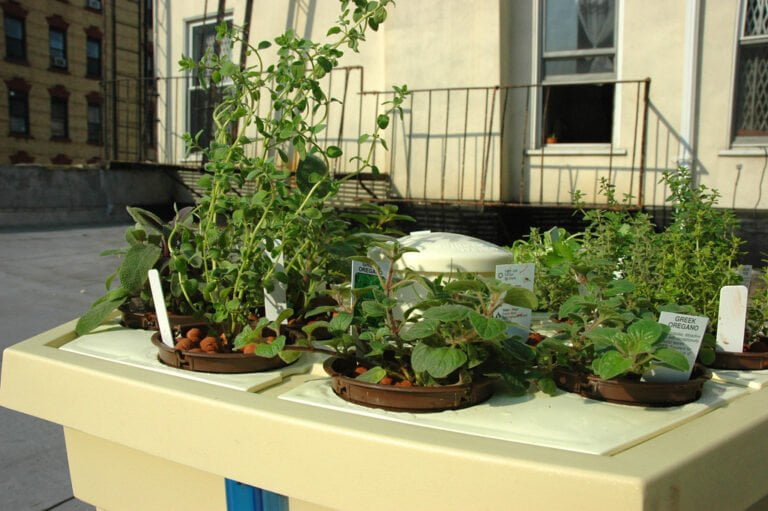
Selecting the Right Container
To ensure successful carrot growth, choose a suitable container that provides enough space for multiple carrots to grow. When selecting a container, consider the size and depth. Carrots need at least 6-8 inches of soil depth to develop long, straight roots. Look for a container that is at least 12 inches deep to allow ample room for the carrots to grow. Additionally, ensure that the container has drainage holes to prevent water from pooling and causing root rot. Consider the material of the container as well. Plastic, ceramic, or wooden containers are all suitable options. Just make sure that the container is sturdy enough to support the weight of the soil and carrots. By choosing the right container, you are setting your carrots up for success and ensuring a bountiful harvest.
Preparing the Soil Mix
Once you have selected the right container for your carrots, it is time to prepare the soil mix. The soil mix plays a crucial role in the growth and development of your carrots. It provides essential nutrients and ensures proper drainage for the roots. To prepare the soil mix, start by choosing a high-quality potting mix that is well-draining and rich in organic matter. You can also add compost or well-rotted manure to improve the soil's fertility. Make sure to mix the ingredients thoroughly to ensure an even distribution of nutrients. Additionally, you may consider adding some perlite or sand to enhance drainage. Remember to moisten the soil mix before planting your carrot seeds. With a well-prepared soil mix, your carrots will have the best chance to thrive and produce a bountiful harvest.
Choosing the Best Carrot Varieties
After preparing the soil mix, you can now move on to choosing the best carrot varieties for your container garden. When selecting carrot varieties, it's important to consider your growing conditions, taste preferences, and desired harvest time. For container gardening, it's best to choose shorter carrot varieties that are suited for smaller spaces. Some popular varieties include 'Nantes,' 'Thumbelina,' and 'Parisian.' 'Nantes' carrots are known for their sweet flavor and cylindrical shape, making them a great choice for containers. 'Thumbelina' is a small, round carrot that matures quickly and is perfect for shallow containers. 'Parisian' carrots are small and round as well, with a sweet taste that is ideal for salads. Remember to read the seed packets for specific growing instructions and choose varieties that suit your needs.
Sowing Carrot Seeds
Now that you have chosen the best carrot varieties for your container garden, it's time to sow the carrot seeds and get your garden started. To sow carrot seeds, prepare the container by filling it with well-draining potting soil. Make sure the soil is loose and free from any stones or clumps. Create shallow furrows in the soil, about 1/4 inch deep. Space the furrows about 2 inches apart to allow the carrots room to grow. Sprinkle the carrot seeds along the furrows, aiming for about 2-3 seeds per inch. Gently cover the seeds with a thin layer of soil and water the container thoroughly. Keep the soil consistently moist until the seeds germinate, which usually takes around 10-14 days. Be patient and soon you will see tiny carrot seedlings emerging from the soil.
Proper Watering Techniques
To ensure healthy growth and development, it's important to employ proper watering techniques when cultivating carrots in containers. Carrots have specific water requirements, and meeting them is crucial for their overall well-being. When watering your container-grown carrots, make sure to provide enough moisture without overdoing it. Start by checking the soil moisture level before watering. Stick your finger about an inch into the soil; if it feels dry, it's time to water. Use a watering can or a gentle spray nozzle to water the carrots, aiming for the base of the plants and avoiding wetting the foliage. Ensure that the water reaches the root zone by watering slowly and deeply. Water the carrots regularly, keeping the soil consistently moist but not waterlogged. Remember, too much water can cause the roots to rot, while insufficient water can lead to stunted growth and poor quality carrots. By following these proper watering techniques, you'll provide your container-grown carrots with the optimal conditions for healthy growth and delicious harvests.
Providing Adequate Sunlight
Make sure you give your container-grown carrots enough sunlight to thrive. Carrots are sun-loving plants, and they need at least six to eight hours of direct sunlight each day. When choosing the location for your carrot container, select an area that receives ample sunlight throughout the day. Place it near a south-facing window or on a sunny balcony or patio. If you have limited access to sunlight, you can supplement with artificial light using grow lights. Position the container where it will receive the maximum amount of light, and ensure that there are no obstructions that could block the sunlight. Providing adequate sunlight is crucial for the growth and development of your carrot plants, ensuring they produce healthy and flavorful roots.
Fertilizing Carrots in Containers
After providing adequate sunlight for your container-grown carrots, it is important to fertilize them to ensure optimal growth and yield. Carrots are heavy feeders and require nutrient-rich soil to thrive. When selecting a fertilizer, opt for one that is high in phosphorus and potassium, as these nutrients promote root development and overall plant health. Before planting your carrots, mix a slow-release fertilizer into the potting mix to provide a steady supply of nutrients throughout the growing season. Additionally, supplement with a liquid fertilizer every two weeks to provide a quick boost of nutrients. Be careful not to over-fertilize, as this can lead to excessive foliage growth at the expense of root development. Remember to follow the fertilizer manufacturer's instructions for proper application and dosage. By fertilizing your container-grown carrots, you can ensure they receive the nutrients they need for healthy and bountiful harvests.
Managing Pest and Disease Issues
Once you have fertilized your container-grown carrots, it is important to manage pest and disease issues to protect the health and productivity of your plants. Pests such as aphids, carrot flies, and slugs can cause significant damage to your carrot crop. To prevent these pests, regularly inspect your plants and remove any affected leaves or insects. You can also use natural remedies like neem oil or insecticidal soap to control the pest population. Additionally, diseases like carrot rust and powdery mildew can affect the growth of your plants. To prevent these diseases, ensure proper air circulation around your containers and avoid overwatering. If you notice any signs of disease, promptly remove the affected plants to prevent further spread. By implementing these pest and disease management practices, you can ensure healthy and productive carrot plants in your containers.
Thinning Carrot Seedlings
To thin carrot seedlings, gently pull out any overcrowded plants to create proper spacing for healthy growth. Carrots need enough room to develop strong roots and produce large, flavorful roots. When thinning, aim for a spacing of about 2 inches between each plant. Start by identifying the weakest and smallest seedlings, as they are unlikely to thrive. Grab the base of the unwanted seedling and gently pull it out of the soil, being careful not to disturb the neighboring plants. Avoid yanking or tearing the seedling, as this can damage the roots of the surrounding carrots. Thinning should be done when the seedlings are about 1 to 2 inches tall, allowing enough time for the remaining carrots to grow and fill in the gaps. Remember to water the remaining seedlings after thinning to promote proper growth and development.
Harvesting and Storing Carrots
When harvesting carrots, make sure to carefully lift the plants out of the containers using a garden fork or trowel. Gently insert the tool into the soil and lift the carrot plant from the bottom, being careful not to damage the roots. Shake off any excess soil and remove any attached foliage. Inspect the carrots for any signs of disease or damage. Carrots ready for harvest should have a bright orange color and a firm texture. If the carrots are still small, you can choose to leave them in the container for a few more weeks to allow them to grow further. Once harvested, store the carrots in a cool, dry place. You can store them in a refrigerator, wrapped in a damp paper towel, to keep them fresh for longer. Enjoy your homegrown carrots!
Conclusion
In conclusion, planting carrots in containers is a practical and rewarding way to grow your own fresh produce. By selecting the right container, preparing the soil mix, choosing the best carrot varieties, sowing the seeds correctly, and following proper watering and fertilizing techniques, you can successfully grow healthy and delicious carrots. Managing pest and disease issues, thinning the seedlings, and harvesting and storing the carrots properly are also important steps to ensure a successful container carrot garden. Happy gardening!