Guide to Planting Tomatoes in Buckets
Are you interested in growing your own tomatoes but don't have a traditional garden? Look no further! This guide will show you how to plant tomatoes in buckets, giving you the opportunity to enjoy homegrown tomatoes even if you have limited space. From choosing the right bucket size to dealing with common pests and diseases, this article provides practical and detailed instructions to help you successfully grow tomatoes in buckets. So grab your gardening gloves and let's get started!
Choosing the Right Bucket Size
To ensure successful tomato growth, you need to choose the right bucket size for planting. The size of the bucket plays a crucial role in providing adequate space for the tomato plant's roots to grow and develop. A 5-gallon bucket is generally recommended for growing tomatoes. This size allows for sufficient soil volume, ensuring proper drainage and preventing waterlogging. Additionally, a larger bucket provides more stability for the plant, reducing the risk of toppling over during strong winds or heavy rain. When selecting a bucket, opt for one made of durable material, such as plastic or metal. Ensure that it has drainage holes at the bottom to prevent water from pooling. By choosing the right bucket size, you can set the foundation for healthy and thriving tomato plants.
Preparing the Bucket for Planting
To prepare the bucket for planting, you'll need to gather the necessary materials and make sure it is clean and ready for use. First, gather a 5-gallon bucket with drainage holes at the bottom. This size is ideal for growing tomatoes as it provides enough space for the roots to grow. Next, clean the bucket thoroughly with warm water and mild soap. Make sure to remove any dirt or debris that may have accumulated. Once the bucket is clean, sanitize it by wiping the interior with a solution of one part bleach to nine parts water. Rinse the bucket well to remove any remaining bleach. Finally, place the bucket in a sunny location where it will receive at least 6-8 hours of direct sunlight each day.
Selecting the Perfect Tomato Variety
Now that you have prepared the bucket and it is clean and ready for use, it's time to select the perfect tomato variety for planting. When choosing a tomato variety, consider factors such as taste, size, and disease resistance. If you prefer a sweeter taste, go for cherry or grape tomatoes. On the other hand, if you enjoy a more acidic flavor, opt for Roma or San Marzano varieties. If you have limited space, choose determinate varieties that grow in a compact bush-like shape. Indeterminate varieties, on the other hand, continue to grow and produce fruit throughout the season. It's also important to select tomato varieties that are disease-resistant, such as 'Celebrity' or 'Better Boy'. By considering these factors, you can ensure a successful and enjoyable tomato-growing experience.
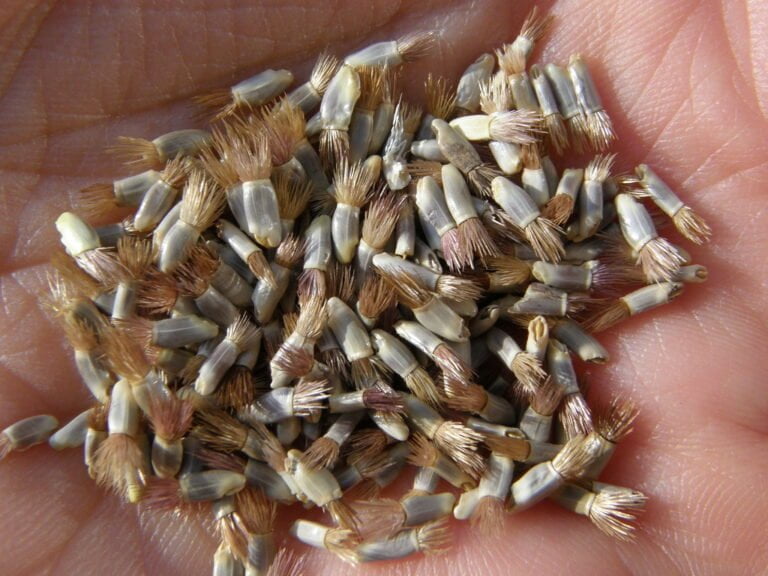
Starting Tomato Seeds Indoors
Start by germinating tomato seeds indoors. This is an essential step in ensuring healthy and robust plants. Begin by selecting a well-draining potting mix and filling seed trays or small pots with it. Moisten the soil, but avoid making it too wet. Gently press the tomato seeds into the soil, about ¼ inch deep, and cover them with a thin layer of soil. Place the trays or pots in a warm area with consistent temperatures between 70-80°F. It's important to keep the soil consistently moist by misting it with water or using a bottom watering method. Once the seeds germinate and sprout, provide them with 12-14 hours of light per day using a fluorescent light or a sunny windowsill. Remember to rotate the trays regularly to ensure even growth. After the last frost date, your tomato seedlings will be ready for transplanting into your buckets.
Transplanting Tomato Seedlings Into Buckets
Once your tomato seedlings have reached a height of 6-8 inches, it is time to transplant them into buckets. Transplanting your seedlings into buckets allows for better control over soil conditions and provides ample space for root growth. Here's how to do it:
- Choose a bucket with a diameter of at least 12 inches and drill drainage holes at the bottom.
- Fill the bucket with a well-draining potting mix, leaving a 2-inch gap from the top.
- Gently remove the seedling from its original container, being careful not to damage the roots.
- Dig a hole in the center of the bucket and place the seedling, ensuring the top of the root ball is level with the soil surface.
- Backfill the hole with soil, pressing it firmly around the roots.
- Water the seedling thoroughly to settle the soil and remove any air pockets.
- Place the bucket in a sunny location and provide support for the tomato plant as it grows.
Proper Soil Mix for Tomato Plants
To ensure optimal growth and development of your tomato plants, it's important to use a proper soil mix in your buckets. The right soil mix will provide the necessary nutrients and drainage for healthy plant growth. Start by using a high-quality potting mix that is specifically formulated for vegetables. This type of mix is enriched with organic matter and essential nutrients that tomatoes need. You can also add compost or well-rotted manure to further improve the soil's fertility. It's important to avoid using garden soil or topsoil, as they can be too heavy and compacted for container gardening. Additionally, make sure the soil mix is well-draining to prevent waterlogged roots. Adding perlite or vermiculite can help improve drainage. By using the proper soil mix, you'll give your tomato plants the best possible start for a bountiful harvest.
Watering and Fertilizing Tomatoes in Buckets
To ensure healthy growth and abundant harvests, you need to properly water and fertilize your tomatoes in buckets. Watering is crucial for tomatoes as they require consistent moisture. Keep the soil evenly moist, but not soggy, by watering regularly. A good rule of thumb is to water deeply once or twice a week, depending on the weather. Make sure the water reaches the roots by watering slowly and at the base of the plant. Avoid wetting the leaves to prevent diseases. Fertilizing is also important to provide essential nutrients. Use a balanced fertilizer with equal amounts of nitrogen, phosphorus, and potassium. Apply the fertilizer according to the instructions on the label, usually every two to three weeks. Regularly monitoring and adjusting the watering and fertilizing practices will help your tomatoes thrive in buckets.
Pruning and Supporting Tomato Plants
To ensure healthy growth and abundant harvests, it's important to prune and support your tomato plants in buckets. Pruning helps to remove unwanted branches and encourage better air circulation, preventing diseases and promoting stronger growth. Start by removing any suckers that grow at the base of the plant, as they can divert energy from the main stem. As the plant grows taller, use stakes or cages to support it and prevent it from bending or breaking under its own weight. Secure the stems to the stakes or cages using soft ties or twine, making sure not to tie them too tightly. Regularly check for any branches that need pruning or additional support throughout the growing season. By giving your tomato plants the care they need, you'll enjoy a bountiful harvest.
Dealing With Common Tomato Pests and Diseases
To effectively deal with common tomato pests and diseases, you should regularly inspect your plants for any signs of infestation or infection. Prevention is key when it comes to maintaining healthy tomato plants. Start by planting disease-resistant varieties and avoid overcrowding your plants. Regularly remove any weeds or debris around your tomato plants, as they can harbor pests and diseases. Monitor your plants for common pests such as aphids, whiteflies, and tomato hornworms. If you notice any signs of infestation, you can try using organic insecticides or other natural remedies to control the pests. For diseases like blight or powdery mildew, it is important to promptly remove infected leaves or fruits. Additionally, ensure that your plants have proper air circulation and avoid overhead watering to prevent the spread of diseases. By being proactive and attentive, you can minimize the impact of common tomato pests and diseases on your plants.
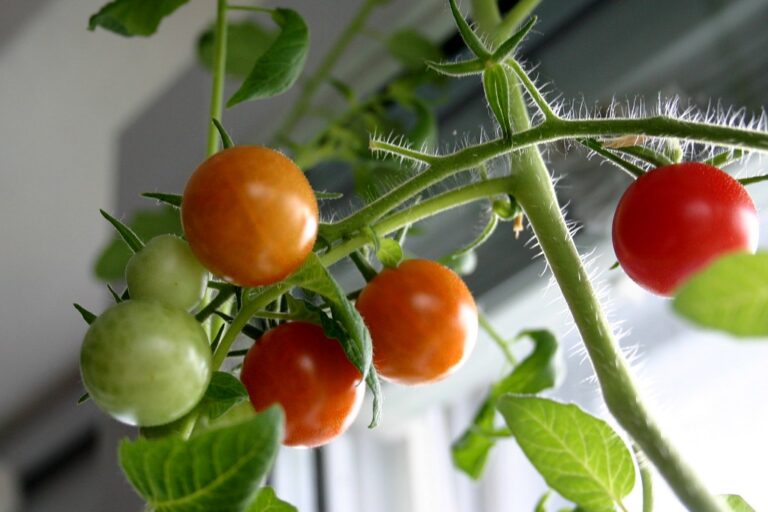
Harvesting and Enjoying Homegrown Tomatoes
You can maximize your enjoyment of homegrown tomatoes by properly harvesting them. When your tomatoes are fully ripe, gently grasp the fruit and twist it off the stem. Be careful not to squeeze or bruise the tomato, as this can affect its flavor and texture. If you prefer, you can also use a pair of clean gardening shears to cut the stem just above the fruit. Once you've harvested your tomatoes, it's important to store them properly. If you plan on using them within a few days, you can leave them at room temperature. However, if you have a large harvest or want to store them for longer, it's best to place them in a cool, dark area or in the refrigerator. Remember to wash your tomatoes just before using them to remove any dirt or debris. Enjoy the delicious taste of your homegrown tomatoes in salads, sandwiches, sauces, or simply on their own!
Conclusion
In conclusion, planting tomatoes in buckets is a practical and rewarding way to grow your own homegrown tomatoes. By choosing the right bucket size, preparing the bucket properly, selecting the perfect tomato variety, starting seeds indoors, transplanting seedlings, watering and fertilizing, pruning and supporting, and dealing with pests and diseases, you can enjoy a bountiful harvest of delicious tomatoes right from your own backyard. So grab your buckets and get started on your tomato-growing adventure!