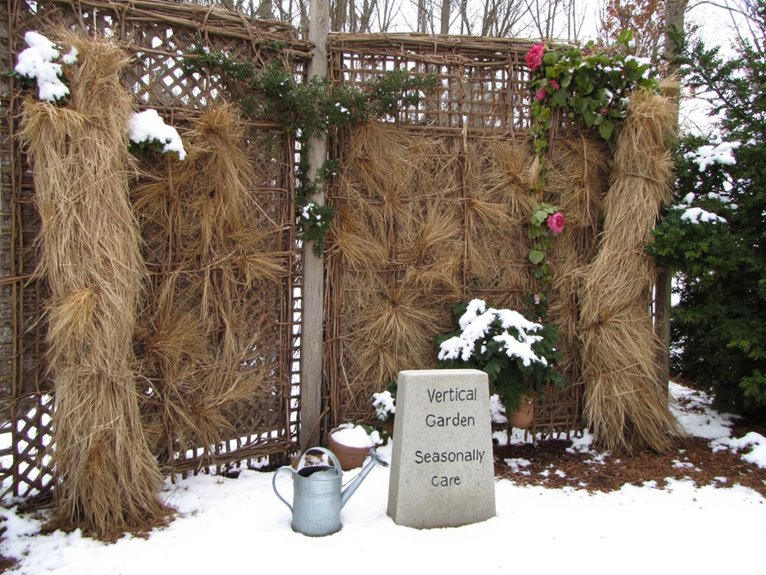
Living Wall Installation: Step-by-Step Guide to Indoor Plant Wall Creation
To start your living wall, measure walls carefully, accounting for doors and windows. Choose systems like modular panels or pocket walls based on your space and design goals. Prepare surfaces thoroughly to guarantee stability. Install securely with frameworks that support both plants and water weight. Set up efficient irrigation with proper tubing and timers. With these steps, you’ll create a thriving indoor oasis that improves air quality while adding natural beauty to any room – perfect for small spaces too!
Notable Insights
- Choose a sturdy wall with ample height (4–6 ft) for living wall installation to support soil and plants securely.
- Install a waterproof liner and drainage system to prevent water damage and root rot in indoor plant walls.
- Use modular or pocket wall systems for flexible planting arrangements and easy maintenance access.
- Position near natural light sources and set up timers for consistent irrigation of vertical gardens.
- Ensure proper wall load capacity and prepare the surface thoroughly before attaching plant holders.
Calculating Space Requirements for Your Living Wall
First, let’s figure out how much space your living wall will really need. Calculate your wall surface by measuring length and height, then multiply for square footage. Don’t forget to subtract doors and windows-you’ll save money on plants! Optimize space by choosing a sturdy wall that can handle the weight of soil and water. Leave room for irrigation lines and maintenance access so you won’t have to climb on ladders every week. Consider lighting too-plants need 4–6 hours of direct sun, so position your wall smartly near windows. With these calculations in hand, you’ll have a perfect foundation for your greenery without wasting an inch of wall surface!
Enhanced Content Addition
Before you start planting, use the formula: wall square footage = total length of walls × ceiling height, making sure to measure accurately and account for openings as this will determine how many plants you’ll need to buy.
Selecting the Right Planting System (Panels, Trays, Pockets)
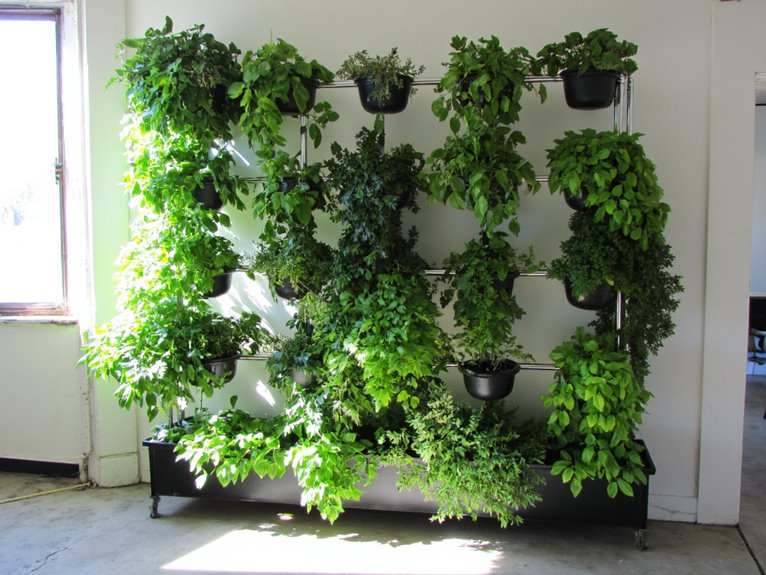
One of the most important decisions for your living wall is selecting the right planting system. Modular systems offer pre-grown panels with diverse plants, making installation quick and designs flexible. They’re great for both indoor and outdoor use, especially if you want to change layouts easily.
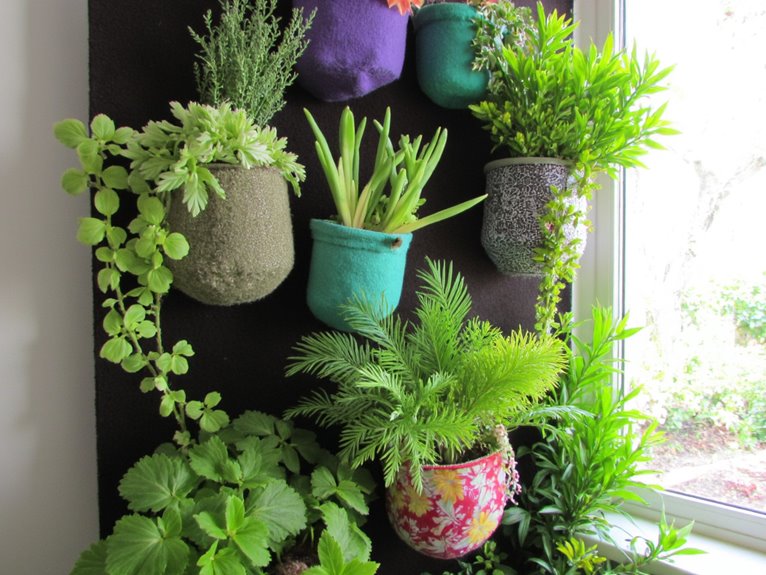
Hydroponic benefits make soilless options ideal for urban spaces, providing clean growth conditions and efficient water use. Pocket walls let you mix plant species in unique patterns, while tray systems may limit root space and increase maintenance needs. Choose based on your wall’s size, desired look, and how often you’ll need to replace plants-modular or hydroponic solutions often deliver the best long-term results for vibrant indoor gardens.
The modular panel system allows for creative arrangements with pre-grown plants, offering design flexibility by letting you mix different species in the same panel or combine multiple panels for larger displays. Consider the assembly time required for your chosen system, as some installations can be completed in 15 to 30 minutes with proper planning and pre-cut components.
Preparing the Wall Surface for Installation
Before you hang anything from your wall, take a moment to examine what’s already there – those cracks and uneven spots might not look bad now but could become problems down the line. A thorough wall inspection helps identify structural issues that might compromise your living wall’s stability over time.
When securing your living wall system, ensure the bracketed phrase “structural integrity” is maintained by distributing the weight of the panels, plants, and irrigation evenly across the surface. This prevents localized stress points that could lead to failures in the support structure.
| Step | Action | Purpose |
|---|---|---|
| 1 | Inspect for cracks/bulges | Prevent water damage and plant stress |
| 2 | Measure load capacity | Verify structure can handle soil weight |
| 3 | Clean surface thoroughly | Promote adhesion of waterproof membranes |
| 4 | Install moisture-proof liner | Protect interior from irrigation runoff |
| 5 | Double-check alignment | Create even panel contact for long-term health |
Focus on moisture control during this phase to avoid water damage behind your wall. Use a level and take notes as you prepare – a solid foundation makes your living wall both beautiful and resilient.
Installing the Plant Holder System
When setting up your plant holder system, think of it as both a framework and a canvas – sturdy enough to support weight yet flexible for creative arrangements. Choose between attachment methods like tabs or screws for panels, ensuring waterproof walls for durability. Stack plant boxes using clips to create vertical interest while securing them to walls for stability. The right materials breathe and support beneficial microbes in your living wall design. Take time with leveling and fixing joints so your system stands strong through seasons of growth. Consider incorporating containers with drainage systems that include multiple holes and removable plugs to prevent root rot and maintain optimal plant health in your vertical garden.
Setting Up an Efficient Irrigation System
Water flows through your living wall not just as nourishment but as a lifeline connecting plants to care. Setting up an efficient irrigation system is key to sustaining vibrant greenery while practicing water conservation. Let’s explore smart irrigation techniques that support both your plants and the planet.
| Component | Function | Material |
|---|---|---|
| Tubing | Delivers water | 5/8″ or 3/4″ black polyethylene |
| Tees | Split flow evenly | Brass or PVC |
| End caps | Seal tubing ends | Plastic or rubber |
Use pumps for large walls, install filters to prevent clogs, and time watering for ideal plant health. Recirculating systems maximize water conservation by reusing excess water.
Plant Selection and Arrangement
Selecting the right plants is essential for a thriving vertical garden, whether you’re starting fresh or expanding on existing greenery-consider their light requirements, water needs, and growth patterns before making your choices. Focus on plant compatibility by matching humidity and lighting preferences to avoid stress or disease in your aesthetic arrangement. Pothos, Spider Plants, and Dracaena offer easygoing options that blend well with taller species like Peace Lily or Parlour Palm. Arrange cascading plants at the top for a natural flow, while ferns and Maranta should be placed near irrigation sources. Mix textures and colors to create depth without overcrowding-keep it simple yet thoughtful! When selecting containers for your vertical garden, ensure each planter has multiple drainage holes to prevent waterlogging and root rot that can damage your carefully planned arrangement.
Safety Measures and Long-Term Maintenance
While creating your indoor plant wall, safety should come first-after all, you want to enjoy your green space without worrying about structural risks or plant mishaps. Follow safety protocols like checking structural support for weight capacity and using waterproof membranes to protect walls. Wear gloves and harnesses during installation, and keep electrical wires away from water sources. For long-term maintenance strategies, inspect frames annually for rust, clean irrigation fixtures regularly, and update waterproof coatings. Maintain proper drainage to prevent waterlogging, and follow watering schedules with timers or sensors. Prune plants consistently, monitor soil moisture, and replace struggling specimens. Developing a maintenance plan with regular inspections guarantees your wall thrives for years to come.
Frequently Asked Questions
How Do Different Wall Textures Affect Panel Mounting?
Wall textures dramatically impact surface compatibility and mounting techniques. Smooth surfaces let panels adhere directly, while rough ones need shims or backing. Porous walls require waterproof barriers, and fragile textures call for non-invasive methods like adhesive or clips rather than screws.
Can Self-Watering Pots Work With Vertical Installations?
Yes, self-watering pots work great with vertical gardens! They provide consistent moisture through self watering benefits, which is essential for vertical gardening techniques. This helps maintain even hydration across tiers while minimizing manual care needs.
What Are the Best Practices for Heavy Living Wall Systems?
What are the best practices for heavy living wall systems? Make sure your framework can handle the heavy weight considerations-thick wires and reinforced structures. Prioritize regular maintenance strategies like pruning and efficient watering to keep plants healthy without adding extra load.
Are There Alternative Irrigation Methods Besides Drip Systems?
Yeah, there are alternatives-subsurface irrigation and water retention techniques. They minimize evaporation, keep roots consistently moist, and reduce the need for frequent watering. These methods enhance plant health while cutting down on maintenance time and water waste.
How Often Should Plants Be Rotated on a Living Wall?
You should rotate plants on a living wall every 1-2 months to maintain plant health and fresh visual aesthetics. Check for growth patterns, lighting needs, and seasonal changes to determine when to rearrange. This prevents overcrowding and guarantees equal care for each plant.
On a final note
With your living wall thriving and enhancing your space, remember regular care is key to its long-term beauty. Inspect plants weekly, adjust watering as needed, and clean the system to prevent buildup. A well-maintained wall not only looks great but also supports air quality and wildlife. Stay encouraged – these efforts pay off in a greener, more inviting environment that benefits both you and nature.