Window Box Garden Succession Planting: Continuous Harvests From Window Sill Containers
To grow continuous harvests in your window box, start with compact plants like dwarf tomatoes, miniature peppers, and trailing calibrachoa that thrive in containers. Plant lettuce and radishes every 2 weeks for fresh greens, then rotate to herbs or slower-maturing vegetables when the first crops finish. Keep soil rich with compost and water deeply to guarantee steady growth. With these techniques, you’ll enjoy abundant produce from your sill year-round-just imagine what other secrets await discovery in the world of container gardening!
Notable Insights
- Plant dwarf tomatoes, miniature peppers, and compact herbs for optimal window box space utilization.
- Establish continuous harvests by rotating lettuce, radishes, and other fast-growing crops every 2 weeks.
- Use lightweight potting mix with composted bark and coconut coir for container fertility and drainage.
- Water deeply at soil level and consider self-watering systems for consistent moisture in containers.
- Include pest-repelling herbs like lavender and mint to protect edible plants naturally.
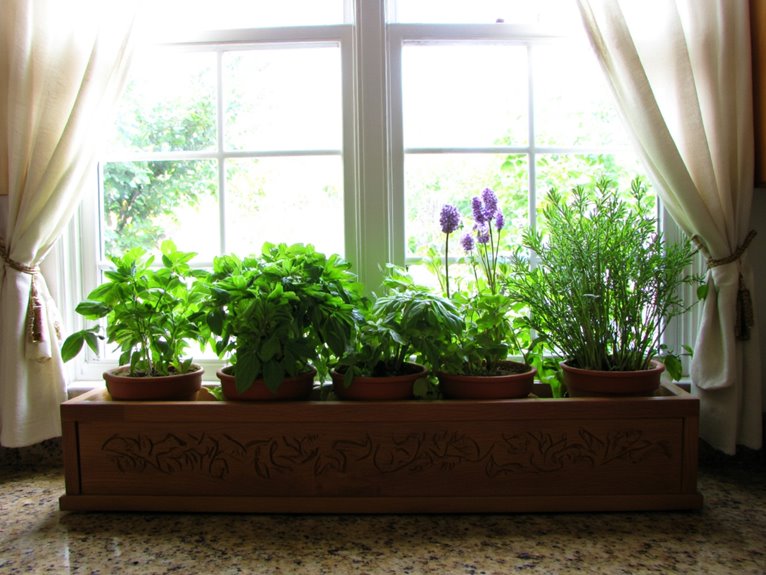
Selecting Compact Plants for Succession Planting
As you plan your window box succession planting, starting with compact varieties makes it easier to refresh your display without uprooting everything each season. Compact plants like dwarf basil or miniature peppers fit container sizing perfectly, allowing multiple plantings in the same space. Consider hardiness zones when choosing varieties that thrive in your climate. Dwarf tomatoes such as Golden Nugget offer both color and edibles without sprawling. Even compact tomato varieties benefit from containers with excellent drainage to prevent root rot and maintain optimal growing conditions. Layer with low-growing fillers like alyssum for dense coverage. Trailing plants like calibrachoa cascade beautifully from edges. Keep plants under 4 inches tall to ensure they fit comfortably in small boxes without overcrowding. This approach provides continuous interest while working smartly with your available space and climate conditions!
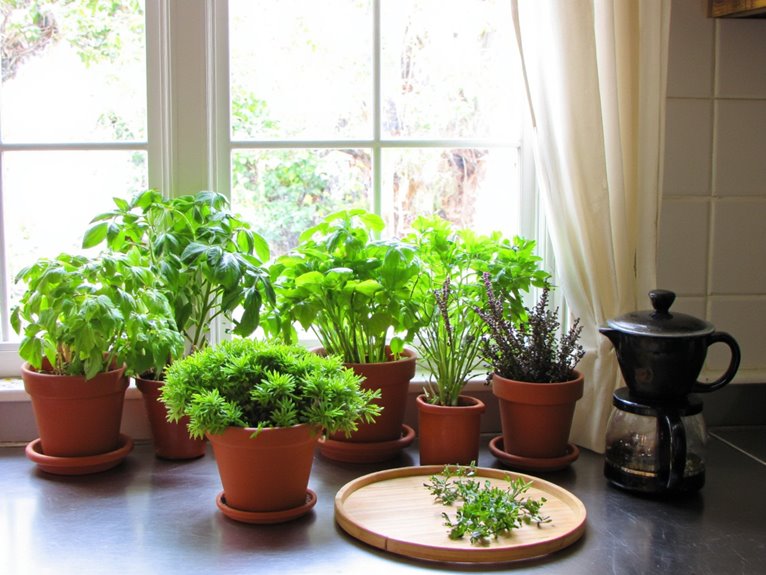
Creating a Planting Schedule for Continuous Harvests
Once you’ve got your compact plants in place, crafting a succession schedule becomes the key to keeping your window box buzzing with color and harvest potential, rather than just a seasonal display. Season timing strategies mean planting new crops as old ones finish, like sowing lettuce every 2 weeks or radishes at 2-week intervals. Container space optimization lets you grow multiple layers of quick-maturing greens, herbs, and root vegetables in the same box. Start with fast-growing varieties like arugula or spinach for frequent harvests, then rotate to basil or kale as seasons change. Track your planting dates to refine this rhythm, adjusting for hot summers that slow growth. Compact varieties are especially important in containers, as they maximize yield without outgrowing your window box space. For window boxes that receive intense sunlight, consider UV-resistant materials for your containers to prevent fading and maintain their appearance throughout the growing season.
Building Fertile Container Soil for Successive Crops
A well-drained mix forms the foundation for any thriving container garden. Balance soil composition ratios carefully-combine lightweight materials like coconut coir with perlite for drainage and composted bark for structure. Organic matter sources such as aged manure or worm castings enrich the mix with nutrients while improving texture. Avoid dense garden soils that compact easily. Proper aeration prevents waterlogging and ensures roots receive oxygen, which is essential for healthy plant development.
Refresh your window box soil annually by replacing half the mix or starting fresh for heavy feeders like tomatoes. Top-dress with compost between plantings to sustain successive crops. Test pH and adjust with lime if needed. Maintaining a clean growing environment also helps reduce pest problems that can damage your crops, and chemical-free pest management methods are safest around edible plants. With proper soil building, you’ll enjoy continuous harvests from your smallest container spaces!
Water Management in Window Box Gardens
After the soil foundation is laid, keeping your window box garden hydrated becomes as significant as planting itself. Window boxes dry quickly, so Water Cycling-watering until runoff occurs-is essential to avoid root rot and make sure of deep saturation. Invest in Drainage Solutions like plastic liners with holes or moisture-retaining mixes to balance evaporation and retention. Water at the base of plants rather than foliage to prevent disease and encourage strong roots. Use self-watering systems or drip irrigation for consistency, especially when away frequently. Monitor soil daily with your finger-moist but not soggy-and adjust based on weather. With proper hydration management, your window box can thrive through multiple succession plantings year-round.
Pest Prevention in Small-Space Gardening
While your window box garden thrives on sunlight and well-drained soil, it’s also vulnerable to pests that can quickly undermine your efforts-aphids, slugs, and even unexpected visitors like ants or birds. Physical barriers like fine-mesh screens and floating row covers help block flying insects and crawling pests. Creating Natural predator habitats by introducing ladybugs, lacewings, and parasitic wasps builds biological control naturally. Planting herbs like basil, lavender, and mint acts as both pest deterrents and pollinator attractors through their scent. These Herbs as pest deterrents not only repel insects but enrich your harvest with flavor. Proactive prevention is always better than reactive treatment in small-space gardening.
Optimal Harvest Techniques for Fresh Produce
Indeed, knowing when to pick your crops can make or break a garden season-so let’s explore how timing and technique work together to maximize yield from your window box. Harvest timing varies by plant type; leafy greens thrive young, while fruits like tomatoes reach peak flavor when fully colored but firm.
| Crop Type | Harvest Timing | Cutting Techniques |
|---|---|---|
| Lettuce | Young and tender | Cut outer leaves first |
| Tomatoes | Fully colored, firm | Twist or cut the stem |
| Radishes | At appropriate size | Snip close to base |
Use sharp tools for clean cuts that minimize damage. Pinch back plants like basil to encourage regrowth. Harvest early morning when plants are hydrated for maximum freshness and nutrition.
Extending the Growing Season With Protective Covers
Whether you’re keen to start seeds earlier or extend your harvest well beyond the first frost, protective covers can transform your window box into a year-round garden. Row covers offer varying frost protection temperatures based on weight-light versions add 2–4°F, while heavier ones provide up to 8°F of warmth. Compare cover materials: reemay fabrics balance light transmission with protection, insect barriers let air and sunlight through, while bird netting deters animals. Pop-up greenhouses trap heat but require secure anchoring against wind. Shade cloth cools plants in hot climates. Choose based on your climate and what you’re growing-frost protection temperatures matter most when chilling plants. With the right cover materials comparison, your window box can thrive season after season.
Rotating Crops to Maintain Garden Health
Container Garden Crop Rotation Guide
After extending your growing season with protective covers, keeping your window box garden healthy requires thoughtful planning – that’s where crop rotation comes in. By rotating crops with different nutrient needs, you support nutrient cycling dynamics and address seasonal nutrient demand shifts. Start with nitrogen-hungry leafy greens, then follow with phosphorus-loving tomatoes for a balanced approach. Let legumes like beans replenish soil nutrients naturally. Track what goes where to avoid repeating the same plants year after year, which drains specific nutrients and invites pests. Simple rotations not only maintain garden health but also extend harvests – imagine starting with herbs, moving to brassicas, then finishing with berries! This smart strategy sustains your containers productive through multiple seasons.
Frequently Asked Questions
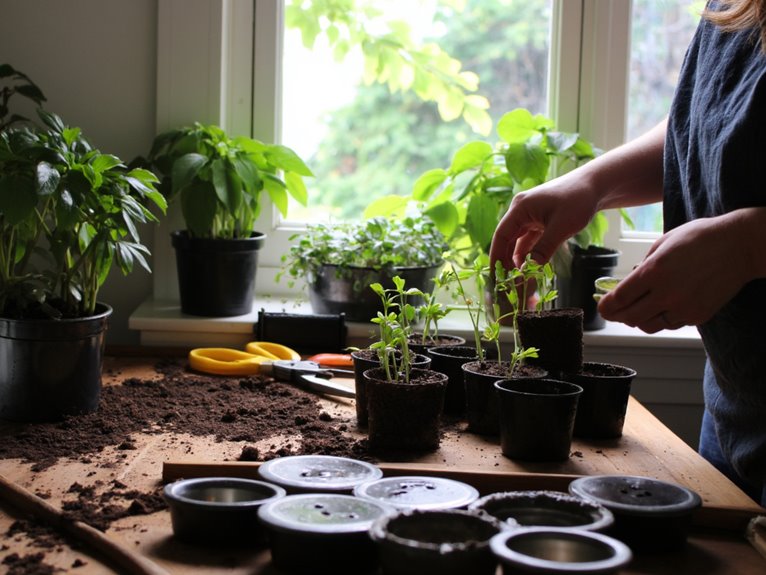
What’s the Best Way to Start Seeds for Succession Planting Indoors?
For succession planting, ideal indoor setups use shallow trays with drainage holes and fresh seed-starting mix. Efficient germination comes from bottom watering, consistent warmth (65-75°F), and 12-16 hours of bright light daily. Start seeds every 7-14 days to keep plants at different stages for continuous harvests.
Can I Reuse Potting Soil for Multiple Plantings in a Window Box?
Yes, you can reuse potting soil for multiple plantings in a window box, but don’t forget about Soil Sterilization and Nutrient Levels. After each crop, add compost to boost nutrients and mix in new soil to keep it loose and healthy for the next round.
How Do I Prevent My Plants From Becoming Leggy in Small Containers?
To prevent legginess, make sure your plants get enough Light needs-aim for 6–8 hours of direct sun or use grow lights. Pruning tips: pinch back stems regularly and keep soil moist but not soggy.
Are There Any Plants That Shouldn’t Be Planted Together Successively?
Yes, some plants shouldn’t be planted together successively-like black walnut with veggies or sunflowers before tomatoes. These affect plant pollination dynamics and soil nutrient depletion strategies, causing growth issues in containers. Be mindful of their allelopathic effects and rotate wisely to keep your garden thriving.
How Do I Keep My Window Box Warm Enough for Winter Succession Planting?
You can keep your window box warm by insulating techniques like thermal wraps or foam inserts, and placing containers in south-facing spots or near heat sources. Use grow bags for better soil retention too.
On a final note
As you begin on your window box gardening journey, remember that success comes with patience and preparation. By carefully selecting plants, creating a thoughtful schedule, and nurturing your containers, you’ll enjoy fresh produce all season long. Embrace the learning process and don’t be discouraged by setbacks-each growing cycle brings new insights and opportunities to improve. With dedication, your small space can yield abundant harvests that inspire both your kitchen and your green thumb.